You may need to send videos from your iPhone to a Mac computer for various reasons. You may want to free up space on your iPhone, keep a backup of your precious data, and improve your iPhone's speed. Additionally, professional video editors may transfer their iPhone videos to a Mac computer to exploit the Mac computer's advanced video editing capabilities. As such, there is a need to learn how to transfer videos from iPhone to Mac, and this article will discuss how to do so. Keep reading to learn more.
This technique requires an original USB cable and the Photos application installed on iPhone and Mac devices. Follow the steps outlined below to import videos from iPhone to Mac:
Step 1. Using the USB cable, connect the iPhone to your Mac. Follow the prompt to ensure the connection between the two devices has been established successfully.
Step 2. Launch the Photos app on Mac if it does not launch automatically. Find your iPhone's name under "Devices" on the left side column of your screen and tap on it.
Step 3. Go back to your iPhone and tap on the "Trust" button from the "Trust This Computer" notification that appears on your iPhone.
Step 4. Select where to import your videos from the drop-down menu and click the "Import" button. Otherwise, if you want to create a new album, choose "New Album", key in the Album name, and hit the "Create" button.
Step 5. Hit the "Import Selected" button to import specific videos or the "Import All New Videos" button at the top right corner to import the entire video collection. Your videos will be moved to your Mac computer.

Read More:
How to Transfer Videos from Mac to iPhone with 5 Methods
How to Transfer Videos from Mac to iPad? (Step-by-step Tutorial)
AirDrop is a wireless sharing feature on Apple devices used for sharing files. The biggest reason for using AirDrop is its super-fast transfer speeds. To use AirDrop, ensure the Wi-Fi and Bluetooth features are enabled on the two devices. Afterward, follow the steps below to transfer video from iPhone to Mac:
Step 1. Swipe the iPhone's screen upward from the bottom, turn AirDrop on, and make it visible to "Everyone".
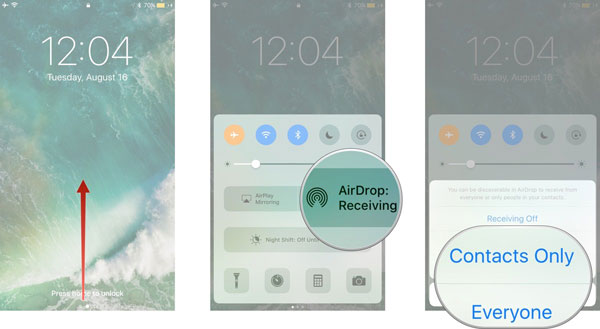
Consequently, navigate to Mac's AirDrop on the menu bar, tap on it, and activate it to be visible to "Everyone".

Step 2. Launch the iPhone's Photos application, tap on the "Albums" button located at the bottom of the application's interface, scroll to the "Media Types" section, and select "Videos".
Step 3. Hit "Select" at the top-right corner of your application's video interface. Tap on the video you want to import or select "All" in the upper-left corner.
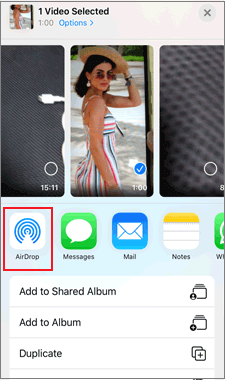
Step 4. Now hit the "Share" icon at the bottom-left corner of your screen. A "Share" pop-up menu will appear. Tap on the "AirDrop" icon resembling a bull's eye.
Step 5. Choose your "Mac Computer" from the "AirDrop" screen. Counter-check if the Mac's AirDrop feature is activated if no computer is discoverable.
Step 6. Accept the shared videos on the Mac to initialize the transfer. The import process may take seconds, and a pop-up window will appear, letting you select destination folders. Choose one to complete the procedure.
See Also:
[SOLVED] How to Import Videos from iPhone to iMovie Breezily?
Easy Ways to AirDrop from iPhone to Mac [Support Various File Types]
iCloud enables users to sync files like videos between Apple devices. In this method, we are syncing videos from iPhone to Mac using the below simple steps:
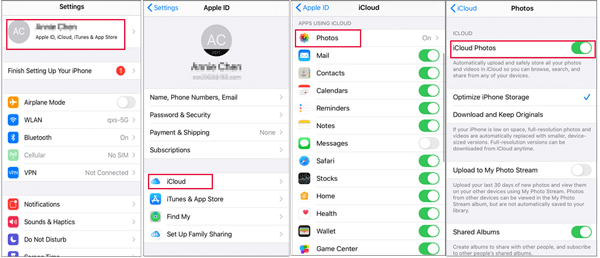
Step 1. Open the Settings application on your iPhone, navigate to the top of the application's interface, and tap "your name".
Step 2. Hit "iCloud" from the "Apple ID" page.
Step 3. Hit on "Photos" and toggle the "iCloud Photos" button to "On" mode.
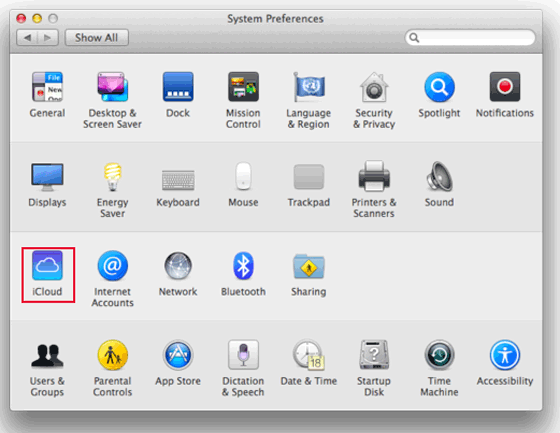
Step 4. Afterward, open the "System Preferences" on your Mac and hit the "Apple ID" in the upper-right corner. For older Macs, tap the "iCloud" button.
Step 5. Click the "iCloud" button on your Apple ID's left side and checkmark the box beside "Photos" to sync the videos. Consequently, on older Macs, open "Options" beside "Photos" and hit the button that appears to sync them.
Step 6. Download videos to your Mac computer by visiting the iCloud website, logging into your iCloud account, hitting the "Photos" option, selecting the photos you want to transfer, and hitting the "Download Selected Items" button at the upper right side of the screen.
Dropbox is among the oldest file storage services that allow you to share up to 2GB of file sizes for free between devices. Millions of people across the world use it. Dropbox employs advanced encryption procedures to protect its users' data. Moreover, it organizes your files structurally for easier access. The following steps explain how to upload videos from iPhone to Mac via Dropbox:
Step 1. Download, install, and launch your iPhone's Dropbox application.
Step 2. Log in to your account and tap the "Create" button to upload the videos you wish to transfer.
Step 3. Open your favorite browser on your Mac and navigate to the Dropbox website. Login to your account, find your uploaded video files and download them to your Mac.
Can't Miss:
5 Tips: How to Transfer Videos from iPhone to PC Windows 11/10 Without Any Hassle?
How to Get Videos Off iPhone to Your Computer? This One Might Help!
FileMail allows sending of large files at a high quality. The application is easy to use and provides a Wi-Fi feature only to prevent exceeding the mobile data limit. Transferring files less than 5GB does not require creating an account or subscription. Below is how to move videos from iPhone to Mac via FileMail:
Step 1. Download, install, and launch the FileMail application on your iPhone and tap on the "Add files" button. Attach the videos you want to transfer.

Step 2. Select whether to send your videos as an email or upload them to generate a shareable link.
Step 3. If You select the "Send as email" option, key in the email address to be used on the "Destination" Mac and tap on the "Send" button to send the email.
Step 4. If you select "Send as link", a shareable link will be given once the videos are uploaded. Share this link with the Mac computer you want the files sent to.
Step 5. Download, install, and launch the FileMail desktop application on your Mac computer and access the videos on the shareable link.
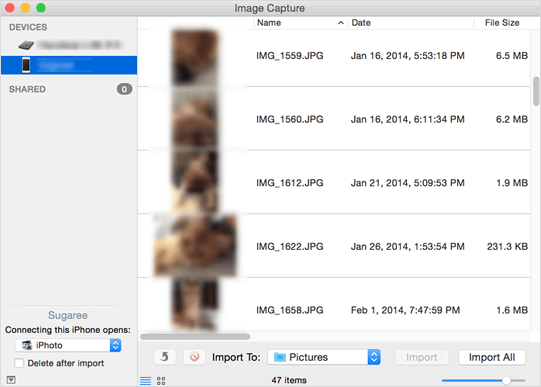
Image Capture is a utility with exclusive access to iPhone videos and photos. It enables us to share videos and photos between iPhone and Mac computers. Below is how to download videos from iPhone to Mac via Image Capture:
Step 1. Connect your iPhone to a Mac computer via a USB cable. Follow all prompts to ensure the connection is successful.
Step 2. Launch the "Image Capture", navigate to the "File" menu, and tap on "Import from iPhone" on your Mac computer.
Step 3. Choose the video files, specify the destination folder, and tap the "Import" button. Once videos have been imported, a green "Tick" will be seen at the lower right corner of your Mac's screen.
May Like:
6 Easy Ways to Transfer Files From Mac to iPhone
How to Transfer Videos from iPhone to Computer? 9 Ways You Can't Miss
The most efficient method of transferring videos from your iPhone to a Mac computer and vice versa is using a professional iOS file transfer application. There are many such applications, and selecting the best can be daunting. Coolmuster iOS Assistant is a peerless, professional iOS data transfer application for transferring data between iOS devices. This unmatched data transfer application has been tried and tested by millions of users across the globe. Interestingly, many have attested to its reliability regarding data transfer speed, ease of use, and security. Coolmuster iOS Assistant is a go-to option for many due to its outstanding features. Among them includes:
Below is how to use the best way to transfer videos from iPhone to Mac:
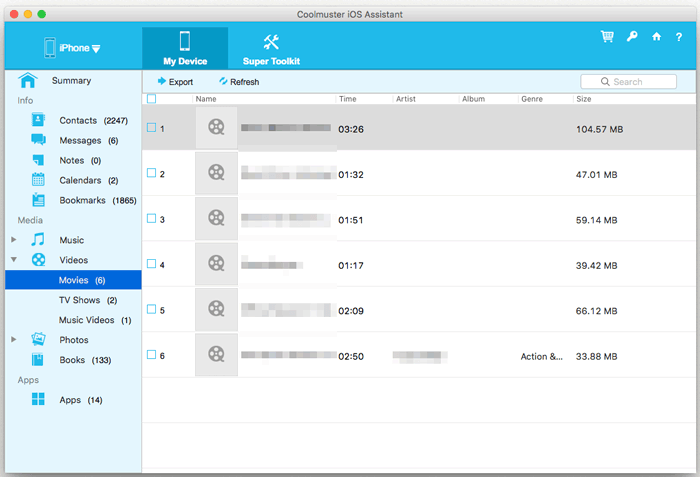
1. Transfer Videos from iPhone to Mac Selectively
01Begin by downloading, installing, and launching the application on your Mac computer.
02Link the iPhone to the computer using a USB cable, tap the "Trust" button below the "Trust This Computer" pop-up message, and hit the "Continue" button.
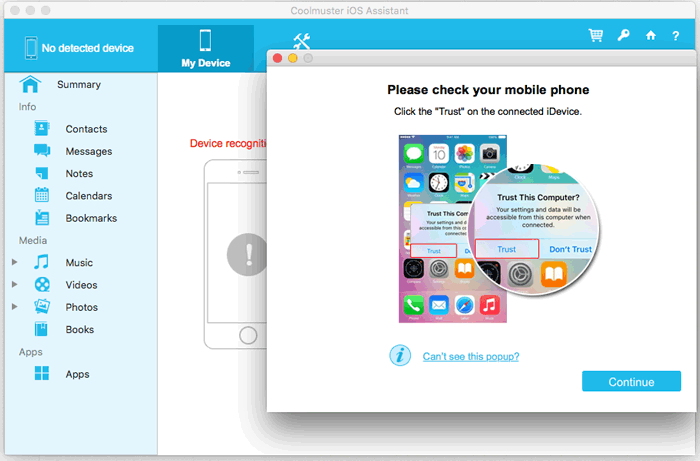
03A screen showing your computer's data organized into categories will pop up.
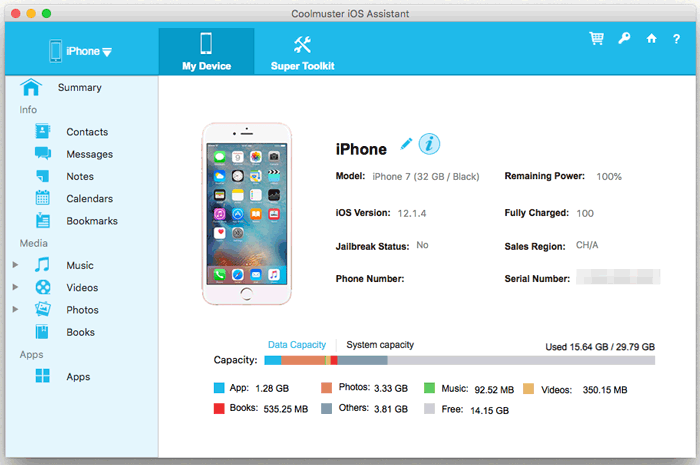
04Click on the "Videos" folder, select the videos you want to transfer and tap the "Export" button to move them to your Mac computer.
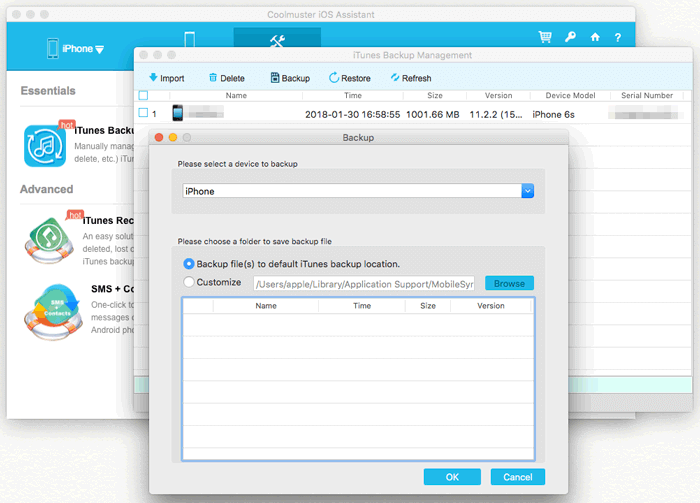
2. Import Videos from iPhone to Mac All at Once
By following these steps, you can swiftly move all your iPhone files, including videos, to your Mac in one go:
01Once the connection is established, click on "Super Toolkit".
02Opt for the "iTunes Backup & Restore" option.
03Choose the desired device for backup and then select a folder on your Mac to save the backup file.
There are various ways of moving your video files from an iPhone to a Mac computer. However, they have different file transfer efficiency levels, and we recommend you use Coolmuster iOS Assistant as it has unmatched data transfer speed, is secure, and easy to use.
Related Articles:
How to Transfer Files from iPhone to Mac without iTunes [Full Guide]
How to Put Videos on iPhone? [Solved with 5 Ways]
How to Transfer Large Videos from iPhone to PC? Try 8 Methods Here
How to Transfer Music from iPhone to Mac? (Top 4 Ways)
How to Sync Contacts from iPhone to Mac with Ease in 2023? (5 Smart Ways)
Seamless Sync: Effortlessly Transfer Files between iPhone and Mac


 Free Download for Mac
 Free Download for PC

