Coolmuster Android Assistant Online Help
Welcome to the official user guide for Coolmuster Android Assistant. This all-in-one Android desktop manager allows you to seamlessly transfer files between Android and computer, manage contacts, text messages, call logs, media files, apps, and perform 1-click full Android backup and restore directly on PC.
Video Tutorial: How to Use Coolmuster Android Assistant
Part 1: How to Connect Android Device to Computer
To start managing your phone data, launch Coolmuster Android Assistant on your PC. You can establish a connection via USB Cable or Wi-Fi Network.
Method 1: Connect Android to Computer via USB Cable
Step 1. Connect your device: Launch the program and plug your Android phone into the computer using a working official USB cable.
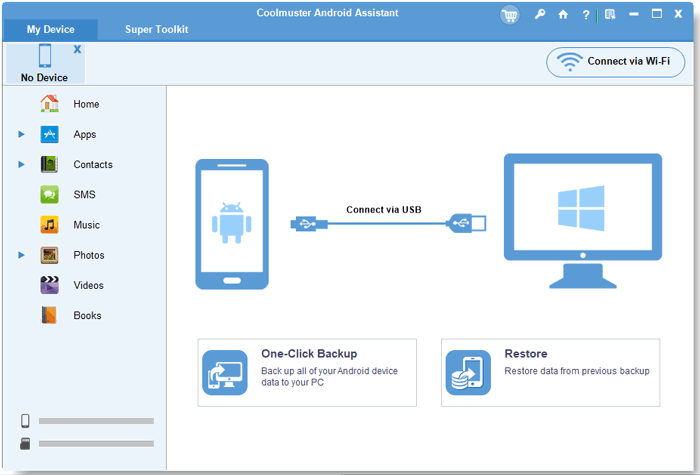
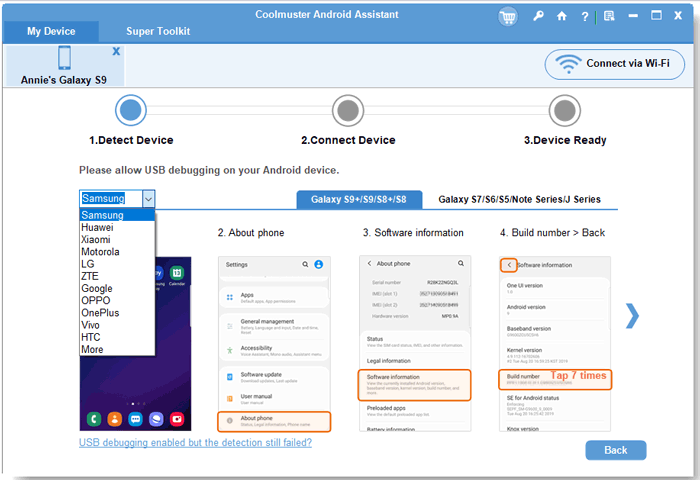
Step 2. Enable USB Debugging: The software will detect if USB debugging is enabled. If not, follow the on-screen prompt to enable USB debugging on your Android phone.
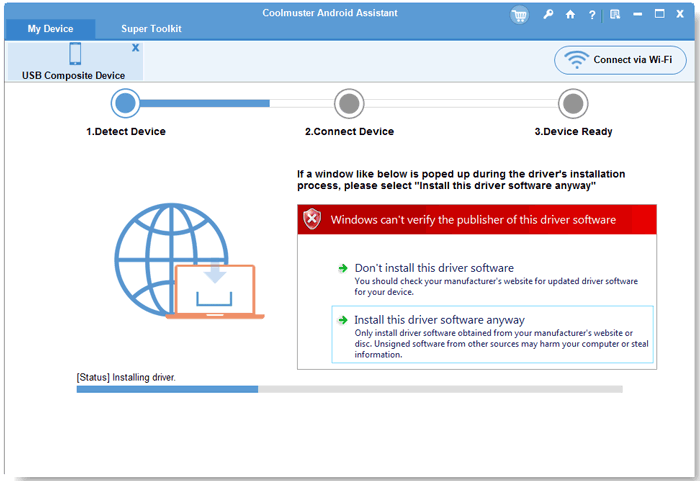
Step 3. Install Device Driver: The software will automatically download and install the required driver on your PC. (What to do if driver installation failed?)
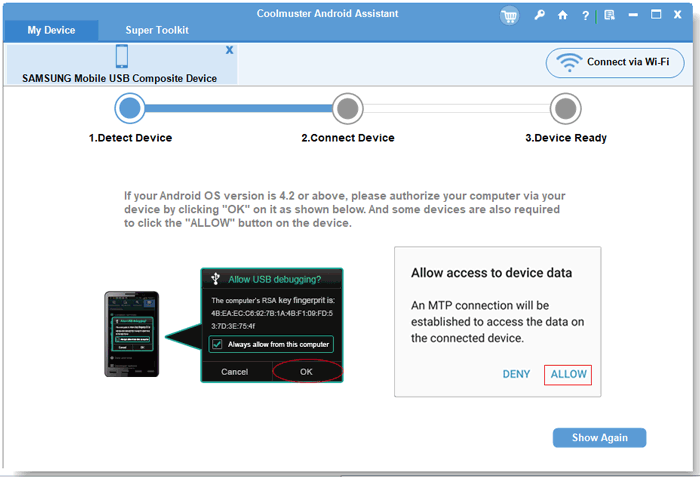
Step 4. Authorize Connection: For Android 4.2 or higher, tap "ALLOW" or "OK" on your phone screen to authorize computer access. (Click "Show Again" on PC if the pop-up disappears).
Step 5. App Installation & Ready: The desktop program will install Coolmuster Android Assistant (Android Version) on your phone to complete the connection. Once finished, your phone details will display on the main screen.
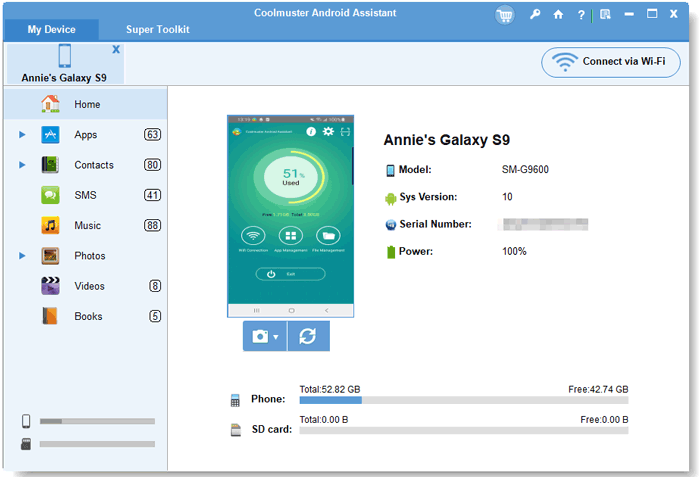
Method 2: Connect Android to Computer via Wi-Fi (2 App Options)
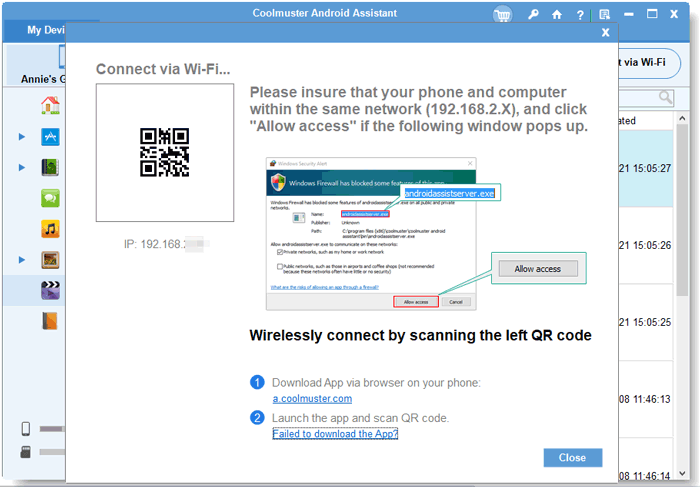
Important Before Connection:
1. Ensure your Android phone and computer are connected to the same network.
2. Allow network access if a firewall or security pop-up appears on your phone or PC.
To connect wirelessly, scan the QR code displayed on the desktop program using either of the two methods below:
Option 1: Connect via CoolTransfer App (Quick Setup from Google Play)
Note: CoolTransfer is fast to install, but it does not support sending SMS or managing apps.
Step 1: Open Google Play Store on your Android device.
Step 2: Search for CoolTransfer and install it.
Step 3: Launch CoolTransfer and tap the Scan icon in the top-right corner to scan the QR code on your PC screen.
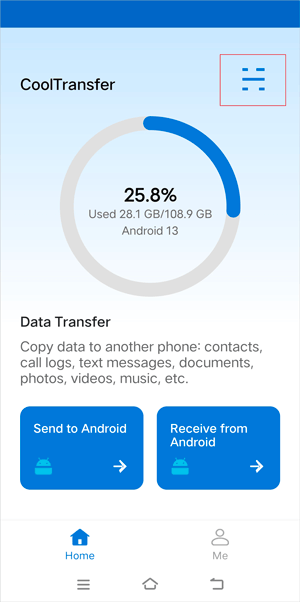
Option 2: Connect via Coolmuster Android Assistant App (Full Featured)
Recommended: Supports all features, including SMS management, App management, contacts, call logs, and media transfer.
Step 1: Open any mobile browser on your Android phone and visit: a.coolmuster.com
Step 2: Download and install the official Coolmuster Android Assistant App. See detailed steps >>
Step 3: Launch the app and tap the Scan icon in the top-right corner to scan the QR code on your PC screen.
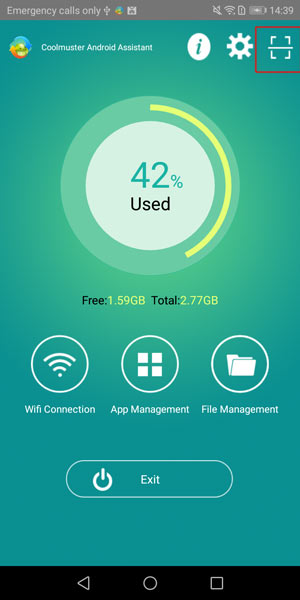
Part 2: How to Transfer and Manage Android Data on PC
Once your Android phone is connected, you can preview, transfer, edit, add, or delete your device data directly from your computer.
1. Transfer & Manage Android Media Files (Photos, Music, Videos, Books)
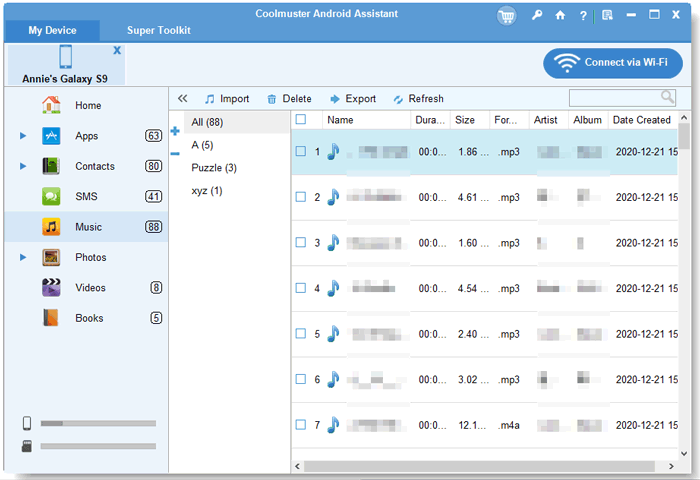
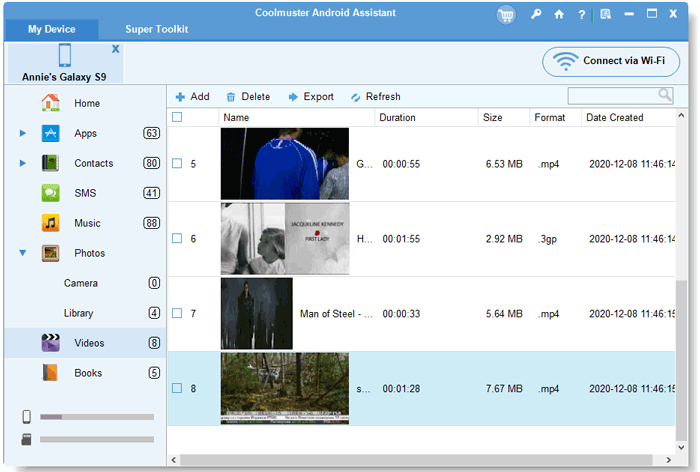
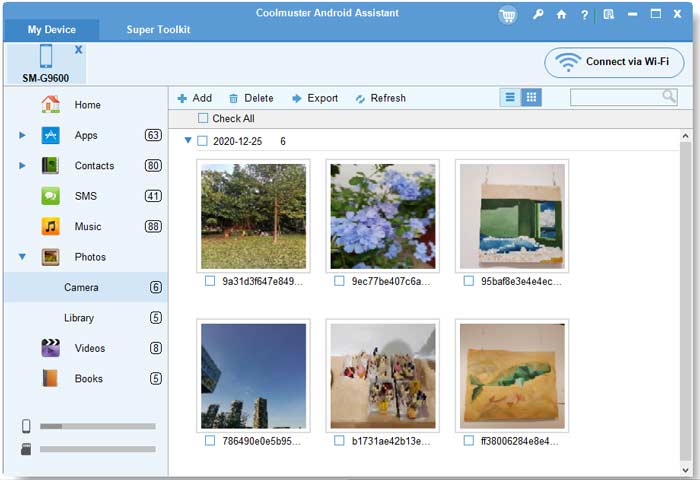
Click on Photos, Music, Videos, or Books in the left side menu. You can easily manage all your media files using the top toolbar buttons:
(1) Export / Back Up Android to PC: Select any media items and click "Export" to transfer them from Android to computer selectively.
(2) Import to Android: Click "Add" or "Import" to copy music, photos, or videos from computer to Android.
(3) Delete: Select unwanted files and click "Delete" to clean up Android device storage.
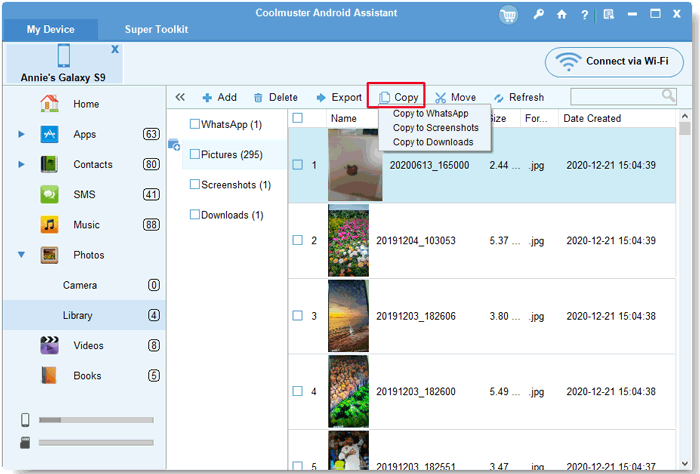
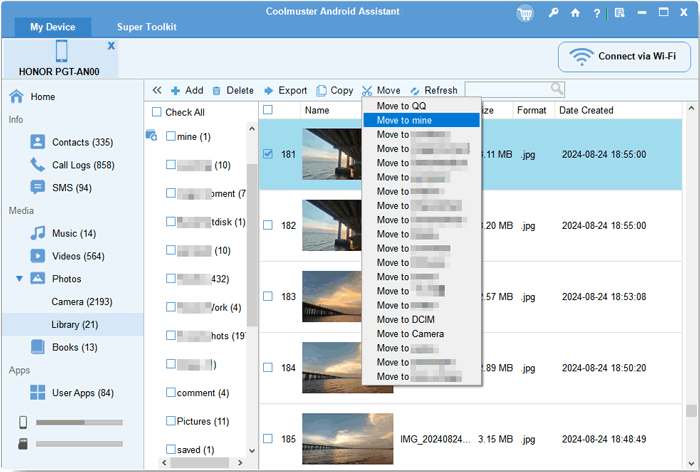
(4) Album Management (Photos): Under "Photos" > "Library", click "+" to create new albums or "-" to delete albums. Use "Copy" or "Move" to organize photos between albums.
Screenshots:
Music: Manage and transfer Android music on PC
Videos: Manage Android videos on desktop
Photos - Library:
- Organize and copy Android photo albums:
- Move photos between Android albums:
Photos - Camera: Manage Android photos on computer
2. Manage & Export Android Contacts & Call Logs
Click Contacts from the left menu to control your contact list and call history effortlessly:
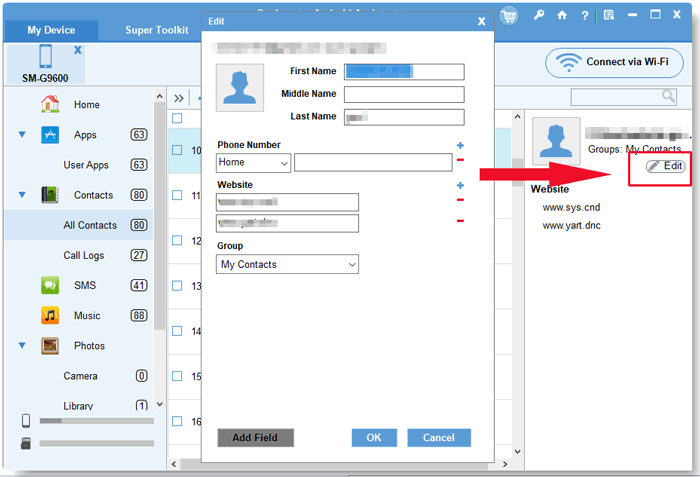
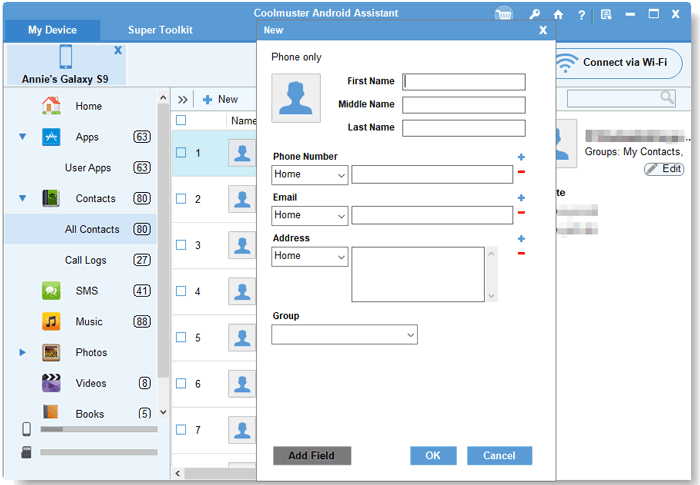
(1) Add / Edit Contacts: Click "New" to create a contact, or select one and click "Edit" to update phone numbers, emails, addresses, names, and more.
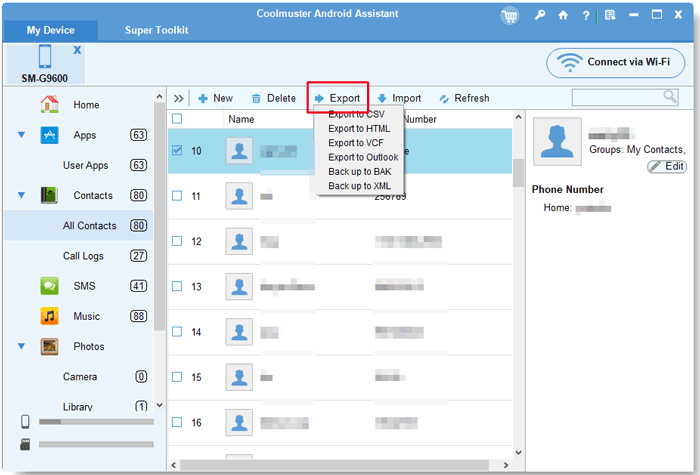
(2) Export Contacts: Save contacts to PC in CSV, HTML, VCF, Outlook, BAK, or XML formats.
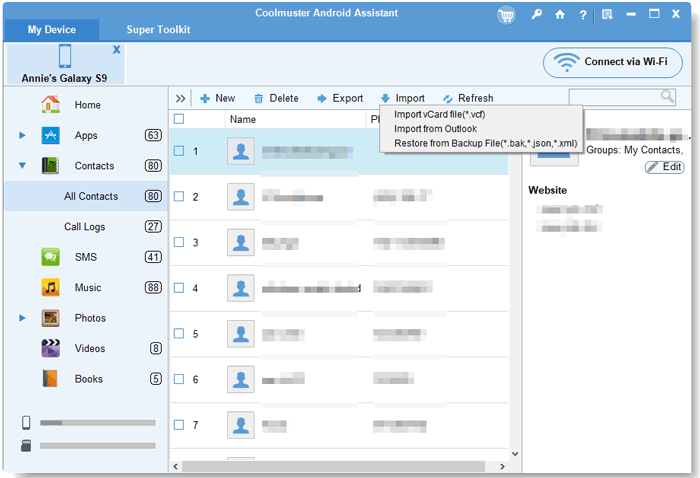
(3) Import Contacts: Restore contacts from vCard files, Outlook, or backup files (.bak, .json, .xml).
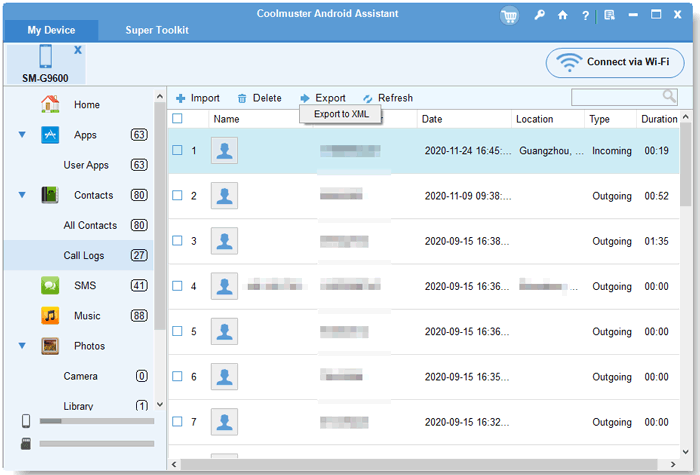
(4) Manage Call Logs:View, restore (import), or delete call history; export (back up) call logs to a PC in XML or HTML format.
Screenshots:
Contacts:
- Import contacts from PC to Android:
- Export Android contacts to computer:
- Edit Android contacts on computer
- Add new Android contacts on computer:
Call history: Manage and back up Android call history on PC
3. Export, Import, Send, & Manage Android Text Messages (SMS)
Go to the SMS tab to manage SMS messages on your computer screen:
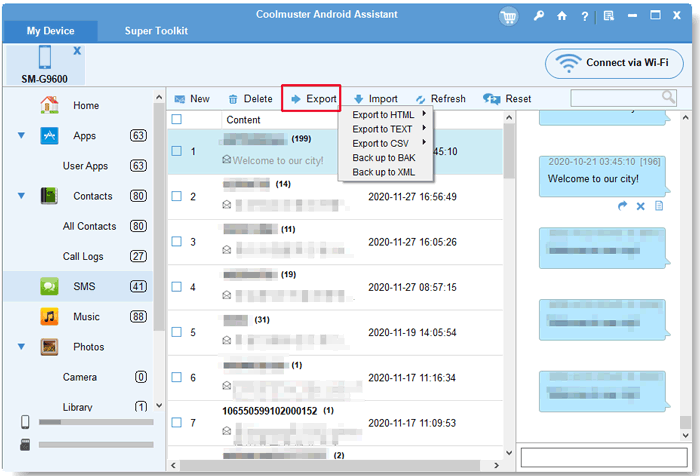
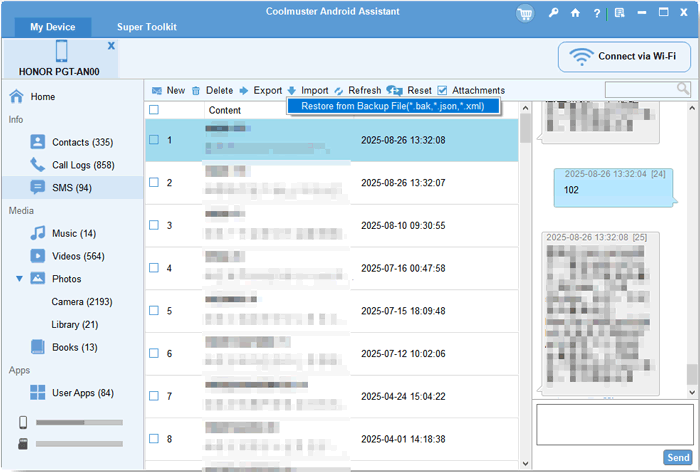
(1) Export / Import SMS: Transfer Android text messages to PC in HTML, TEXT, CSV, BAK, XML formats for backup, or import SMS backups (.bak, .json, .xml) to Android.
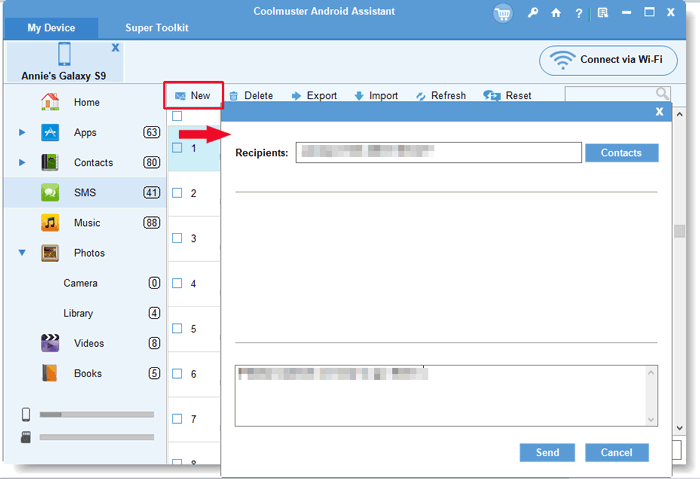
(2) Send SMS from PC: Click "New", enter or select recipient phone numbers, type your message, and click "Send".
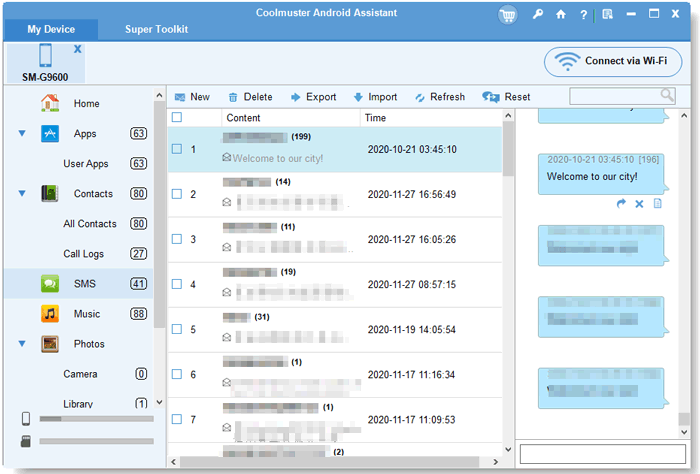
(3) Direct SMS Actions: Right-click or use the message panel to Resend, Forward, Copy, or Delete text conversations.
Screenshots:
SMS:
- Export text messages from Android to computer:
- Import text messages from computer to Android:
- Send text messages from PC to any phone directly:
- Resend, Forward, Copy, or Delete Android text messages on PC directly:
4. Install, Uninstall, and Back Up Android Apps
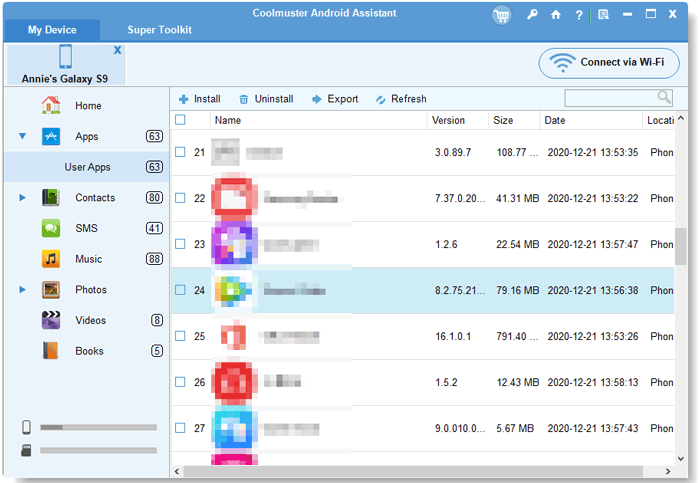
Click on User Apps to view all installed applications on your Android phone. From here, you can batch Install APK files from PC, Uninstall unwanted applications, or Export apps to PC for backup.
5. Manage Multiple Android Devices & Capture Screenshots
(1) Multi-Device Management: Connect multiple Android phones simultaneously. Switch between devices via the top tab bar to manage them concurrently.
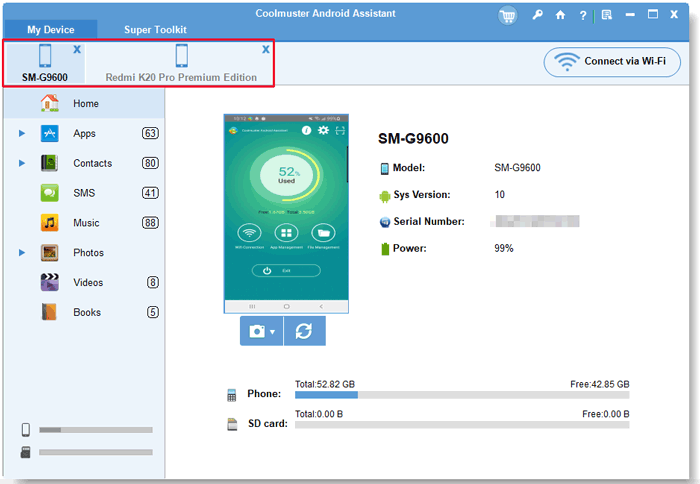
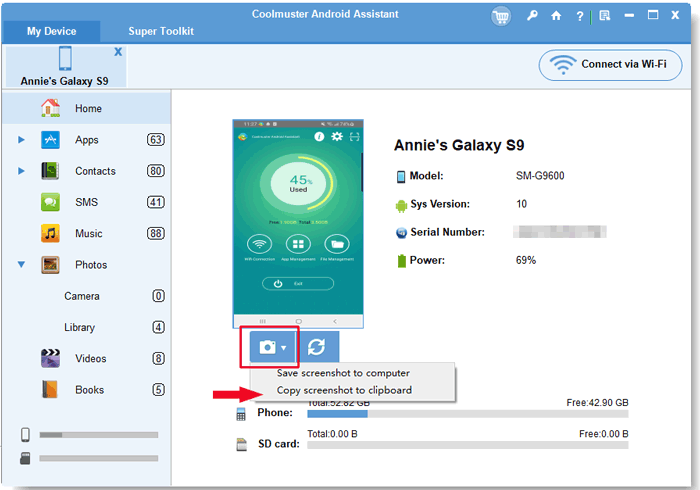
(2) Take Screenshots (USB Only): Click the Camera icon on the home interface to take real-time screenshots of your Android phone screen, then save them to PC or copy to clipboard.
Part 3: Back Up and Restore Android Data with 1 Click
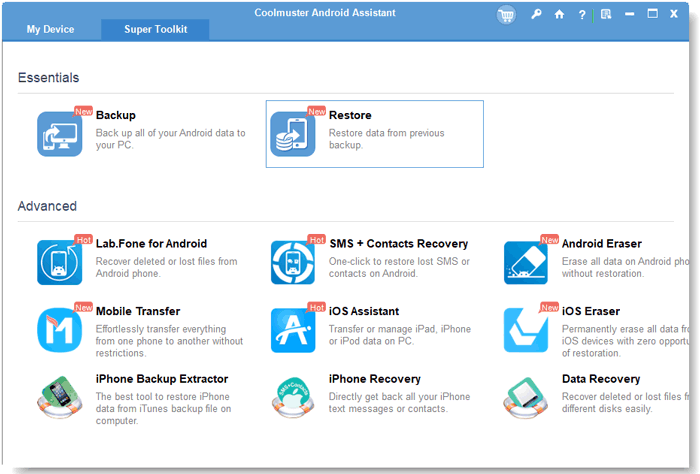
Instead of manually selecting files, you can back up your entire Android device to PC or restore a backup file to any Android device using the Super Toolkit feature.
1. 1-Click Android Backup
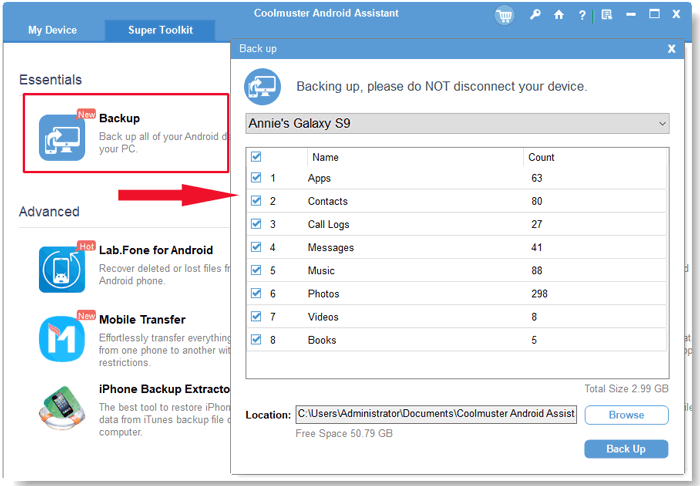
Navigate to Super Toolkit > Backup. Select the file categories (Contacts, Messages, Call Logs, Photos, Music, Videos, Books, Apps), choose a destination folder on your PC, and click "Back Up".
2. 1-Click Android Restore
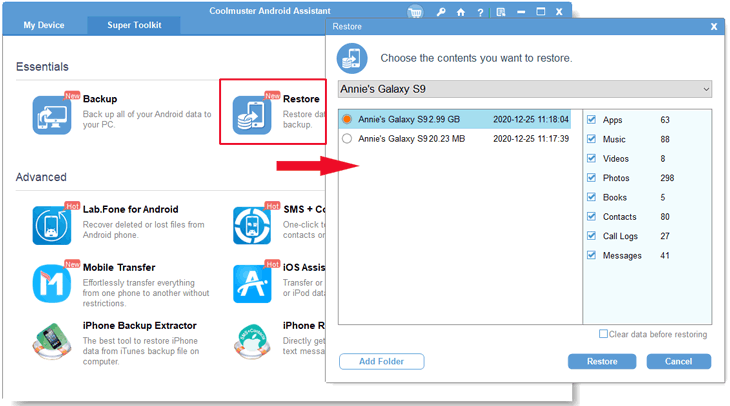
Navigate to Super Toolkit > Restore. Choose the desired backup record, select the data types you want to restore, and click "Restore" to transfer data back to the connected phone.
Useful Tips for Restoring Data:
1. Clear data before restoring: Checking this option will erase existing data on your connected phone before restoring the backup file.
2. Add Folder: If your target backup record does not appear in the list, click "Add Folder" to manually locate and load any backup folder from your computer.

