After using a Windows computer for a long period of time, the system automatically accumulates a large number of temporary files, update caches, log files, etc., which occupy disk space and slow down the computer's performance. Disk Cleanup is a built-in utility from Microsoft that helps users quickly free up disk space and optimize system performance.
However, many users have reported that after running Disk Cleanup, they found that files were not deleted and space was still being occupied. Why does this happen? And how can it be fixed? This article will provide a detailed analysis of the reasons behind the "Disk Cleanup not deleting files" issue and offer several step-by-step solutions.
Before diving into solutions, it's important to understand why Disk Cleanup not deleting files occurs. Here are the most common causes:
Here are five proven methods to fix the problem of Disk Cleanup not deleting files. Follow each one carefully to restore your system's ability to clean up storage properly.
Sometimes, Disk Cleanup can't delete certain files simply because it doesn't have enough permissions. Running it as an administrator gives the tool elevated privileges to remove system and protected files.
Here is how to fix Disk Cleanup not deleting temp files:
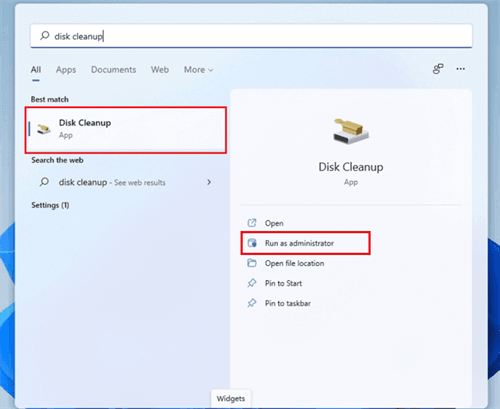
Step 1. Press "Windows + S" to open the search bar.
Step 2. Type "Disk Cleanup".
Step 3. Right-click on Disk Cleanup and choose "Run as administrator".
Step 4. Select the drive you want to clean, then click "Clean up system files" in the next window to access additional options for a more thorough cleanup.
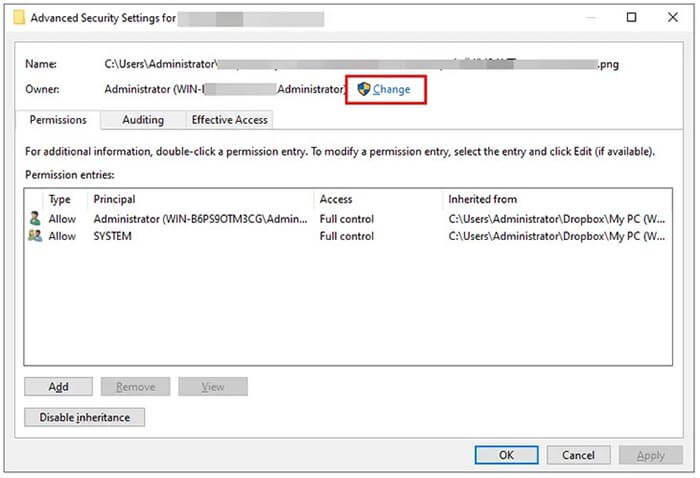
If the system displays the message "No permission to delete this file", it means the file's ownership or permission settings are incorrect. By manually changing the file's owner and permissions, you can regain full control and delete the file normally.
Here is how to fix Windows Disk Cleanup not deleting files:
Step 1. Right-click the file or folder you want to delete, then select "Properties" > "Security" > "Advanced".
Step 2. Next to "Owner", click "Change" and enter your username, then click "OK".
Step 3. Once you're the owner, you can adjust the permissions to allow for deletion.
If the target file is being used by a program, Disk Cleanup won't be able to modify or delete it. You can use Task Manager to end these processes and then try the cleanup again.
Here is how to fix Windows 10/11 Disk Cleanup not deleting Windows update files:
Step 1. Press "Ctrl" + "Shift" + "Esc" to open Task Manager.
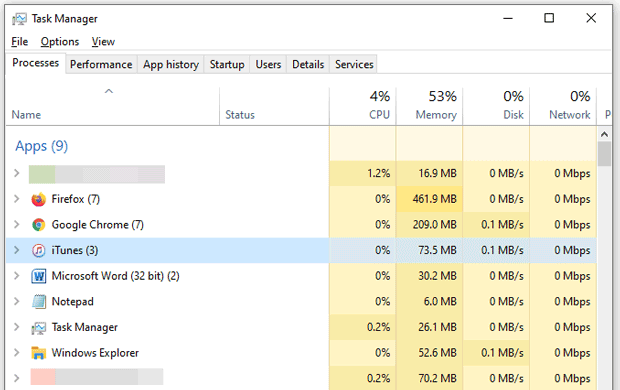
Step 2. Under the "Processes" tab, look for applications that may be using your files (such as browsers, Windows Update, antivirus software, or video players).
Step 3. Select the process and click "End Task".
Step 4. Once done, try running Disk Cleanup again.
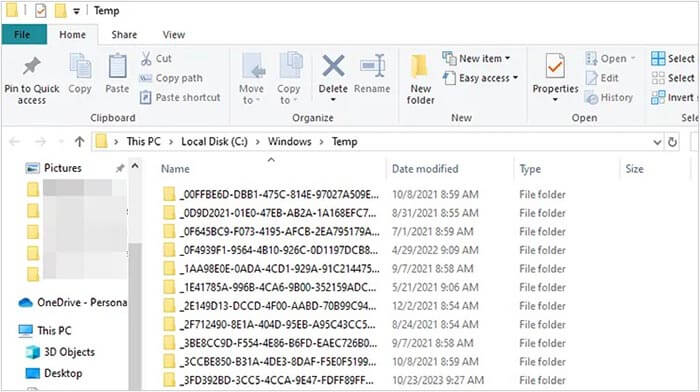
If Disk Cleanup fails to remove temporary files, you can manually clean them yourself. This direct approach often works when automatic cleanup tools get stuck.
Here is how to fix Disk Cleanup not deleting temp files on Windows 11:
Step 1. Press "Windows + E" to open File Explorer.
Step 2. Navigate to the following directories:
Step 3. Select all files (Ctrl + A).
Step 4. Press "Shift + Delete" to permanently remove them.
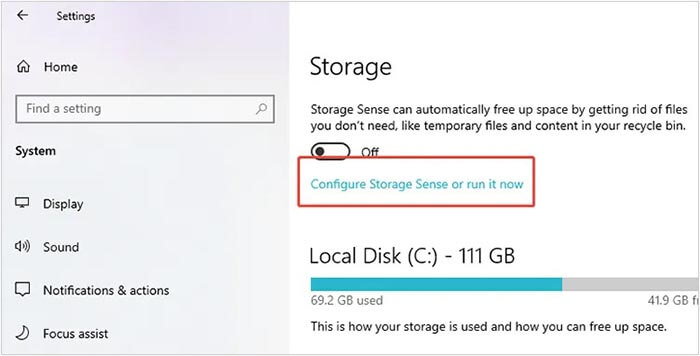
Windows 10 and 11 come with a built-in feature called Storage Sense, which automatically removes temporary files, Recycle Bin contents, and system cache. You can use this method when Disk Cleanup fails to delete files on your Windows 11 or Windows 10 PC.
Here is how to fix Disk Cleanup not deleting files on Windows 10/11:
Step 1. Open "Settings" > "System" > "Storage".
Step 2. Toggle on "Storage Sense".
Step 3. Click "Configure Storage Sense or run it now".
Step 4. Choose how often you want cleanup to occur (daily, weekly, or monthly).
Step 5. Enable automatic removal of temporary files, downloads, and Recycle Bin items.
Step 6. Click "Run Storage Sense now" to start the cleanup immediately.
If you still encounter issues with Disk Cleanup or need a safer way to permanently delete files, Coolmuster Data Erasure is an excellent alternative. This professional tool is designed to securely and permanently erase files, folders, and even entire hard drives without any chance of recovery. Moreover, it allows you to wipe only the free space to completely remove previously deleted data, ensuring your privacy is fully protected.
Main features of Coolmuster Data Erasure:
Here is how to permanently delete files on a Windows PC:
01 Download, install this software on your PC and then launch it.
02To erase all your data, select "Drive Wiper" from the side panel. Then, choose a drive and an erasure mode.
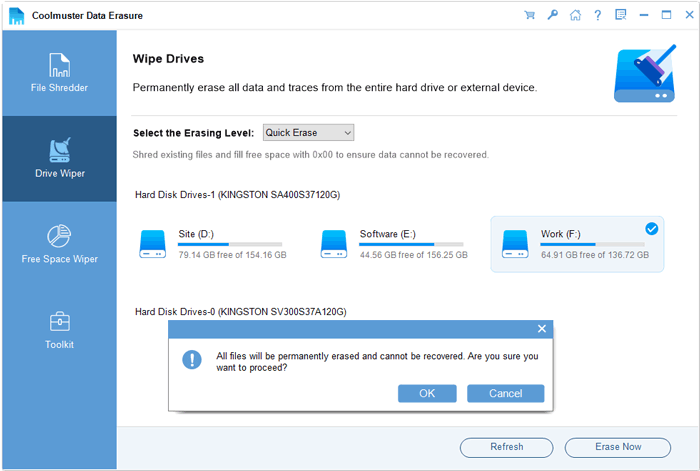
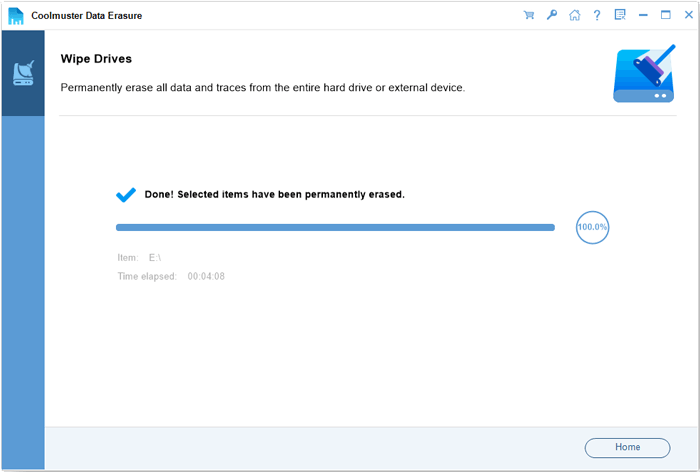
03Click "Erase Now" and confirm the action by clicking "OK" on the pop-up. The software will begin wiping all the data from your computer.
Video Tutorial:
When Disk Cleanup does not delete files, the five fixes above can help you resolve the issue and clean up your system successfully. If you want a faster, safer, and more powerful way to permanently remove unwanted files and protect your privacy, Coolmuster Data Erasure is the best choice.
With one click, it securely wipes data beyond recovery, freeing up storage space and giving your PC a fresh start.
Related Articles:
[Solved] How to Erase SD Card on Windows/Mac/Android/Camera?
How to Reset Hard Drive in Windows 11/10? Solved in 4 Secure Ways
How to Delete All Data from HP Laptop? Solved in 3 Safe Ways
[Step-by-Step Guide] How to Securely Wipe Free Space on SSD?


 Free Download for PC

