TL;DR:
diskpart -> clean all in Command Prompt to write zeros across every sector.When retiring, selling, or recycling a hard drive (HDD), simply deleting files or executing a Quick Format leaves data intact in unallocated clusters, exposing you to privacy leaks and identity theft. To permanently make data unrecoverable, you must perform an HDD Secure Erase via zero-filling or multi-pass sanitization compliant with NIST SP 800-88 or DoD 5220.22-M standards.
This comprehensive guide covers everything from built-in command-line utilities like DiskPart clean all and Windows Reset to dedicated data wiping software, giving you step-by-step instructions to erase your hard drive safely and completely.
HDD Secure Erase is a hardware or software-based data sanitization process designed to completely overwrite disk platters with binary zeros, ones, or pseudorandom data. Unlike a standard Quick Format-which merely deletes the file allocation table (FAT/NTFS references) - Secure Erase physically destroys the data remnants stored on magnetic platters.
Modern secure wiping standards follow NIST SP 800-88 Rev. 1 (Clear/Purge) or the U.S. Department of Defense (DoD 5220.22-M 3-pass/7-pass) guidelines, ensuring even forensic laboratory tools cannot reconstruct original files.
Crucial Technical Distinction (HDD vs. SSD): While mechanical HDDs rely on sector overwriting, Solid State Drives (SSDs) use flash memory and wear leveling. To erase an SSD safely, you should use hardware ATA Secure Erase or NVMe Format via manufacturer software rather than repeated traditional overwrite passes.
When should you perform an HDD Secure Erase?
Depending on whether you are erasing a secondary data drive or your active Windows C: system drive, choose from the following 4 proven wiping methods below.
If you want to quickly and securely erase data on an HDD with a graphical interface and zero risk of wiping the wrong drive, Coolmuster Data Erasure is the best HDD secure erase software.
Equipped with professional-grade wiping algorithms compliant with the U.S. Department of Defense data destruction standard (DoD 5220.22-M), it guarantees 100% permanent data destruction across external HDDs, internal drives, and USB drives.
Key Advantages of Coolmuster Data Erasure:
Here is how to securely erase HDD using Coolmuster Data Erasure:
01Download and launch the tool on your PC. From the main interface, select the "Drive Wiper" mode and choose the desired erasure level, either "Quick Erase" or "Deep Erase", to proceed.
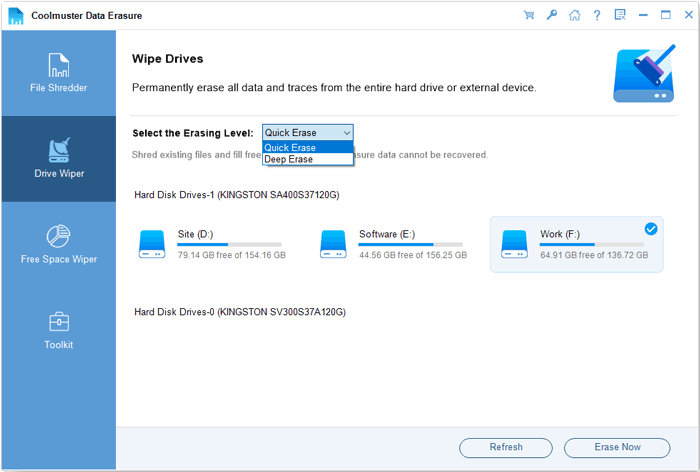
02Select the HDD you want to wipe, then click the "Erase Now" button to begin the wiping process.
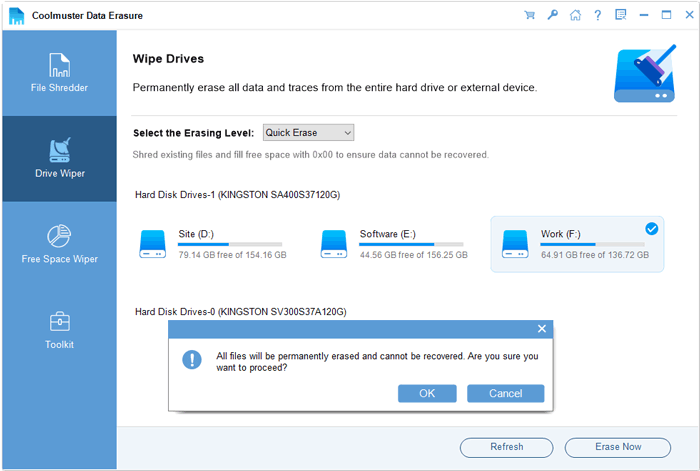
03Confirm your selection when prompted. Be sure to back up any important data, as this process will erase everything on the drive.
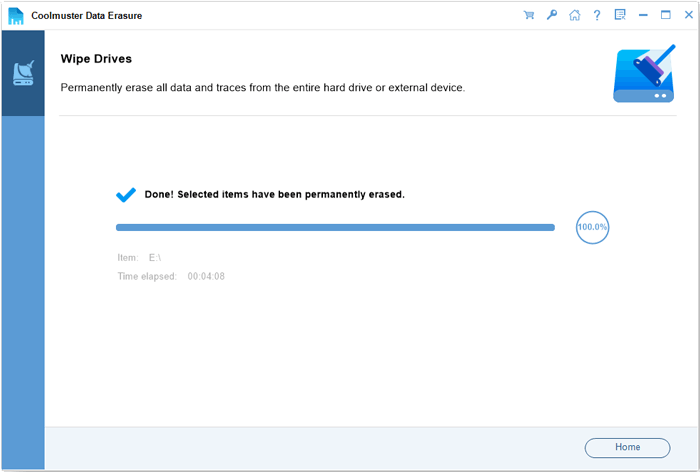
Video Tutorial:
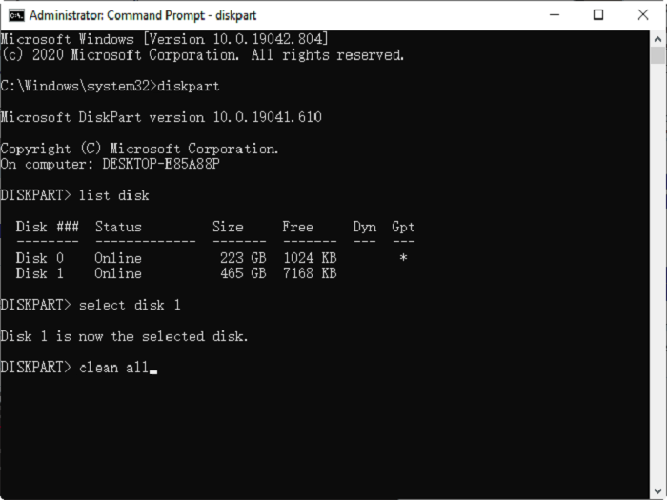
If you don't want to install additional software, the built-in DiskPart command-line tool in Windows can be used to perform a free zero-fill erase. Executing the clean all command writes binary zeros (0x00) over every sector, destroying all partition tables and stored data.
Here is how to securely erase HDD using DiskPart:
Step 1. Type "cmd" in the Windows search bar, right-click on "Command Prompt", and select "Run as Administrator".
Step 2. In the Command Prompt window, type diskpart and press "Enter".
Step 3. Type list disk and press "Enter" to find the disk number of the drive you want to erase (e.g., Disk 2).
Step 4. Type select disk 2 and press "Enter" (replace "2" with your disk number-verify carefully to avoid wiping the wrong system drive).
Step 5. Type clean all and press "Enter". DiskPart will perform a zero-fill on the entire drive, erasing all data.
Step 6. This process may take anywhere from 1 to 4 hours depending on the capacity and speed (5400 RPM / 7200 RPM) of the hard drive.
Step 7. Once it displays "DiskPart succeeded in cleaning the disk", type exit to close Command Prompt.
If the HDD you want to wipe contains your active Windows OS (C: Drive), Windows will prevent DiskPart from cleaning it while running. In this case, use the native Windows Reset feature with full drive cleaning enabled.
Steps to Reset and Clean the System HDD:
Win + I to open Settings -> navigate to System > Recovery (Windows 11) or Update & Security > Recovery (Windows 10).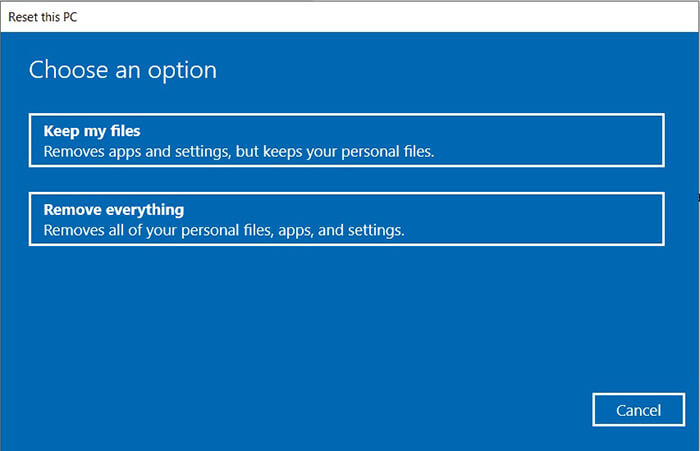
If you want to erase a secondary drive while simultaneously building a fresh NTFS partition in a single command, use Windows Command Prompt or PowerShell with the format overwrite flag.
Steps for PowerShell Overwrite Format:
format D: /FS:NTFS /P:1 (replace D: with your target drive letter)./P:1 parameter tells Windows to perform a Full Format (scanning for bad sectors) AND write a pass of zeros across every sector, followed by a second pass of random numbers.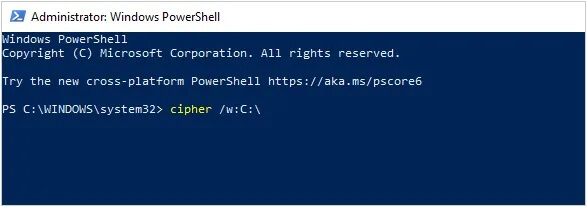
During the hard drive wiping process, you might encounter technical issues. Here are quick fixes for the most frequent error scenarios:
Error 1: "DiskPart has encountered an error: Access is denied"
Cause: The drive is currently locked by a system process, pagefile, or antivirus scanner.
Fix: Run Command Prompt as Administrator, boot Windows into Safe Mode before running diskpart, or use Coolmuster Data Erasure to force-lock and unmount the target volume.
Error 2: "The media is write protected"
Cause: The drive hardware triggered a read-only safety state or registry lock.
Fix: In DiskPart, select your target disk and run attributes disk clear readonly before executing clean all.
Error 3: Drive wipe process hangs at 0% or takes days
Cause: Severe physical bad sectors or SMART platter failure on an aging mechanical HDD.
Fix: Verify drive health via CrystalDiskInfo. If platters are physically damaged, software zero-fills will fail, requiring hardware degaussing or physical destruction (shredding/drilling).
Q1. What is the difference between HDD Secure Erase and regular formatting?
Regular (Quick) formatting only deletes the file allocation table (FAT/NTFS index), leaving actual binary data on disk platters where recovery tools can easily retrieve it. In contrast, HDD Secure Erase completely overwrites every sector with zeros or random bit patterns, ensuring data cannot be recovered by any means.
Q2. Is a single-pass zero fill (DiskPart clean all) enough to erase an HDD securely?
Yes. According to NIST SP 800-88 Rev. 1 Guidelines for Media Sanitization, a single pass of zero-overwrite (writing zeros across all addressable sectors) is sufficient to render data unrecoverable even against laboratory-grade forensic tools on modern high-density hard drives.
Q3. Will securely erasing an HDD damage the hard drive?
No, secure erasure only involves standard magnetic write operations and does not affect the physical mechanical structure of the drive. However, avoid performing excessive multi-pass overwrites (e.g., 35-pass Gutmann method) on older drives as it creates unnecessary thermal stress without extra security benefits.
Q4. Can I use HDD wiping methods on a Solid State Drive (SSD)?
While software like Coolmuster Data Erasure safely wipes SSD partitions, traditional zero-fill commands (like DiskPart clean all) should be used sparingly on SSDs. SSDs use flash memory and wear leveling, so hardware-level ATA Secure Erase or NVMe Format commands are recommended for SSD sanitization.
Q5. Can deleted files be recovered from an HDD after a Secure Erase?
No. Once an HDD is securely wiped using Coolmuster Data Erasure (DoD 5220.22-M) or DiskPart clean all, original binary data is permanently overwritten. Recovery software and forensic labs cannot retrieve the destroyed files.
That's all about HDD secure erase. If you need to thoroughly erase HDD data and ensure complete information security, Coolmuster Data Erasure is the best choice. Compared to built-in Windows command tools, it offers a foolproof GUI, 3 flexible wiping modes (Drive Wiper, File Shredder, Free Space Wiper), and strict compliance with DoD 5220.22-M standards, effectively preventing data recovery. Whether you're an individual user or an IT admin, you can use it with confidence.
Download Coolmuster Data Erasure now to ensure your data is secure and worry-free.
Related Articles:
8 Best Android Data Eraser Software: Erase Your Android Permanently
Which Is the Best iPhone Data Eraser Software? [A Comprehensive Review]
How to Erase USB Drive Completely? 3 Effective Methods Inside!






 Free Download for PC


