In the process of daily computer use, we often encounter a problem: a seemingly ordinary file that just won't delete. The system prompts "File is in use", "No permission", or "Operation cannot be completed", which can be quite frustrating. So, how to force delete a file? This article will explain various methods for both Windows and Mac platforms, helping you quickly remove stubborn files and free up storage space.
If you're using a Windows PC and need to force delete files, this section offers three effective methods to help you do so.
The most common reason a file can't be deleted is that it is being used by a process. You can try closing the related program completely through Task Manager, then attempt to delete the file again.
Here is how to force delete a file that is open in another program:
Step 1. Open the Start menu, type "Task Manager", and select "Task Manager" to open it.
Step 2. Locate the application that's using the file, then click "End Task".
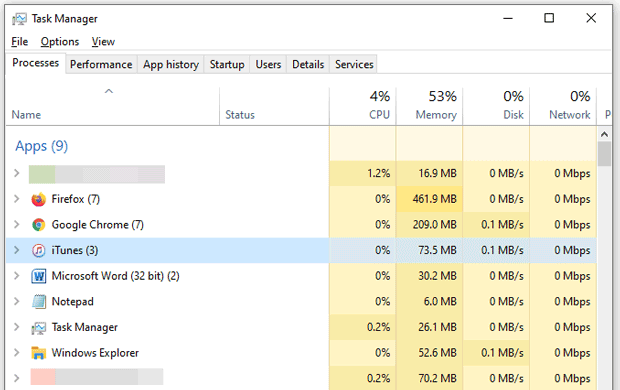
Step 3. Now, try deleting the file again on your Windows PC.
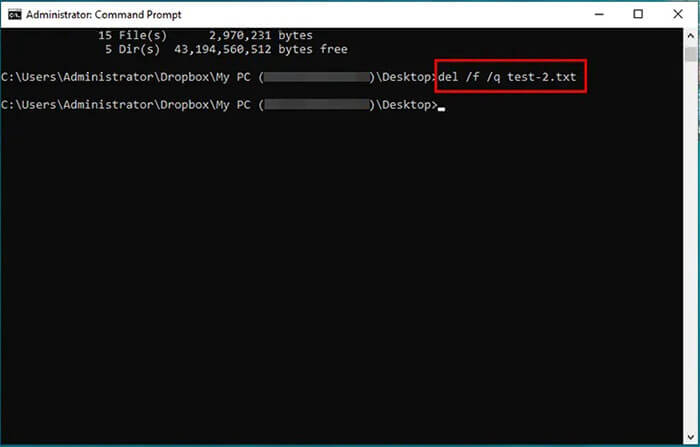
Command Prompt can often be a more effective solution, and it's definitely worth a try. Here's how to force delete a file in CMD:
Step 1. Type "cmd" in the Windows search bar.
Step 2. Right-click "Command Prompt" → choose "Run as administrator".
Step 3. Enter "del /f /q "file_path". (/f forces deletion; /q enables silent mode)
Step 4. Press "Enter" and check if the file has been removed.
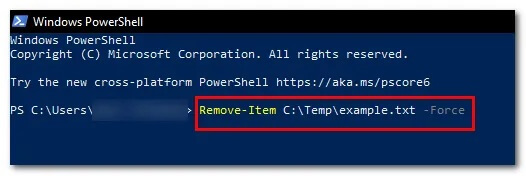
You can also use PowerShell to force delete a file on your Windows 11 or Windows 10 PC. The steps are similar to those for using CMD.
Here is how to force delete a file that cannot be deleted using PowerShell:
Step 1. Search for "PowerShell" in the Start menu, right-click on "Windows PowerShell", and select "Run as administrator."
Step 2. Next, enter the following command: Remove-Item -Path "C:\Path\To\Your\File.txt" -Force
(Be sure to replace C:\Path\To\Your\File.txt with the actual path of the file you want to delete.)
Step 3. Press "Enter", and the file will be removed from your PC.
If the methods above don't work to force delete a file, you can try booting your computer into Safe Mode and then deleting the file.
Here is how to force delete a file on Windows 11/10:
Step 1. Press "Win + I" to open "Settings" → Click on "Update & Security".
Step 2. Go to "Recovery" → "Advanced Startup" → Click "Restart now".
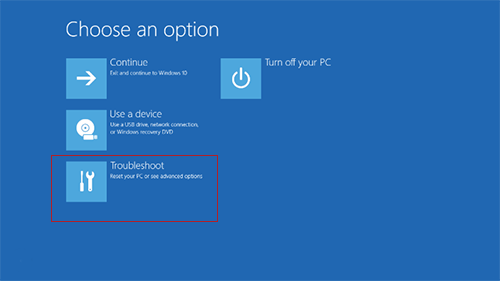
Step 3. In the blue menu, select the following options: "Troubleshoot" > "Advanced options" > "Startup Settings" > "Restart".
Step 4. After restarting, press "4" or "F4" to enter Safe Mode.
Step 5. Find the file that couldn't be deleted and try deleting it again.
If you want to completely erase a file without leaving any traces of recovery, you can use a specialized tool, Coolmuster Data Erasure, to force delete files on your PC. It lets you easily select files and folders to wipe completely with just a few clicks—no need to type any command lines. Additionally, this tool can wipe an entire hard drive in one go. If you're planning to sell your old computer or hard drive, it's a simple and secure way to ensure all data is permanently erased.
Main features of Coolmuster Data Erasure:
Here is how to force delete a file that cannot be deleted on Windows 11/10 using Coolmuster Data Erasure:
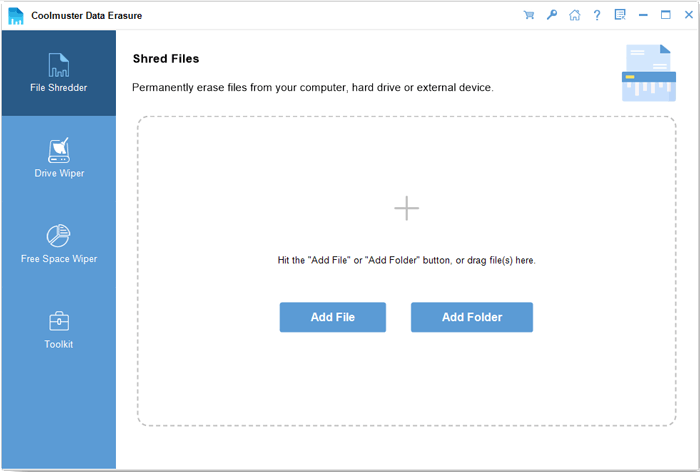
01Install Coolmuster Data Erasure on your computer and launch the program from your desktop.
02In the "File Shredder" tab, click "Add File" to select the file you want to delete, then click "Open".
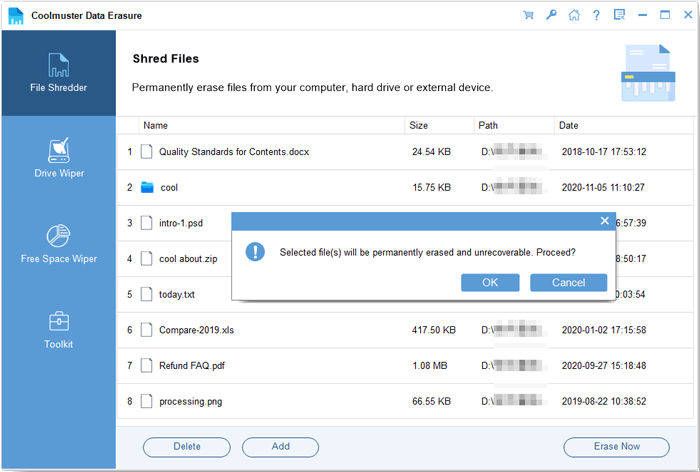
03Once the file is added, click "Erase Now" to permanently delete it.
Video Tutorial:
On a Mac, you can also force delete a file. Here are two ways you can use to force delete a file on a Mac. Let's look at it together.
The Terminal gives you command-line control over your Mac's files, allowing you to bypass permission restrictions and system barriers. This method is useful for deleting corrupted, hidden, or system-protected files. Additionally, Terminal commands can forcefully remove files that don't respond to regular deletion methods.
Here is how to force delete a file on a Mac using Terminal:
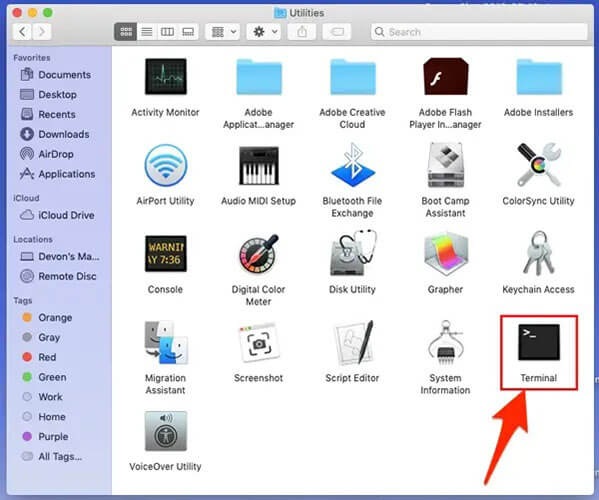
Step 1. Open Finder, then go to "Applications" > "Utilities" > "Terminal".
Step 2. Type "rm -f" (make sure there's a space after -f). Next, drag the file you want to delete into the Terminal window—this will automatically add the file's full path. Your command should look something like:rm -f /path/to/the/file/FileName.ext
Step 3. Press "Return". The file or folder will be deleted immediately and will not be moved to the Trash.
Mac users can use Safe Mode to load only essential system components and disable third-party extensions. This minimizes software conflicts and often allows stuck files to be deleted without needing any technical commands. Follow these steps to force-delete a file on a Mac in Safe Mode:
Step 1. Click the "Apple logo" in the corner of your screen and choose "Restart" from the drop-down menu.
Step 2. Select Reopen windows when logging back in (if needed), then click "Restart".
Step 3. As your Mac restarts, hold down the "Shift" key and release it when you see the Apple logo.
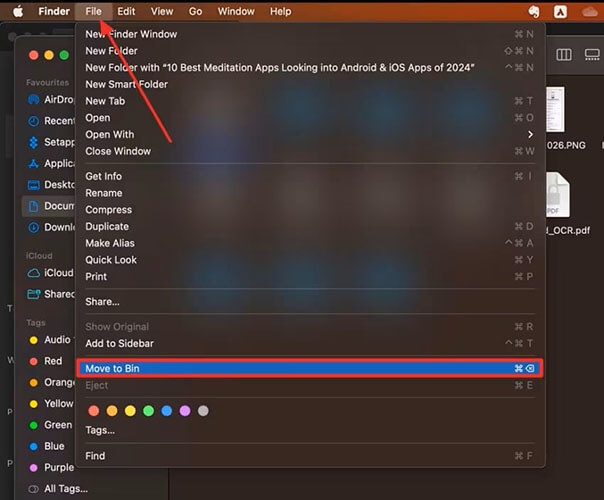
Step 4. Once in Safe Mode, locate the unresponsive file, open the "File" menu, and choose "Move to Bin".
Whether you are using Windows or macOS, knowing how to force delete a file helps you deal with stubborn, locked, or damaged files quickly. While built-in tools can usually help resolve most deletion issues, they sometimes fall short when you need a permanent, secure, and irreversible file removal solution.
For Windows users, the most reliable and efficient option is Coolmuster Data Erasure. Unlike manual deletion methods that may leave traces or allow data recovery, this tool ensures your files are completely wiped using professional-grade erasing algorithms. Whether you are deleting private documents, sensitive work files, or simply cleaning up your system, Coolmuster Data Erasure provides a safer, cleaner, and more thorough result than any built-in Windows method.
Related Articles:
How to Erase USB Drive Completely? 3 Effective Methods Inside!
[Step-by-Step Guide] 5 Reliable Ways to Erase SSD Disk on Windows
How to Reset Hard Drive in Windows 11/10? Solved in 4 Secure Ways
Step-by-Step Guide to Delete Everything But OS on Windows & Mac


 Free Download for PC

