How are you going to treasure your memories? Many of us have an iPhone or iPad to store our photos and videos. While iOS camera quality is great, did you know that a few minutes of 4K video recording can use up to 1 GB of data? If you go for the 128 GB, or even the 16 GB model, you're going to be very tight on space. Therefore, you may need an iPad Photo Manager to manage your photos on iPad, such as deleting useless photos or transferring photos between iPad and computer. Apple iTunes is ideal for managing iPad videos and music, but not for managing iPad photos.
About iPad Photo Manager:
That's why iPad Photo Manager comes in handy. The freeware is able to scan the iPad automatically after it is connected to the PC. It works for both jailbroken and normal devices. Browsing and exploring your files and pictures is easy by using this free software. The user-friendly application lets you delete, add, export, save and view your images directly on the device without any problem. Your pictures can be transferred from the iPad to computer, and from computer to iPad with just one click. Photos and other files stored on the iPad can be accessed easily via this freeware.
iPad Photo Manager can be your best choice if you need to transfer and manage data on your iOS devices. You no longer need to worry about not having a USB slot on your iOS device because it can mount your iOS device as an external drive. Below is how you can use it to add, export and delete photos on your iPad Pro/Air/mini/4/2.
Read More:
5 Easy Ways on How to Transfer Video to iPad without iTunes
How to Transfer Files from Mac to iPad? 6 Ways for you
Step 1. Connect your iPad with the computer and run the freeware.
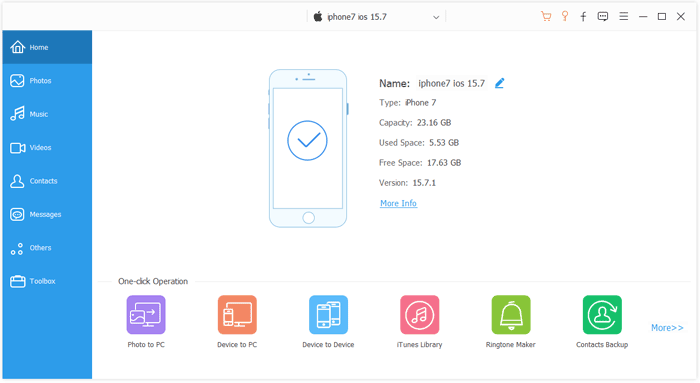
Launch the free program on your computer. Use a USB cable to connect your iPad with the computer and the program will automatically detect your iPad. Then, you can see the starting window appears like the following picture.
Note: Here we take the iPhone for example but the operations to manage iPad photos is the same as iPhone's.

Step 2. Import/export/delete photos on iPad in batch.
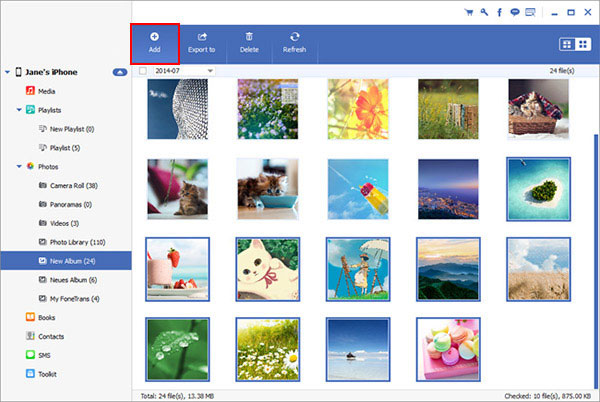
All files and folders on your iPad are displayed on the left. Choose "Photos" tab and select the photos you want to delete, then click "Delete" button from the top to delete iPad photos with one click.
To put photos onto iPad, you should choose "Add" button, then browse the photos you want on your computer and click Ok to import them to your iPad.
To export iPad photos to computer, you can tick off the files or folders you want to export. Choose the option says "Export to ", choose a location on your computer and then export the files or folders.

That's the way that this iPad photo manager manage photos on your iPad. Now, download the iPad Photo Manager, which is totally free of charge, to have a try by yourself.
Related Articles:
5 Easy Ways on How to Transfer Video to iPad without iTunes
How to Transfer Files from Mac to iPad? 6 Ways for you
6 Methods to Transfer Music from Computer to iPhone without iTunes
How to Transfer Videos from Computer to iPhone Easily


