TL;DR:
Missing photos can usually be recovered if you act before they are overwritten. Built-in Mac features offer the quickest free recovery, while third-party tools can salvage data from formatted or corrupted drives.
Photo recovery for Mac is more achievable than most people think, even when precious images seem gone forever. Whether you have lost irreplaceable family portraits, a professional portfolio, or vacation snapshots, data loss on a Mac isn't always permanent. With the right approach and the correct tools, you have a high chance of getting your images back.
This comprehensive guide covers the immediate steps you need to take after noticing your photos are missing, the top 8 recovery tools available for macOS, and answers to the most pressing questions about Mac photo recovery.

What you do in the first few minutes after realizing your photos are gone can make the difference between a successful recovery and permanent data loss. If you notice photos have gone missing, follow these steps immediately:
Do Not Install Recovery Software on the Affected Drive: If you do not have a Time Machine backup and need to download a recovery tool, do not download or install it onto the partition where the photos were lost. If possible, run the software from an external USB drive to avoid overwriting your data.
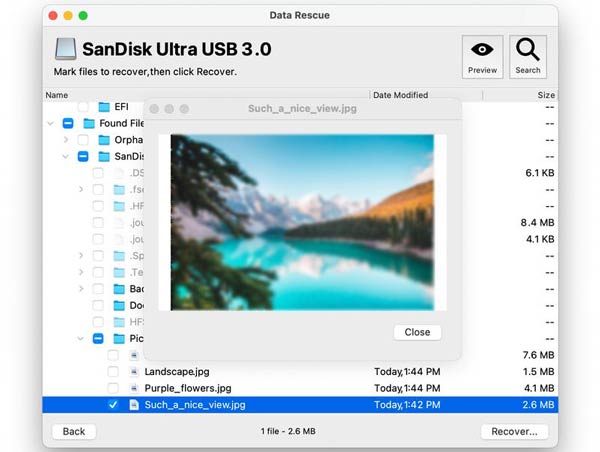
If your photos aren't in the Trash, the Recently Deleted album, or a Time Machine backup, it's time to bring in specialized software. Below is a detailed breakdown of 8 popular data recovery tools for Mac, including their features, pros, and cons.
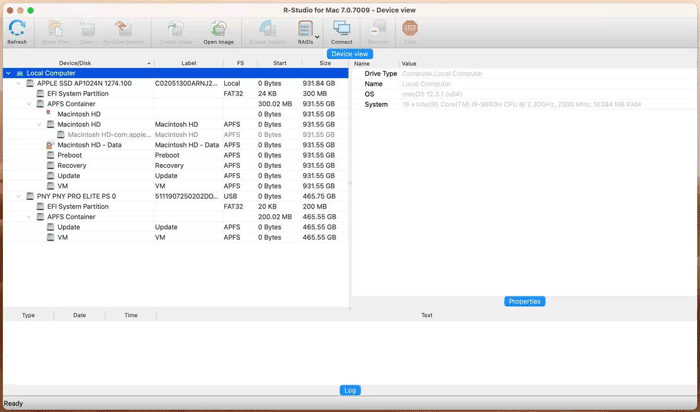
R-Studio is a heavy-duty, enterprise-grade data recovery suite engineered for data recovery professionals, forensic analysts, and system administrators. It specializes in dealing with severely damaged file systems, unbootable machines, and complex disk arrays.
Pros:
* Exceptionally powerful raw file carving capabilities for heavily corrupted drives.
* Supports a massive array of file systems including APFS, HFS+, NTFS, exFAT, and Linux Ext2/Ext3/Ext4.
* Includes an advanced built-in Hex Viewer to inspect disk sectors at a binary level.
* Provides professional disk imaging tools to clone a failing drive before scanning.
Cons:
- The highly complex, technical user interface is extremely intimidating for casual users.
- No direct support for data recovery from mobile devices like iPhones or Androids.
- Customer support can be slow to respond to non-technical configuration inquiries.
- Advanced features like network recovery require upgrading to a much more expensive license tier.
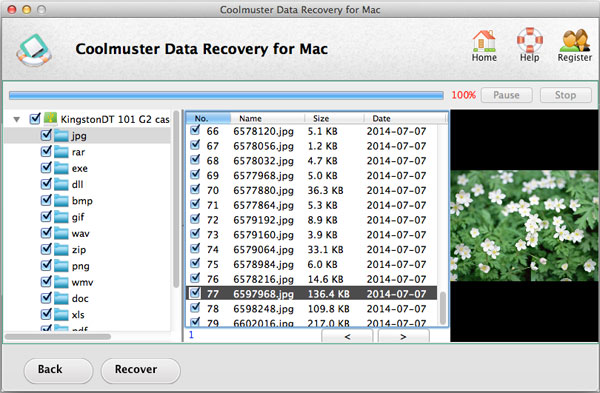
Coolmuster Data Recovery (Mac version) offers a lightweight, wizard-style application tailored specifically for everyday consumers. It breaks down the recovery process into a few clear steps, focusing on quick scans for accidentally deleted or formatted files.
Pros:
* Highly streamlined, user-friendly interface that requires zero technical knowledge.
* Lightweight software footprint that consumes minimal system memory during operation.
* Enables you to preview your photos on the interface before the recovery.
* Allows users to easily filter scanned files by file extension or name.
* Suppors the recovery of photos, documents, and other media files.
* Can recover files from local and external hard drives.
Cons:
- Lacks deep-scanning algorithms necessary to piece together fragmented images on corrupted media.
- The free trial version only scans the drive; you cannot save any recovered files without buying a license.
- The Mac version has not received the latest software updates like the Windows version has.
Download the Mac version of Coolmuster Data Recovery.
Here's how to use this photo recovery software on Mac:
01Download and install the photo recovery program on your Mac computer, and launch it. Then choose "Photo" and tap "Next".
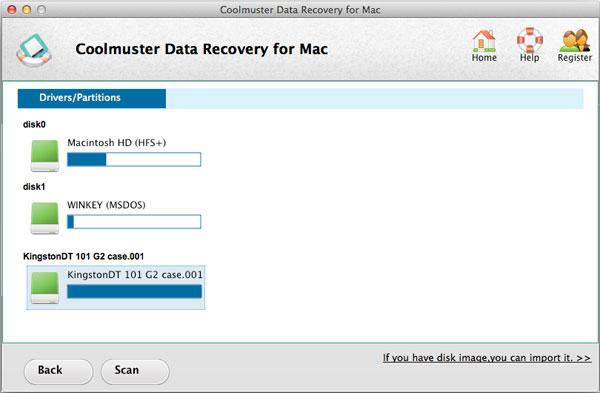
02Choose the hard drive where your photos are stored, and click "Scan" to go on. The software will start to scan the hard disk.
03After scanning, select the photos you want to recover, and tap "Recover" to save them to your Mac's another hard drive.
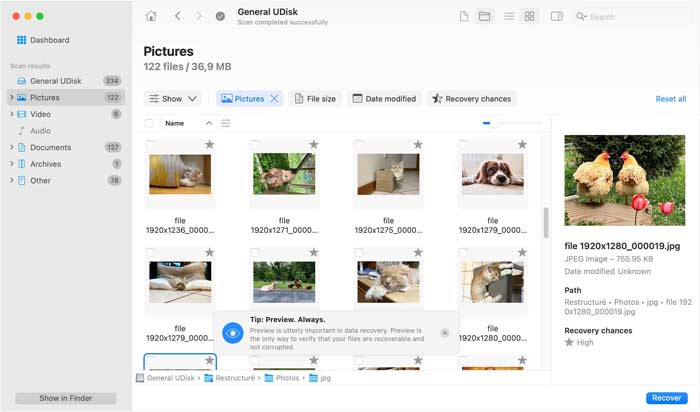
Disk Drill is widely considered a leading consumer-tier data recovery application for macOS. It stands out for its balance of professional-grade scanning algorithms and a beautifully polished, intuitive user experience.
Pros:
* Extremely modern UI with a guided wizard workflow that simplifies the entire recovery process.
* Outstanding file preview engine that displays images and RAW photo formats before executing recovery.
* Bundles excellent free disk health utilities including S.M.A.R.T. monitoring and a duplicate file finder.
* Provides cross-platform value, as a purchase unlocks both the Mac and Windows versions.
Cons:
- The scanning process can be quite slow on larger drives compared to faster competitors.
- The upfront pricing for the Pro edition is significantly higher than alternative consumer software.
- The background disk monitoring service can sometimes lock external drives and prevent clean ejection.
- No direct telephone-based customer support is available for real-time troubleshooting.
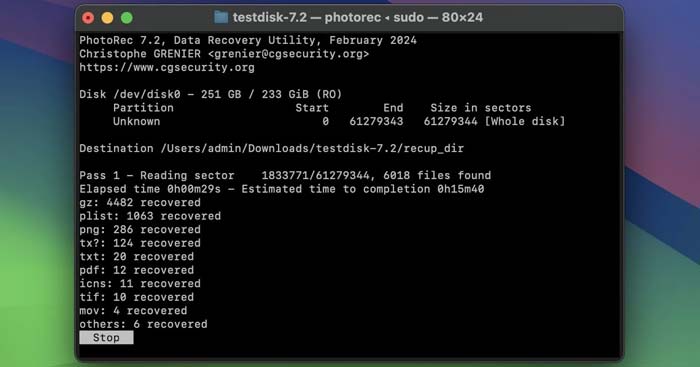
PhotoRec is a legendary, open-source data recovery application that functions entirely via file signature carving. Because it completely ignores the disk's file system metadata, it can find files even when a drive has been completely re-formatted or severely damaged.
Pros:
* Completely free and open-source under the GPL license with absolutely no data recovery caps.
* Incredibly lightweight, portable, and runs smoothly without requiring a traditional installation.
* Recognizes more than 480 distinct file extensions across approximately 300 different file families.
* Uses a safe, strictly read-only scanning process that will never write over or damage your lost data.
Cons:
- Runs inside a text-based terminal/command-line interface, which is very confusing for beginners.
- Does not preserve original file names, creation dates, or folder hierarchies.
- Cannot display previews of images or allow selective filtering before the recovery process finishes.
- Cannot access the internal system storage on modern Macs with Apple Silicon (M-series chips) due to security restrictions.
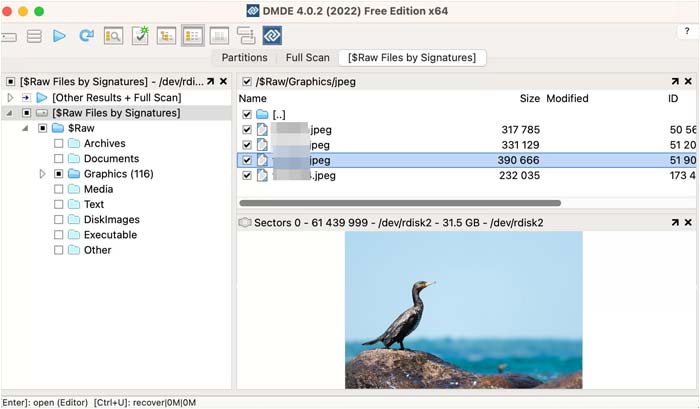
DMDE (Data Management and Data Recovery) is a highly specialized tool designed for searching, editing, and restoring data on physical disks. It is favored by data technicians due to its ability to repair partition tables and reconstruct broken directory structures.
Pros:
* Extremely efficient at parsing and reconstructing original complex directory structures.
* The free version offers a very generous allowance to recover full folders of files without a payment block.
* Includes a built-in partition manager and a comprehensive disk hexadecimal editor.
* Features exceptionally fast raw file scanning speeds on stable external storage devices.
Cons:
- The user interface looks very dated and resembles legacy Windows utilities.
- Requires a deep understanding of disk geometry, partitions, and hex values to use safely.
- The documentation is heavily technical and provides little guidance for casual home users.
- Misconfiguring a command inside the partition manager can accidentally wipe an entire disk.
Formerly known as Data Rescue, Prosoft Data Recovery v6 is a premium application crafted for thoroughness and data safety. It is a popular option among corporate IT departments that require rigorous validation and stable recovery methods.
Pros:
* Features built-in safety alerts that actively prevent you from accidentally overwriting your source data.
* Allows the user to create a customized bootable USB recovery drive for crashed Macs.
* Offers highly detailed, step-by-step instructions throughout the configuration phase.
* Excellent support for professional camera RAW image formats and legacy Mac file systems.
Cons:
- One of the most expensive data recovery choices available on the consumer market.
- The deep scanning process is deliberately slowed down to maximize accuracy, which can take hours.
- The pricing structure can be confusing, transitioning between single-use and subscription models.
- The interface can feel overly restrictive for power users who want to jump straight to custom sector scans.
EaseUS is a household name in the utility software space. Its Mac variant delivers reliable performance paired with automated workflows, striking an ideal compromise for intermediate users who need deep scanning without the technical jargon.
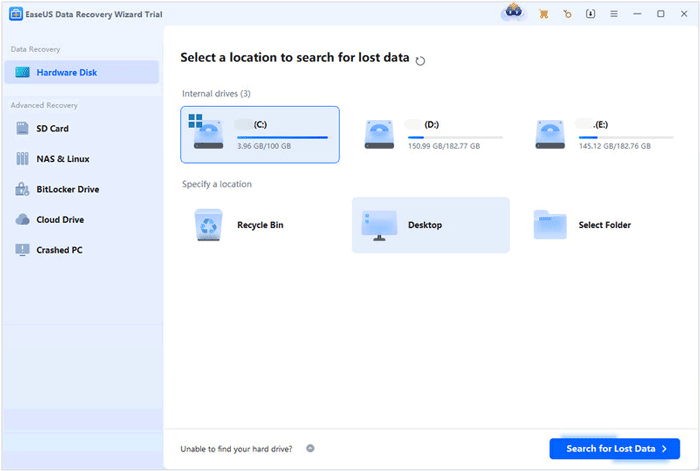
Pros:
* The free tier allows you to fully recover up to 2GB of data before prompting for payment.
* Automatically separates recovered media into clear categories by file format (JPEG, PNG, RAW).
* Includes an integrated basic repair module that attempts to fix corrupted photos or unplayable videos.
* Provides active customer support options including an interactive live web chat interface.
Cons:
- The monthly subscription plan is expensive if you need the software for long-term use.
- The file preview window struggles with image sizes over 100MB and some proprietary RAW files.
- Lacks full sector-by-sector disk imaging tools, which are essential when handling physically failing disks.
- The recovery paths view sometimes displays existing folder structures rather than organizing the newly found files.
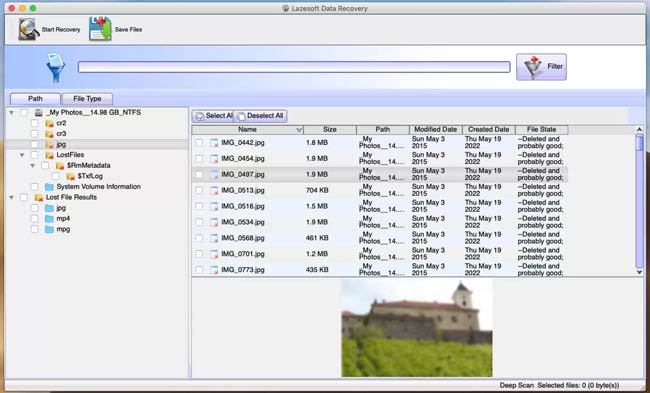
Lazesoft Mac Data Recovery is a completely free utility built specifically to resolve data loss on Apple storage formats. It focuses primarily on recovering files from old formatting styles like HFS+ as well as standard FAT32 media cards.
Pros:
* Entirely free for personal use with no hidden premium paywalls or data retrieval limits.
* Features a very clean layout that makes it easy to quickly initiate a basic disk scan.
* Optimized specifically for scanning external camera memory cards and portable USB storage.
* Allows users to unerase files from formatted volumes and recover lost partitions on older drives.
Cons:
- Has not been updated regularly to support newer macOS security features and systems.
- Lacks optimized support for the modern APFS file system utilized by default on new Macs.
- Does not run natively on newer Apple Silicon (M1/M2/M3/M4) chips, requiring emulation layers.
- Deep scanning results show lower data yield rates for modern compressed media formats.
Q1: Does SSD storage make photo recovery harder?
Yes, significantly. Most modern Macs utilize Solid State Drives (SSDs) equipped with a feature called TRIM. When you delete a file on a TRIM-enabled SSD, the operating system immediately wipes the cells to ensure the drive maintains peak writing speeds.
This means that if a file is permanently deleted from a Mac's internal SSD and no backup exists, the window of opportunity for software recovery is incredibly small. Immediate action is absolutely vital. Recovery from traditional Hard Disk Drives (HDDs) or external SD cards remains much easier.
Q2: Can photos be recovered without software on Mac?
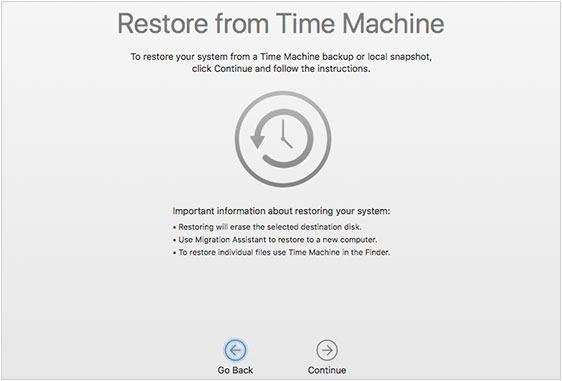
Yes, but only under certain conditions. If the photos were recently deleted, you can retrieve them directly from the Trash or the Recently Deleted folder in the Photos app. Additionally, as detailed in Part 1, if you have Time Machine actively saving your data, you can plug in your backup drive, travel back to a point before the deletion occurred, and recover them natively without buying software.
Q3: Can permanently deleted photos on Mac be recovered from iCloud?
Yes, if iCloud Photos was enabled. When you delete a photo from your Mac while connected to iCloud, it moves to the "Recently Deleted" folder on iCloud.com. You have 30 days to log into iCloud via a web browser, navigate to the Photos app, select the deleted pictures, and click "Recover." However, if you manually delete them from the iCloud "Recently Deleted" folder, they are permanently gone from the cloud.
Data loss is undoubtedly stressful, but a missing photo is rarely truly gone until it has been overwritten. The key is to act fast, take advantage of built-in macOS safeguards like Time Machine, and deploy a useful tool like Coolmuster Data Recovery, Disk Drill, EaseUS, or PhotoRec when backups aren't available. With the right approach, you stand an excellent chance of restoring your entire library.
To safeguard your memories against future mishaps, always keep Time Machine active or combine it with an automated cloud service like iCloud.
Related Articles:
Best Laptop Data Recovery Software for You: 12 Recovery Tools
How to Recover Deleted Files on Your Android [100% Workable]
How to Import Photos from SD Card to Mac: A Step-by-Step Guide
How to Transfer Photos from Android to Mac Hassle-Free? [10 Ways]


 Free Download for Mac
  Free Download for PC

