
How to Import Photos from SD Card to Mac: A Step-by-Step Guide

After a fantastic vacation filled with countless photos, your SD card is ready to share all those memories. Luckily, Apple's Photos app makes it incredibly easy to import photos to your Mac. So, what other methods are there for transferring photos from an SD card to your Mac?
In this guide, we'll walk you through various methods for importing photos from an SD card to your Mac, whether you're using macOS High Sierra or later. Let's get started!
If you're looking to transfer photos from your camera's SD card to your Mac, the Photos app offers a simple and efficient way to do so. This method works well if you have a Mac with an SD card slot or a USB reader. It's fast, straightforward, and doesn't require additional software. However, keep in mind that this process works best with recent macOS versions like High Sierra or later.
Step 1: Insert your SD card into the Mac's SD card slot or connect it via a USB SD card reader.
Step 2: Open the Photos app on your Mac and it will automatically detect the SD card and display your photos.
Step 3: Hit the "File" menu, click the "Import" menu item, and a finder window appears. Locate your SD card using the finder window and select the image files that you would like to transfer to your Mac computer.
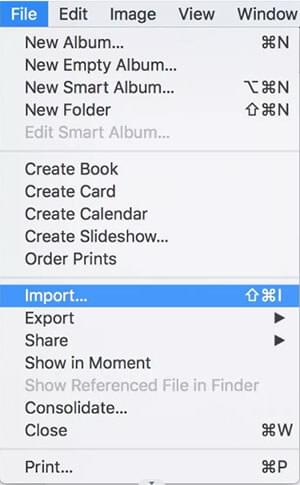
Step 4: You can now import all the available photos from the SD card by clicking on the "Import All New Photos" or import the selected images by clicking on the "Import Selected" option.
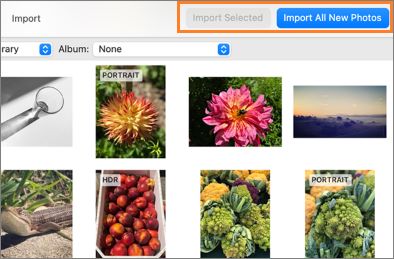
You have now transferred your photos from your SD card to the Mac computer using an SD card reader. As such, you can free up some memory space on your SD card to allow it to hold other photos. (How to Transfer SD Card to Computer Easily and Quickly)
If you prefer a straightforward method without using the Photos app, importing photos from your SD card via Finder is a simple and effective option. This method allows you to manually copy your photos, giving you more control over where you store them. The downside is that it doesn't automatically organize your photos like the Photos app, so you'll need to manage them yourself. Here's how you can do it:
Step 1: Insert your SD card into your Mac's SD card slot or use a USB SD card reader.
Step 2: Open Finder and locate the SD card under the "Devices" section in the sidebar.
Step 3: Double-click the SD card to open it and browse to the folder containing your photos.
Step 4: Select the photos you want to import, then drag them to your desired folder on your Mac.
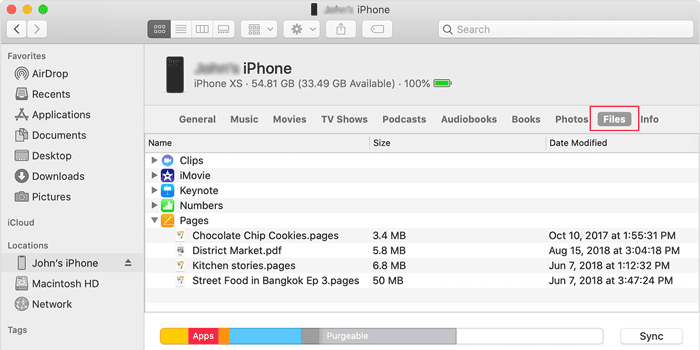
Step 5: Once the transfer is complete, safely eject the SD card by right-clicking on it and selecting "Eject." (How to Transfer Photos from SD Card to iPhone in 4 Quick Ways?)
To wirelessly transfer photos from an SD card to your computer using a cloud service, Google Photos is a great option. It syncs your pictures and videos, allowing you to access them on any device. Here's how you can import your photos from an SD card to your Mac with Google Photos:
Step 1: Download the mobile version of Google Photos on your phone with an SD card inserted into your phone.
Step 2: Sign in to Google Photos and set it up. Then click on "Menu", tap "Settings", "Back up & sync", and then tap on the "Choose folder to back up" option. Proceed to upload photos from your SD card.
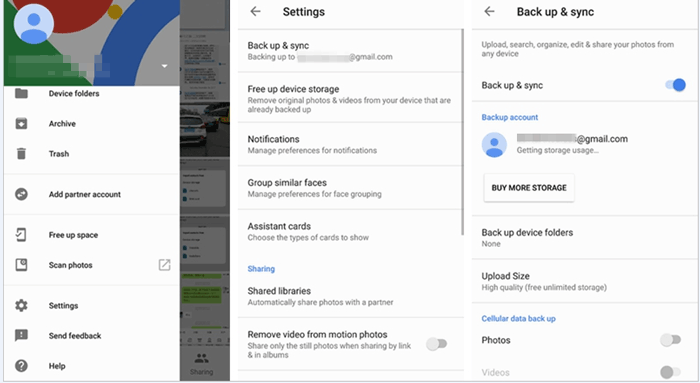
Step 3: Now go to Google Photos webpage on your computer and log into the account you created in Step 2. The uploaded pictures will appear on the screen. Check them and save them on your computer.
Many people wonder how to easily transfer photos from their iPhone to a Mac. One of the simplest and most reliable methods is using a professional tool. Coolmuster iOS Assistant is a top choice for managing and transferring iOS data. It makes the process smooth and efficient, allowing you to transfer not only photos but also contacts, videos, messages, music, and more between your iPhone and Mac.
This tool is perfect for anyone looking to organize their iOS data. With Coolmuster iOS Assistant, you can easily move all your photos or select specific ones to your Mac. Plus, it supports a wide range of other data types, making it a must-have app for iOS device management.
What Can iOS Assistant Do for You:
Below are the simple steps on how to import photos from iPhone to Mac using Coolmuster iOS Assistant:
01Launch Coolmuster iOS Assistant on your computer after downloading and installing it. Link the iOS device to the Mac computer, and the tool will detect it automatically. Ensure that you unlock your iPhone and tap on Trust.
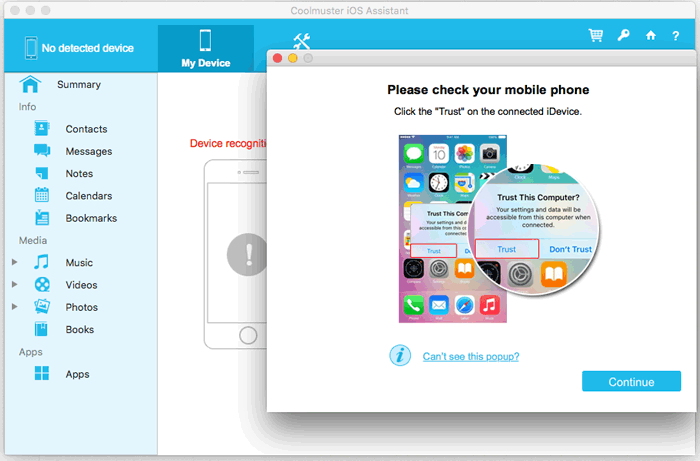
02After successfully connecting your iPhone, the main interface of Coolmuster iOS Assistant will be displayed.
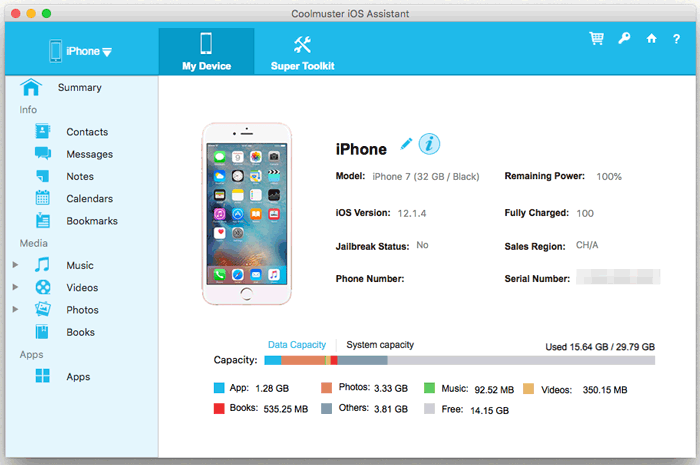
03Clicking on the "Photos" folder in the left corner of the interface. Tick your desired items from the right panel. On the top, Click "Export" to transfer the photos to Mac.
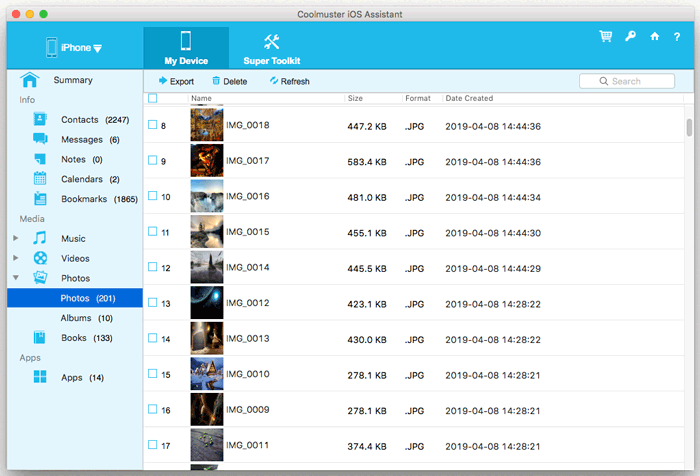
After that, you will have successfully copied your photos of interest to Mac, and you can safely free up your phone's spaces by deleting the backed-up data. Additionally, you can use your Mac's photo editing applications to edit and enrich the photos before sharing them with friends.
Video Guide:
Q1: Which devices use SD cards?
Q2: How can I access and view files on an SD card?
Q3: My Mac doesn't detect my SD card. What should I do?
Try restarting your Mac, check the card reader connection, or use a different card reader. If it still doesn't work, make sure the SD card is properly inserted and not damaged.
Now that you've learned how to transfer photos from an SD card to your Mac, you'll have more space for new photos while keeping your old ones safe. You can also use Coolmuster iOS Assistant to easily and happily transfer data on your iPhone. With its powerful features and easy-to-use design, Coolmuster iOS Assistant has become the preferred choice of users worldwide, making iOS data management and transfer seamless.
Related Articles:
[Fixed] How to Transfer Photo Albums from iPhone 14 to PC with Ease?
How to Transfer Music from iPhone to Mac? (Top 4 Ways)
Full Guide on How to Access iPhone Files on PC without iTunes
