TL;DR:
Recovering lost files on a Mac is highly successful if you act quickly before new data overwrites them.
There are moments when every Mac user accidentally deletes an important file - a stressful experience that feels all too familiar. Whether you mistakenly emptied the Trash, formatted a drive, or lost data during a system crash, knowing how to recover deleted files on Mac can save you from what feels like permanent loss.
The good news is that macOS offers several built-in safety nets, and advanced third-party tools can handle the rest. This comprehensive guide walks you through five proven methods to recover your deleted data, ranging from basic built-in features to advanced recovery software.

Before panicking, check the most obvious locations where macOS temporarily stores deleted items. Depending on the app or location, your files might just be waiting in a holding zone.
When you delete a file in Finder, it isn't immediately erased; it moves to the Trash.
You can get your deleted files back from Trash:
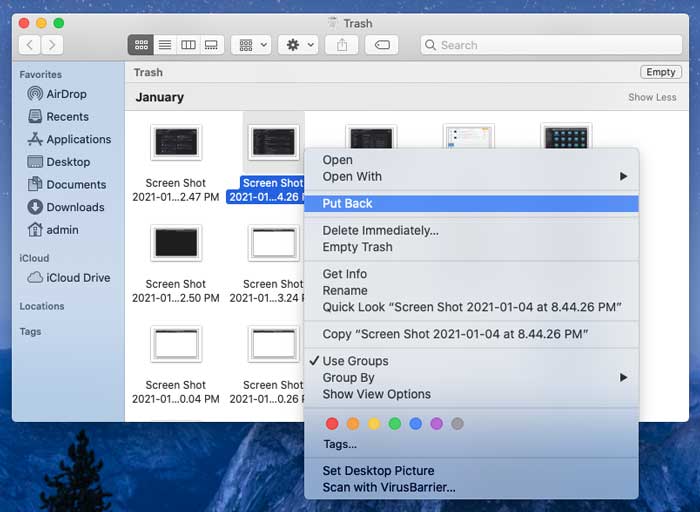
Step 1: Open the "Trash" icon on your Dock, and browse or search for your missing file.
Step 2: Right-click (or Control-click) the file and select "Put Back". The file will return to its original location.
If you deleted a photo, note, or email, apps like Apple Photos, Notes, and Mail have their own internal trash bins. By the way, most app-specific folders only retain deleted items for 30 days before permanently erasing them.
Photos App: Open the app, look at the left sidebar, and click "Recently Deleted". Select your photos and click "Recover".

Notes App: Check the "Recently Deleted" folder in the sidebar.
See also: If you accidentally deleted your PNG files on your Windows PC, you can rescue the files with 4 solutions.
Many Mac users believe that Time Machine only works when an external backup drive is plugged in. However, macOS has a built-in feature called Local Snapshots. Even if your backup drive is disconnected, your Mac automatically saves hourly snapshots of your file system onto its internal storage (as long as there is plenty of free disk space).
This allows you to roll back changes and recover deleted files even when you are on the go.
Here's how to restore your deleted files on Mac with Time Machine:
Step 1: Open the folder where your deleted file was previously located.
Step 2: Click the "Time Machine" icon in the menu bar and select "Browse Time Machine Backups" (or open Time Machine via Launchpad).
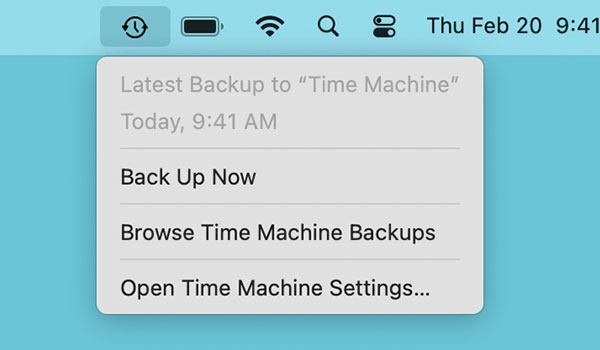
Step 3: The screen will shift into the familiar Time Machine starfield interface. Use the timeline on the right edge of the screen or the up/down arrows to browse through the available past versions.
Tips: Local snapshots are typically restricted to daily or hourly versions from the past 24 to 48 hours.
Step 4: Select the file or folder you want to bring back. Click the "Restore" button. The file will be copied back from your internal snapshot database to its original location.

Disk Utility cannot directly scan for and undelete individual files like photos or Word documents. However, it is a crucial tool if your files went missing because a drive became corrupted, unmounted, or unreadable. By repairing the drive's file system structure, your files may reappear.
Here's how:
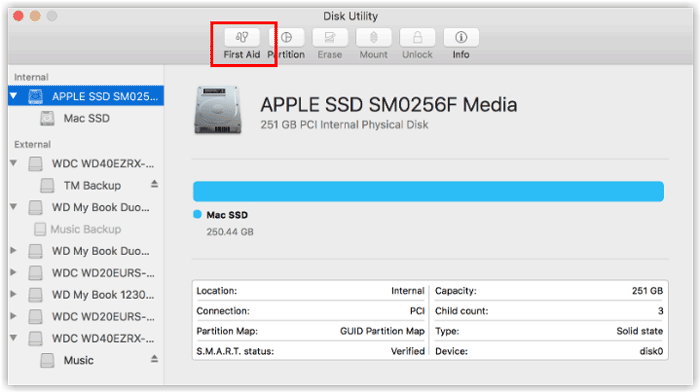
Step 1: Open Disk Utility. Go to Finder > "Applications" > "Utilities" > "Disk Utility".
Step 2: Select the corrupted or unrecognized drive from the sidebar on the left. Then click the "First Aid" button at the top of the window.
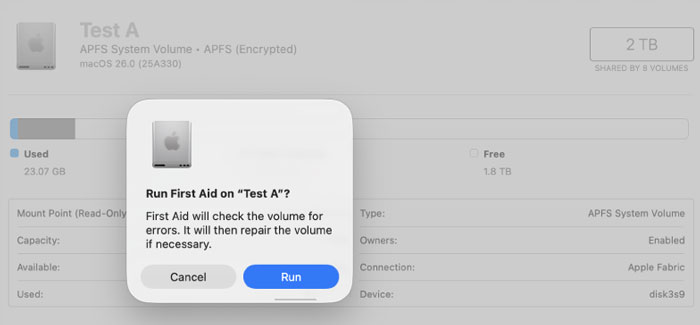
Step 3: Then click "Run" to confirm. Disk Utility will scan the drive for errors and repair them. If successful, your drive will mount properly, and you will be able to access your files again.
If you don't have a backup and the Trash has been emptied, the file is considered "permanently deleted." However, the data often still physically resides on your drive until new data overwrites it. Data recovery software like Coolmuster Data Recovery can scan these hidden sectors.
Key features of the Mac version of Coolmuster Data Recovery:
Download Coolmuster Data Recovery on Mac.
To recover permanently deleted files on Mac with this software:
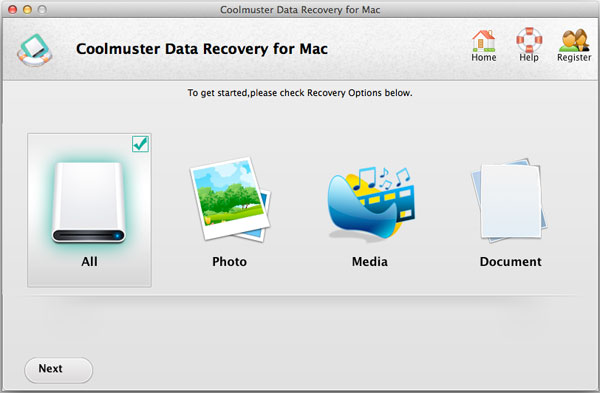
01Download and install Coolmuster Data Recovery for Mac on your computer. Please remember to install it on a separate drive or partition to avoid overwriting your lost data. Choose the "All" option to scan all file types, and click "Next".
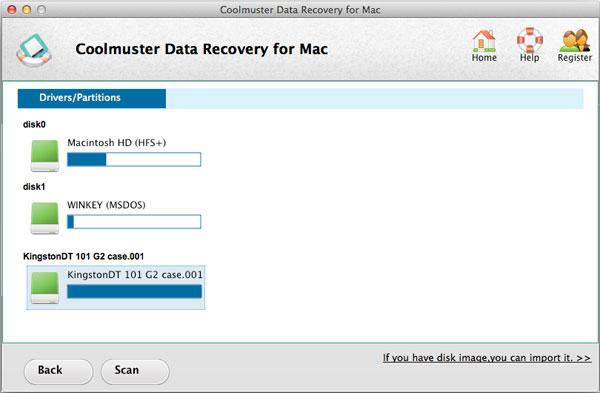
02Select the drive that you want to scan, and tap "Scan" at the bottom to start the process.
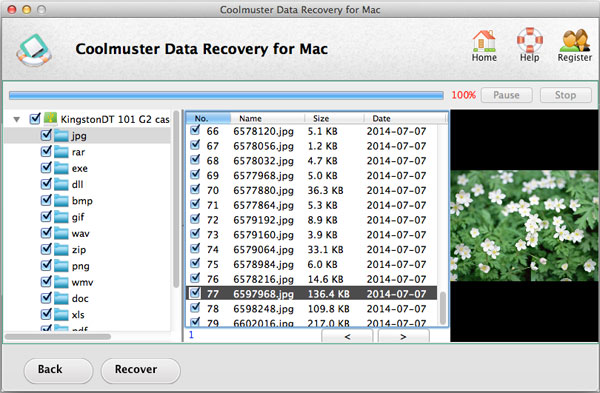
03Then the software will list the found files on the interface, and you can click one to preview it. Next, click "Recover" to save the file to another drive on your Mac.
For users who prefer a free, open-source solution and don't mind a text-based interface, PhotoRec is a powerful command-line data recovery tool. Despite its name, it recovers far more than just photos—it supports hundreds of file formats.
To recover files on Mac with PhotoRec:
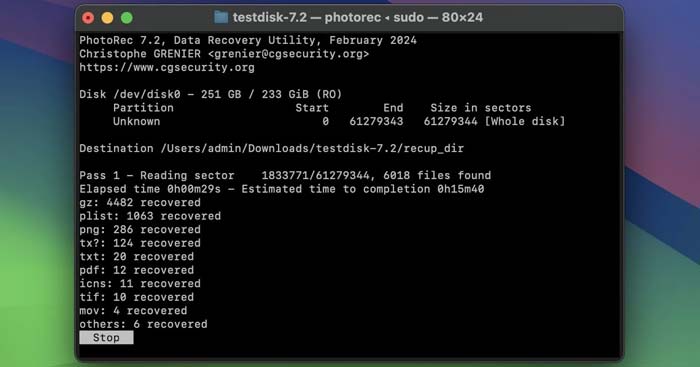
Step 1: Download the TestDisk & PhotoRec package for macOS and extract it. Launch terminal, or simply double-click the photorec executable file to open it in a Terminal window.
Step 2: Use the arrow keys to select the media disk you want to scan and press "Enter". Then select the source partition and choose the file system type (usually ext2/ext3/ext4 or Other for Mac's HFS+/APFS).
Step 3: Choose whether to scan the "Free" space (for deleted files) or the "Whole" partition.
Step 4: Select a destination directory where the recovered files will be saved, then press "C" to begin the recovery process.
Q1: Does macOS have a built-in file recovery tool?
Yes, macOS includes several built-in features to protect and recover data. The primary tool is the Trash, followed by Time Machine for comprehensive system backups. For cloud users, iCloud.com also features a "Data Recovery" section in the account settings to restore deleted files, contacts, and calendars. However, macOS does not feature a native command-line "undelete" tool for drives that have been completely wiped without a backup.
Q2: What types of files can I recover on my Mac in general?
Virtually any file type can be recovered if the underlying data has not been overwritten. This includes:
If you use a data recovery program, it also requires that the tool supports the data types.
Q3: How long after deletion can I recover files?
There is no fixed time limit, but rather a data activity limit. On older Hard Disk Drives (HDDs), files can theoretically be recovered months later if no new data is written to the drive. However, modern Macs use Solid State Drives (SSDs) with a feature called TRIM. TRIM automatically clears deleted data blocks to maintain drive efficiency, often making permanent recovery via third-party data recovery software incredibly difficult shortly after deletion. Acting quickly is key.
As we have explored, a "deleted" file is rarely truly gone right away. Your first step should always be checking the Trash or an app's Recently Deleted folder. If those fail, turn to your Time Machine backups. When dealing with drive corruption or permanent deletion without a backup, tools like Disk Utility, Coolmuster Data Recovery, or PhotoRec can step in to save the day.
To protect your data in the future, the best practice is prevention: keep an external drive plugged in for automatic Time Machine backups, and always think twice before hitting Command + Option + Delete.
Related Articles:
[Solved] How to Sync iPhone/iPad to Mac Wirelessly or with Wires?
How to Transfer Photos from Android to Mac Hassle-Free? [10 Ways]
How to Recover Files from Formatted USB Flash Drive (Solved)
How to Recover Deleted Files from Google Drive with Smart Methods


 Free Download for Mac
  Free Download for PC

