TL;DR:
Want to turn everyday moments into smooth, cinematic clips on your iPhone? This guide shows you how to create amazing time-lapse videos step by step.
Time-lapse videos are a simple but powerful way to show how things change over time. With just an iPhone, you can capture hours of movement, like sunsets, traffic, or clouds, and turn them into a short, engaging video. You don't need professional equipment to get started. In this guide, you'll learn different ways to make time-lapse videos on iPhone, including using the built-in Camera app, third-party apps, and simple tools to improve video stability and quality.

A time-lapse video is a technique that captures photos at regular intervals and combines them into a fast-moving video. It allows you to show long processes in just a few seconds or minutes.
With an iPhone, you can easily create time-lapse videos without any professional equipment. This feature is perfect for recording natural changes and long events in a visually engaging way.
Time-lapse videos are great for capturing moments like sunrise and sunset, moving clouds, busy city streets, or blooming flowers. They help you see how things change over time in a way that normal videos cannot show.
Whether you are a nature lover, a traveler, or simply someone who enjoys creative photography, time-lapse videos let you tell a story in a more dynamic and impressive way. From hours of real time to seconds of playback, you can experience the transformation of life in a completely new perspective.
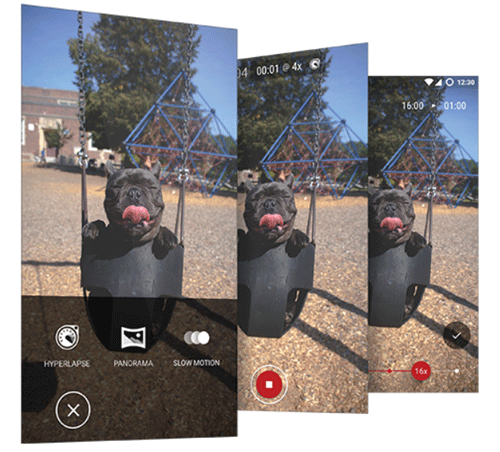
The iPhone Camera app allows you to easily create time-lapse videos without installing any third-party tools. Follow the steps below to get started:
The time-lapse interval is automatically controlled by iPhone. For longer recordings, the system adjusts the frame rate so the final video is smooth and fast-paced.
Pros:
Cons:
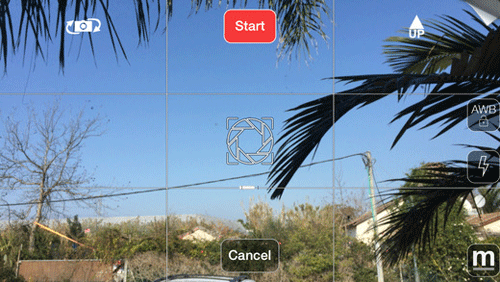
Third-party apps give you more control over time-lapse recording settings such as interval time, exposure, and editing effects. If you want more creative results than the built-in Camera app, this method is a good choice.
Third-party apps usually offer more customization options, allowing you to create more professional-looking time-lapse videos compared to the default Camera app.
Pros:
Cons:
Using a tripod and timer is one of the easiest ways to improve the quality of your iPhone time-lapse videos. It helps reduce shaking and keeps your footage stable and smooth, especially during long recordings.
A stable setup ensures better image quality, smoother motion, and a more professional-looking time-lapse result. (How to Transfer Large Video Files from iPhone to PC?)
Pros:
Cons:
To avoid losing your valuable time-lapse videos and free up storage space, it is important to regularly transfer and back up your iPhone videos to a computer. One useful tool for this is Coolmuster iOS Assistant, which allows you to easily export and manage iPhone data on a PC or Mac.
Key features of Coolmuster iOS Assistant:
Free download Coolmuster iOS Assistant on your computer now:
How to Export Time-lapse Videos from iPhone to Computer:
01 Install the software on your Windows or Mac computer. Use a USB cable to connect your iPhone and trust the computer when prompted. Open Coolmuster iOS Assistant and wait for it to detect your iPhone automatically.
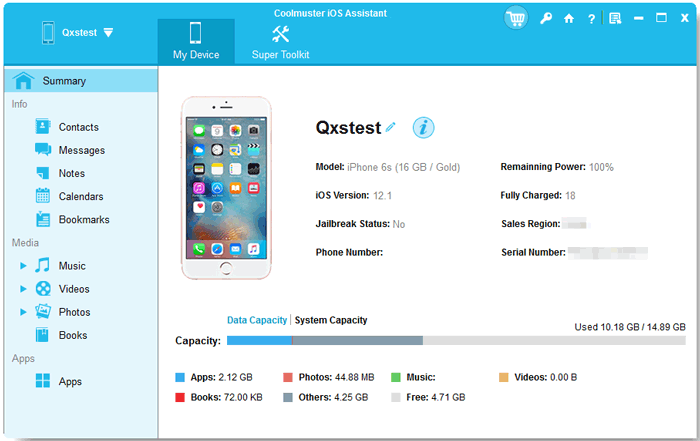
02 All your iPhone files are categorized on the left panel. Click the "Videos" category to find your time-lapse videos. Preview and select the time-lapse videos you need.
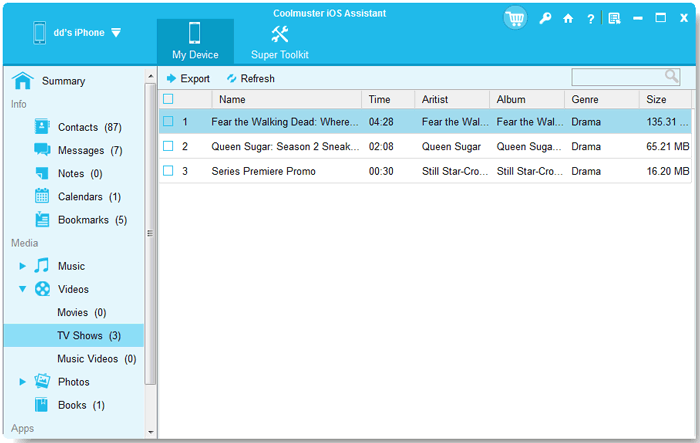
03 After you have selected the time-lapse videos you need, click the "Export" button to transfer videos from iPhone to computer.
Video Guide:
Creating time-lapse videos on iPhone is easier than it looks. Whether you use the built-in Camera app, third-party tools, or a tripod setup, each method helps you capture time in a more creative way. With a few simple tips, you can improve video quality and keep your files safe by backing them up to your computer for future use.
Related Articles:
How to Transfer Videos from PC to iPhone [6 Methods]
[6 Ways] How to Transfer Videos from iPhone to HP Laptop




 Free Download for PC
  Free Download for Mac


