Like WhatsApp, Viber is a popular instant messaging app for sending messages and making free calls. Due to its convenience, more and more people are using Viber on their smartphones and tablets. However, unlike WhatsApp, Viber does not automatically store chat history on its servers or on the device.
Sometimes, you may accidentally delete or lose important Viber conversations, for example, by mistakenly tapping the Clear Data button on the Viber app. What should you do in such cases? How can you recover lost Viber messages on Android? Below are two solutions to back up and restore your Android Viber messages.
As mentioned earlier, Viber does not automatically save your chat history on its servers or your device. However, you can back it up manually. Follow the steps below to back up your Viber chat history, and once set up, you won't need to worry about forgetting to back up your messages on Android in the future.
Step 1. Open the Viber app on your Android phone.
Step 2. Go to "More" (three horizontal lines) > "Settings" > "Account" > "Viber Backup".
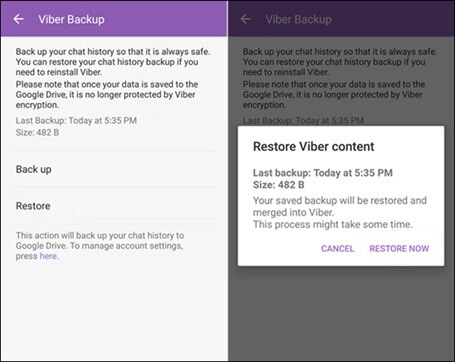
Step 3. Tap "Back Up" and select "Google Drive" as the backup location.
Step 4. Choose the Google account you want to connect with and grant permissions. Wait until the process completes.
Step 1. Install Viber and log in with the same phone number on your Android device.
Step 2. When prompted, select "Restore".
Step 3. Choose the Google account where the backup is stored and tap "Restore Now".
Step 4. Once done, your chats and media will reappear in Viber.
Apart from backing up and restoring Android Viber messages on the Viber app itself, you can also use email to back up Viber messages on Android and restore the backup file to your Android device. Below are the detailed instructions:
Step 1. Open the Viber app on your Android phone.
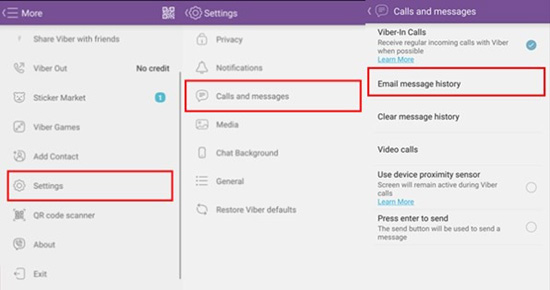
Step 2. Choose the More Options screen and select "Settings".
Step 3. Select the option of "Calls and messages".
Step 4. Tap on the button of "Email message history". Wait until the backup file is generated, then you can send it to your or any other email account.
Unlike Google Drive, email backups are saved as text files and cannot be restored directly into Viber. However, you have to sign into the email account, download the backup file, and save it to some places you like.
1. Where is the Viber backup file stored in Android?
On Android smartphones, Viber history is stored in the following folder: /data/data/com.viber.voip/databases/
2. Can I access my Viber account on two separate devices simultaneously?
No. Viber only allows one primary device (phone) at a time. You can use Viber on your computer or tablet, but these work as secondary devices connected to the same account.
If you want to secure not only your Viber messages but also your entire Android phone data, a professional tool like Coolmuster Android Backup Manager is highly recommended.
Coolmuster Android Backup Manager allows you to back up contacts, text messages, call logs, music, videos, photos, books, apps, and more from your Android device to your computer, and restore them from the backup without any loss of quality. It is compatible with almost all Android smartphones and tablets across various brands and models, including Samsung, Xiaomi, OPPO, OnePlus, TECNO, Infinix, Itel, vivo, Motorola, and Honor.
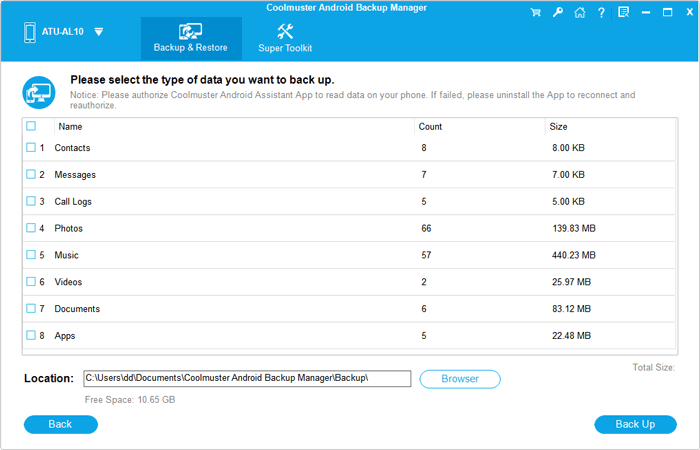
01Install Android Backup Manager on your computer, then connect your Android device to the PC using a USB cable or Wi-Fi. Once your device is recognized, the software interface will appear.
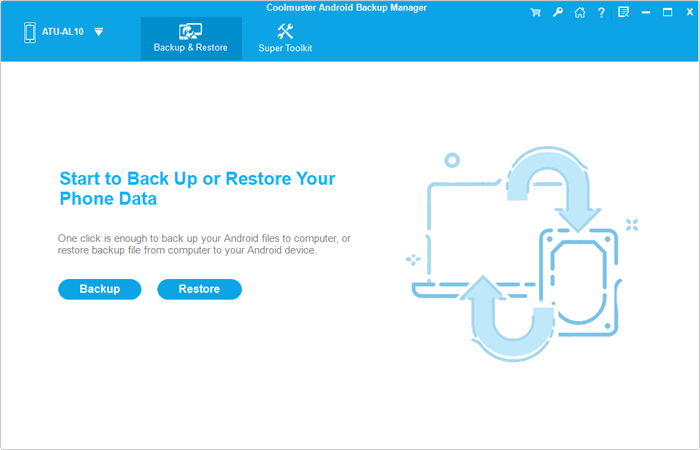
02Click the "Backup" option, choose the types of data you want to back up, and select a location on your PC to save the backups. After making your selections, hit "Back Up" to transfer your Android data to your computer.
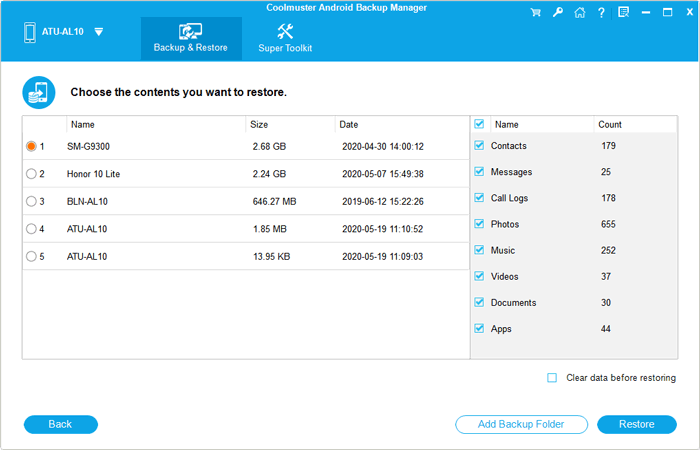
01Open Android Backup Manager on your PC or Mac and connect your device via USB. Once detected, choose the "Restore" option.
02Pick the backup files you want to restore, select the specific data types, and click "Restore". If your backups are saved in a custom folder on your PC, use "Add Backup Folder" to include them in the list.
After following these steps, you can also check out our video tutorial for a visual walkthrough of the entire backup and restore process.
Losing Viber messages on Android can be frustrating, but with the right backup and restore methods, you can keep your important chats safe and even bring them back when needed. Whether you prefer using Google Drive for automatic restoration or saving your chat history through email for future reference, both solutions offer reliable ways to protect your conversations.
If you're looking for a more comprehensive option to secure all your Android data, Coolmuster Android Backup Manager is a great choice. With its one-click backup and restore feature, wide compatibility, and zero quality loss, it ensures your data stays safe and easily recoverable whenever you need it.
By applying the methods introduced in this guide, you now have a clear roadmap to back up and restore Viber messages on Android with ease.
Related Articles:
A Guide on How to Recover Deleted Photos from Viber on Android
How to Recover Deleted Viber Messages on iPhone (with/without Backup)
[Complete Guide] How to Delete Viber Messages on iPhone/Android


 Free Download for PC
  Free Download for Mac

