iPhones are capable of capturing amazing photos, but sharing them can be tricky because of the HEIC format they use by default. This can be frustrating, especially if you're trying to view or upload your photos on platforms that don't support HEIC.
Don't worry, though! In this article, we'll show you how to convert HEIC to JPG on iPhone easily. Since HEIC files aren't supported by every device, knowing how to change them to JPG will make it much easier to access your photos anywhere.
What is HEIC? HEIC (High Efficiency Image File) is the High Efficiency Image File (HEIF) format used by Apple when taking images on iPhone 11 and later devices, which is designed to improve the existing JPEG and PNG formats by increasing the compression ratio and minimizing the loss of quality. HEIC files are much smaller than JPEG files and can provide up to twice the detail and clarity without increasing the file size.
As for the support of the HEIF format, the following models of devices (using iOS 11 or later or macOS High Sierra or later) can enjoy full functionality - while other devices have limited operation of HEIF format media:
Most Apple devices support HEIC files; however, these files may not be compatible with other platforms or programs. To view HEIC files, you must convert them to other formats, such as JPG. (What's the Difference Between HEIC and JPG?)
If you need to know how to change HEIC to JPG on iPhone, there are several convenient and efficient options available. Let's explore each of these solutions in detail.
Looking to convert your HEIC photos to JPG on Windows or Mac? Try Coolmuster HEIC Converter - it's quick, easy, and safe. This tool is perfect for anyone needing to convert HEIC files to JPG, JPEG, or PNG.
Whether you have a few photos or a large batch, this software lets you upload as many images as you need and convert them in no time. Plus, it keeps your photo quality intact with adjustable settings, so you don't have to worry about blurry or pixelated images.
Coolmuster HEIC Converter makes the whole process smooth and fast, making it the ideal choice for handling your image conversion needs.
Key Features of Coolmuster HEIC Converter:
Steps to convert HEIC to JPG on iPhone with Coolmuster Heic Converter:
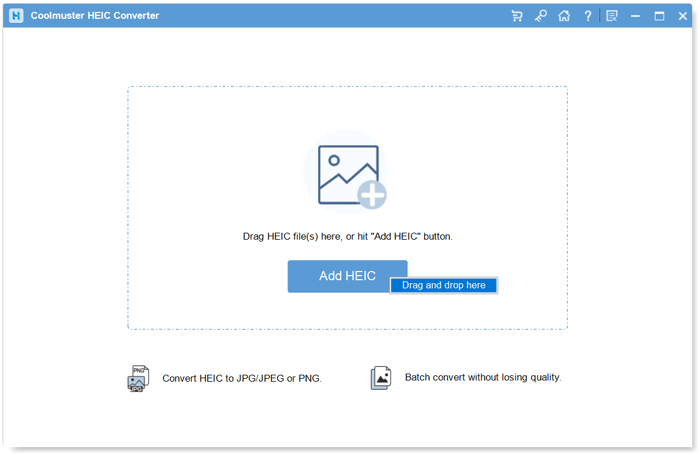
01Install and launch the software on the computer. Simply drag the HEIC files you want to convert over the software and tap the icon for "Drag & drop here". Or, you can click the "Add HEIC" option to find the files you want.
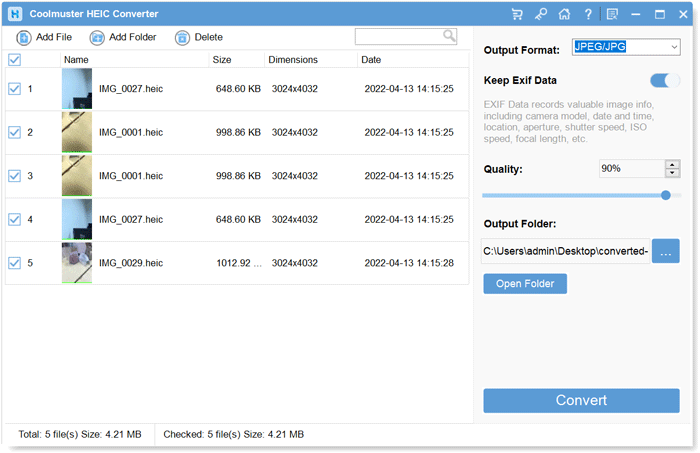
02Once you add the HEIC pictures to the app, choose those to convert. Next, check the Conversion Settings on the left side of your screen and choose JPG/JPEG as its output format. Finally, tap "Convert" when sure you've done everything tight.
03The process is very fast, and when done converting, tap "show in folder" to find the files.
Get help from Official Coolmuster HEIC Converter Guide
We understand the frustration of downloading third-party applications on your smartphone just to convert photos into JPGs. It's not convenient in any way. You don't want to add other apps on your phone, which might make it operate sluggishly. Thankfully, Apple always has already taken care of the needs of its users. We can conveniently convert HEIC photos to JPGs on our iPhones from within the Files App. This is a copy-and-paste solution that you can find right on your iPhone. The procedure is pretty easy. Here's how to save HEIC as JPG on iPhone itself:
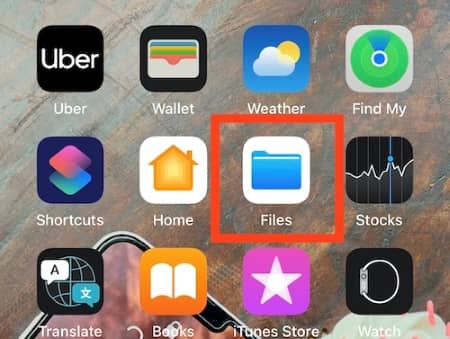
Step 1. Open the Files application from your iPhone.
Locate the Files app already pre-installed on your iPhone. Just click on it to open it.
Step 2. Choose the "On my iPhone" option
After you open the Files application, choose "Location" on the Locations list. From there, you should choose "On My iPhone".
Step 3. Create a new folder
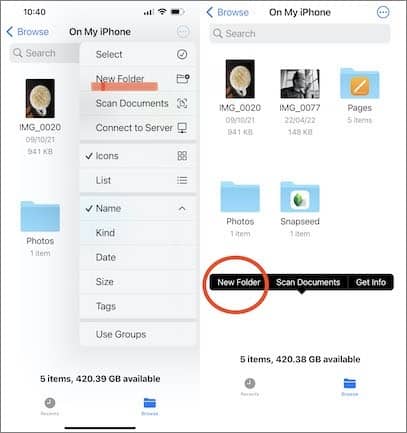
To ensure that all of these precious memories are kept safe and secure, you must create a new folder for them. To do this, simply tap on the three dots located in the right corner of the phone's screen.
In the menu, locate the "New Folder" option and tap it to make a new folder. Or you can simply press on an empty space for a few seconds in the On My iPhone window. The options will appear like New Folder, so name it.
Step 4. Head to the Photos application
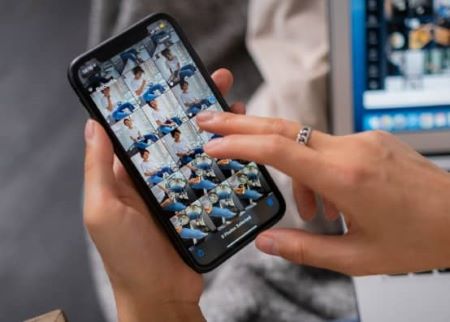
Now it's time to focus on the main task, selecting your photos and converting them into JPG. Visit the iPhone gallery and choose those pictures you want to change into JPG. Click "Select" in the right corner of the screen and click on the images you want to convert.
Step 5. Copy your photos
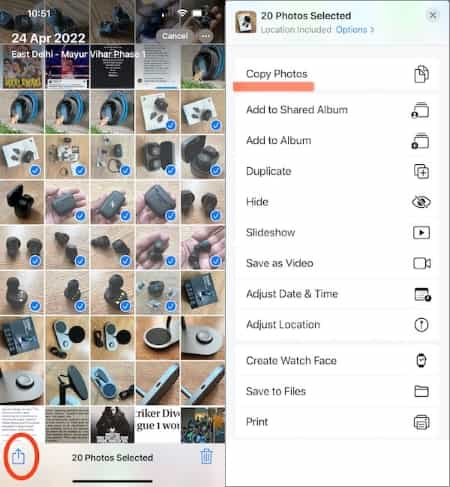
After you have chosen the image you want to convert, press the Share button in the bottom left corner of your screen. You will see new options on the phone. Choose "Copy Photos" and start converting them.
When you select the Copy Photos option, your images will be transferred to your iPhone's Clipboard. Do note that there is also an alternative of Save to Files available; however, this does not alter the photograph format, so opt for Copy Photos instead.
Step 6. Go back to your folder in Files
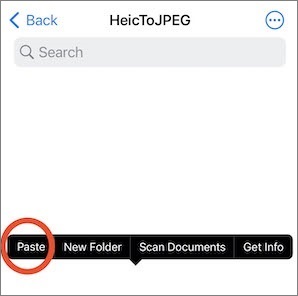
When you finish copying the picture you want to convert, go back to the created folder in the Files application. Open the app and search for the folder in the search bar. If you know its location, just go there and find it. Click on the folder to open it.
Step 7. Paste your photos
Open the created folder, then press on a blank space till you see the option for "Paste". Then select that option, and your image will be in the folder, already saved as a JPEG file. Plus, with this method, you can even rename your pictures.
That's all you need to do. No more creating a new folder whenever you want to change your image format. Just drop the pictures into the existing folder and let the Files app perform its magic. Choose which files you'd like to share or upload in JPEG form from that same folder. It's as easy as that.
In case you need help: iPhone Photos Disappeared from Camera Roll?
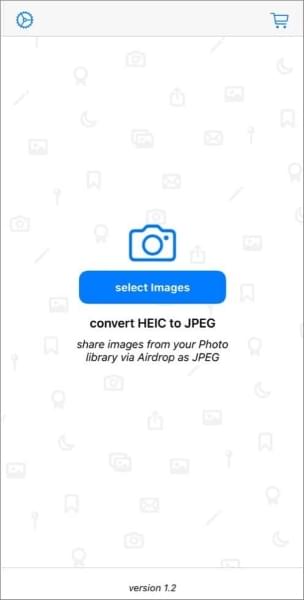
There are several third-party apps you can use to change HEIC images to JPG. One of the apps to use is HEIC to JPEG image converter. This online converter is designed to help you easily convert HEIC pictures to JPG or JPEG-free. When you convert images to JPG, you will save your storage space taken up by HEIC images and make them available universally across multiple devices and platforms.
The app is also great for compressing large files into smaller ones while maintaining reasonable image quality.
Here is how to use HEIC to JPEG converter to change iPhone photo HEIC to JPG:
Step 1. Download and install the app from the App store, then launch it.
Step 2. Click "Select Images", then select the photos you want to convert.
Step 3. Click on the "Share as JPEG" option in the upper corner.
Step 4. Click "Save Image".
If you want to ensure that your iPhone captures and keeps images in the more compatible JPG format instead of its default HEIC, you may change your iPhone's settings. When you do that, all images taken with your iPhone camera will be in JPG format. That way, you won't have to worry about manually changing the settings whenever you want to convert your photo.
Here is how to change iPhone HEIC to JPG on settings:
Step 1. Take your iPhone and open the "Settings" application.
Step 2. Head to "Camera", then select "Formats" from the list of options.
Step 3. Choose the "Most Compatible" option so that all your pictures will be taken in JPG format.
As you know, converting HEIC to JPG is an easy process. Nonetheless, there are some tips to keep in mind:
Tip 1. Old pictures won't be converted
If you switch from HEIC to JPG, your current photos and videos saved on your iPhone will remain unaffected. Only those images you will take after switching will be changed.
Tip 2. Your storage space will be filled up faster
Capturing images and videos with JPG will rapidly use up the available storage on your iPhone, especially if it's already running low on space. Expect twice the needed storage space for videos and pictures to be twice when saving in JPG.
Tip 3. JPG consumes more storage in iCloud
If you fill your device's internal storage and then shoot in older formats, your storage in iCloud will fill up fast. This occurs when you've enabled iCloud Photos and are using a free pan of only 5GB. (Note: See how to view iCloud backups if you need.)
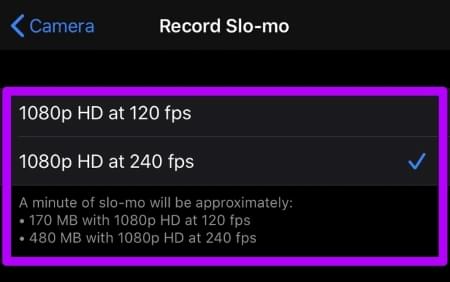
Tip 4. Few quality settings in JPG format
When capturing photographs in JPG format, you will have several standard quality settings. However, there are certain constraints when it comes to videos. If you choose Most Compatible settings, you cannot shoot 4K videos at 60 fps or even record slow-motion 1080p videos at 240 fps. Apple implements this to prevent iPhone from taking up too much storage required when keeping videos using the H.264 encoding.
Tip 5. JPG inferior to HEIC
When you change from HEIC to JPG, the pictures may appear marginally better. This happens because of the JPG's lower compressions.
In addition, HEIC does have a wider range of colors and additional depth data than JPG does. If you wish to edit the images on the screen with a wider color range, you'll miss them out when you switch from HEIC to JPG.
If you need to convert HEIC images to JPG or JPEG, it's easier than you might think with the right tool. We've covered several ways to change the format of your photos, so you can view them on different platforms without any issues. Alternatively, you can set your iPhone to capture photos in JPG format from the start, saving you the trouble of converting them later. For a smooth and simple conversion process, Coolmuster HEIC Converter is a solid choice to consider.
Related Articles:
[Solved] 5 Ways to Convert HEIC to JPG in Google Photo
[Solved] How to Open HEIC Files in Android Effortlessly?
CopyTrans HEIC Review: Is CopyTrans HEIC Safe, Free, and Best to Use?


 Free Download for PC
  Free Download for Mac

