TL;DR:
To back up an iPad directly to an external drive without filling up your computer's C: drive or Mac storage, use Coolmuster iOS Assistant. It lets you select an external hard drive as your custom backup location in 1 click.
Alternatively, you can use symbolic links (mklink /J on Windows or ln -s on Mac) to redirect iTunes/Finder backups, or drag-and-drop raw files directly through the iPadOS Files app.
Modern iPads—especially M2/M4 iPad Pro and iPad Air models—frequently hold hundreds of gigabytes of 4K ProRes video, Procreate drawings, raw photos, and system files. However, when you back up iPad on a Mac or Windows PC, Apple's native software (Finder, iTunes, or Apple Devices app) forcibly saves the multi-gigabyte backup file directly to your primary internal drive.
This usually triggers the dreaded "Not Enough Space on Computer" error.
Fortunately, you can bypass local storage limits entirely. In this guide, we break down four reliable ways to back up your iPad to an external hard drive or SSD on Mac, Windows, or directly on iPadOS.
Before starting, ensure your external hard drive or SSD meets the necessary file system requirements:
| Storage Format | Compatibility | Read/Write Support |
|---|---|---|
| exFAT | Mac, Windows, iPadOS | Full Read & Write (Recommended for cross-platform) |
| APFS / Mac OS Extended | macOS & iPadOS | Read/Write on Mac/iPad; Read-Only or unsupported on Windows |
| NTFS | Windows | Full on Windows; Read-Only on Mac & iPadOS |
Hardware Tip: For high-speed transfers on newer USB-C / Thunderbolt iPads, use a USB 3.2 Gen 2 (10 Gbps) or Thunderbolt 4 cable rather than standard USB 2.0 charging cables to avoid transfer timeouts.
Official Apple backup tools do not allow users to select a custom destination folder. Coolmuster iOS Assistant solves this by giving you full control over your backup paths, allowing you to back up your entire iPad directly to an external hard drive, SSD, or NAS without using your computer's internal storage as a temporary cache.
Quick Answer: [iPad] ---> (USB-C / Lightning Cable) ---> [Coolmuster iOS Assistant] ---> [External Drive (D:\, E:\, /Volumes/)]
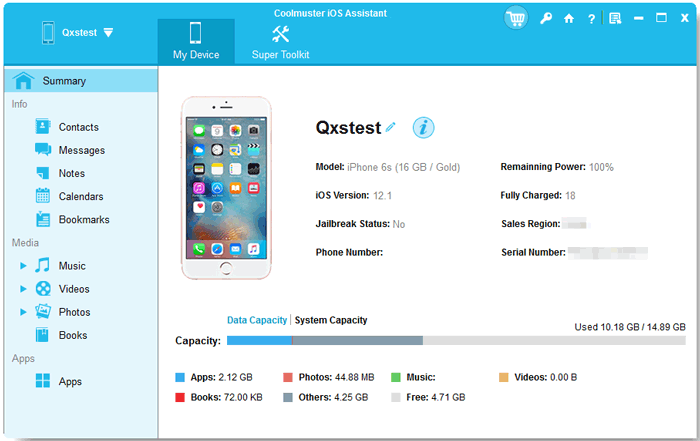
01Connect Devices: Launch Coolmuster iOS Assistant on your Windows PC or Mac. Plug both your iPad and your external hard drive into the computer.
02Trust Computer: Unlock your iPad and tap Trust when prompted. The software will detect your iPad automatically.
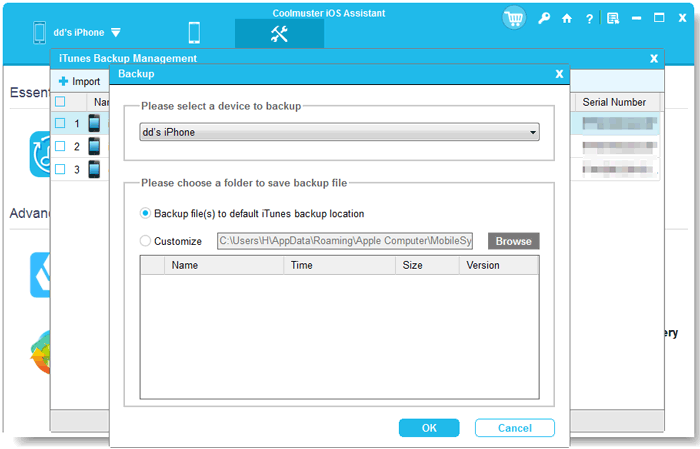
03Select Backup Directory:
04Start Backup: Click OK to begin. The tool will save your iPad backup directly onto your external hard drive.
Video Guide: Back Up iPad to External Drive via Coolmuster iOS Assistant
Tips: Only need to back up some specific data on your iPhone/iPad to the external hard drive? Here's how:
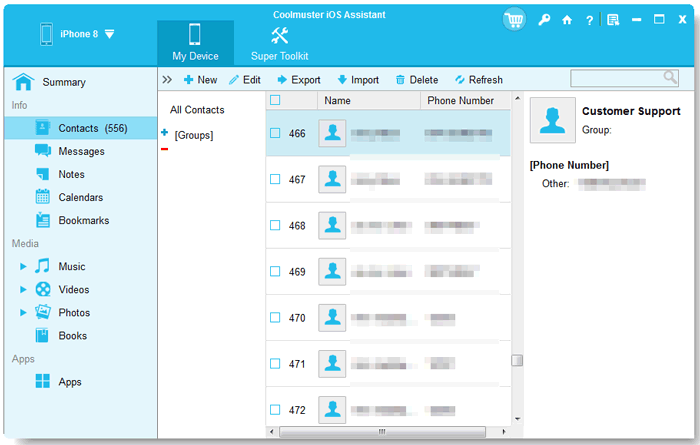
Once connected, choose the data you wish to back up, then select the "Export" option. Next, pick the appropriate file output format and begin the process.
For more details, you can jump to the dedicated guide: How to Transfer Photos from iPad to External Hard Drive with/without Computer?
If you prefer to use native macOS Finder, you must create a Symbolic Link (Symlink) in Terminal. This trick redirects Finder's default backup directory (~/Library/Application Support/MobileSync/Backup) to your external drive.
Quick Answer: [Mac Default MobileSync Path] === (Symbolic Link Pointer) ===> [/Volumes/ExternalDrive/Backup]
1. Connect the Drive: Connect your external hard drive to your Mac. Open it in Finder and create a new folder named iPadBackup.
2. Locate Existing Backup Folder: Open Finder, press Cmd + Shift + G, paste ~/Library/Application Support/MobileSync/, and hit Enter.
3. Move Existing Folder: Move or rename the existing Backup folder inside MobileSync to your external drive (or delete it if empty).
4. Grant Terminal Full Disk Access: Go to System Settings > Privacy & Security > Full Disk Access, and toggle Terminal to ON.
5. Create Symlink in Terminal:
ln -s /Volumes/YourDriveName/iPadBackup ~/Library/Application\ Support/MobileSync/Backup
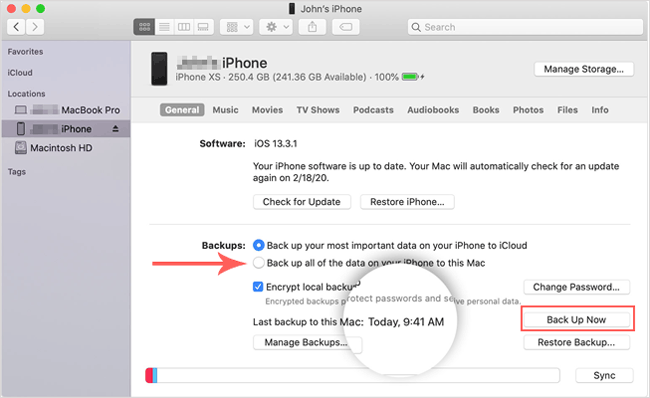
6. Back Up via Finder: Connect your iPad to your Mac, open Finder, select your iPad in the sidebar, choose Back up all of the data on your iPad to this Mac, and click Back Up Now. The files will redirect to the external drive.
On Windows 10/11, iTunes and the Apple Devices app store iPad backups inside the system C: partition. You can create a directory junction (mklink /J) using Command Prompt to map the default backup path to an external drive (e.g., D:\ or E:\).
1. Prepare Drive & Folders: Attach your external drive to your PC. Create a folder named MobileSyncBackup on your external drive (e.g., D:\MobileSyncBackup).
2. Delete Old Local Backup Folder:
3. Run CMD as Administrator: Press Win + S, type cmd, right-click Command Prompt, and select Run as administrator.
4. Execute Junction Command:
Type the following command (adjust drive letters and username as needed):
mklink /J "%APPDATA%\Apple Computer\MobileSync\Backup" "D:\MobileSyncBackup"
Press Enter. You should see the response: Junction created for...
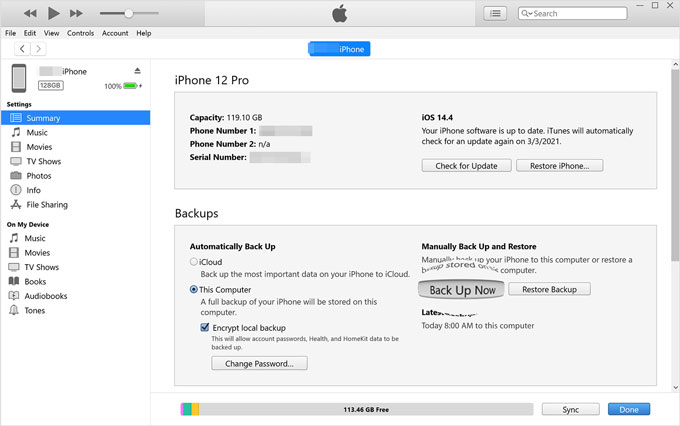
5. Run iTunes Backup: Open iTunes (or Apple Devices app), connect your iPad, select your device icon, and click Back Up Now.
Can't connect your iPad to iTunes? Don't panic, you can find the solution in this article:
4 Easy Fixes to iPad is Disabled Connect to iTunes Issue
If you find command-line prompts technical or encounter permission errors, using a dedicated iPad backup software like Coolmuster iOS Assistant avoids command-line setup entirely.
If you only need to back up media, PDFs, or documents directly without using a computer, iPadOS supports direct file management with external storage devices via the native Files app.
Quick Answer: [iPad Pro/Air USB-C Port] === (Direct Cable Connection) ===> [External Hard Drive / Flash Drive]
1. Connect Hard Drive to iPad: Plug your external hard drive or USB drive into your iPad's USB-C or Thunderbolt port. (Lightning iPads require a Lightning to USB3 Camera Adapter with external power supply).
2. Open Files App: Launch the built-in Files app on your iPad.
3. Verify Drive Recognition: In the Browse sidebar, verify that your external drive is listed under Locations.
4. Copy & Paste Data:
Root Cause: macOS blocked Terminal from editing system files.
Direct Fix: Go to System Settings > Privacy & Security > Full Disk Access and enable Terminal.
Root Cause: The default Backup folder was not deleted before running mklink.
Direct Fix: Delete or rename the existing Backup folder inside %APPDATA%\Apple Computer\MobileSync\ and re-run the command.
Root Cause: iTunes checks free space on C: drive before making a local cache.
Direct Fix: Use Method 1 (Coolmuster iOS Assistant) to bypass local caching completely.
Root Cause: Drive is formatted as Windows NTFS.
Direct Fix: Reformat the drive to exFAT or APFS using Disk Utility (backup external data first!).
Root Cause: Faulty cable or power output issue on USB port.
Direct Fix: Swap to an official Apple cable and connect directly to a primary motherboard port (avoid unpowered USB hubs).
No. iCloud backups are cloud-based and save data directly to Apple servers over Wi-Fi. You cannot set iCloud to output its backup file locally onto an external hard drive.
A standard local backup saves app data, settings, and documents, but does not copy the raw app installation files (.ipa files). When restoring to a new iPad, the device redownloads your apps automatically from the App Store.
Your external drive may require more power than your iPad's USB port can output (especially mechanical HDDs) or may be formatted as NTFS. Use a powered USB hub or reformat the drive to exFAT.
Using Coolmuster iOS Assistant is the safest and most convenient option. It eliminates complex terminal commands (mklink or ln -s), prevents system path corruption, and provides direct path selection with zero risk of wiping your existing data.
Backing up your iPad to an external hard drive is the best way to keep your data safe without maxing out your computer's internal SSD.
We hope our article has been helpful to you. If you have any questions or suggestions, please feel free to leave a comment below. Thank you for reading!
Related Articles:
How to Transfer Photos from iPhone to External Hard Drive in 5 Ways
Top 8 Ways on How to Transfer Files from PC to iPad (Step-by-step)
How to Transfer iCloud Photos to External Hard Drive with Ease
4 Ways to Transfer Photos from iPad to SD Card [with Illustrations]







 Free Download for PC
  Free Download for Mac


