With the ever-advancing camera technology of the iPhone, capturing stunning photos and videos has never been easier. However, over time, these media files can quickly fill up your device's storage. To avoid running out of space, it's a good idea to back up your iPhone photos to a computer, external hard drive, USB flash drive, or iCloud. After making a backup, you can safely delete these photos from your iPhone to free up more space.
Moreover, iPhones can occasionally encounter unexpected issues that may result in data loss. If your photos hold precious memories, backing them up regularly is essential. That way, if anything happens to your device, you can effortlessly restore your pictures once everything is back to normal.
The most efficient way to back up your iPhone photos to your computer is by using Coolmuster iOS Assistant, a tool designed to simplify data management and transfer between Apple devices. It allows you to effortlessly back up and restore not only photos but also contacts, messages, call logs, music, and videos. Beyond just transferring photos from your iPhone to your computer, external hard drives, or USB flash drives, it also lets you manage your files directly on your computer and easily import data to your iPhone, iPod, or iPad.
Key features of iOS Assistant:
The software supports both Windows and Mac versions. Install the correct version on your computer.
How do you back up photos from iPhone to computer using iOS Assistant? Follow the steps below:
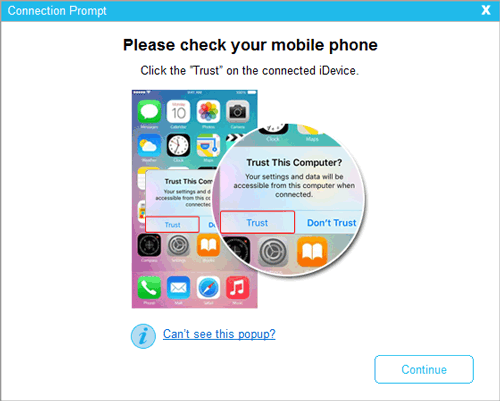
01Launch the program and establish a connection between your device and the computer using a USB cable. Typically, the software will automatically recognize your connected device, prompting a pop-up window on your computer. Select the "Trust" option on your device, and then click the "Continue" button to proceed.
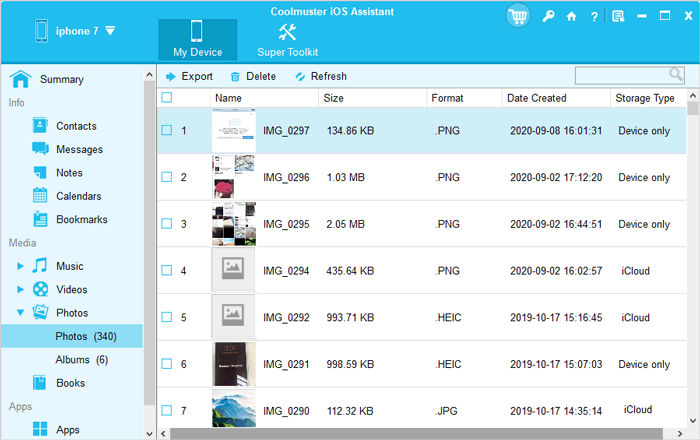
02After this software detects your device, the main interface will appear as shown below. As you can observe, various file folders are now organized on the main interface.

03Go to "Photos", then preview and choose desired pictures. After that, click the "Export" button to selectively back up iPhone photos to the computer.
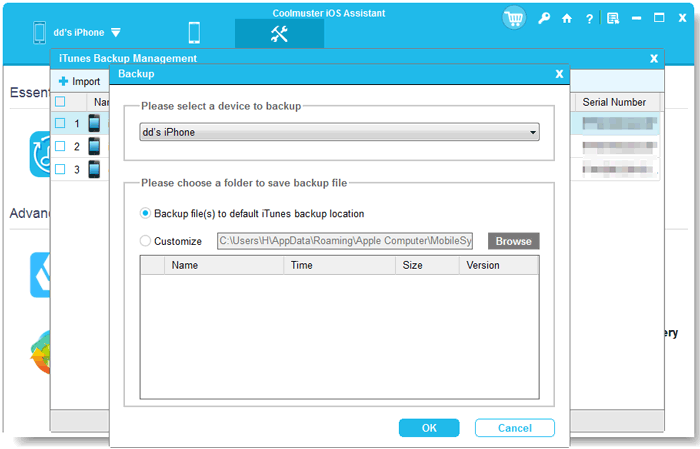
Alternatively, you can navigate to "Super Toolkit" > "iTunes Backup & Restore" > "Backup". Choose your device for backup from the drop-down menu, decide the location to store the new backup files, and then click the "OK" button to initiate the whole backup of iOS data.
Video Tutorial:
iCloud is Apple's official cloud storage service, which automatically syncs iPhone photos and allows access across all Apple devices. However, iCloud offers users 5GB of free storage, and additional space can be purchased if needed. (How to free up iCloud storage?)
Here is how to back up iPhone photos on iCloud:
Step 1. Open "Settings" on your iPhone.
Step 2. Tap on your name at the top of the screen.
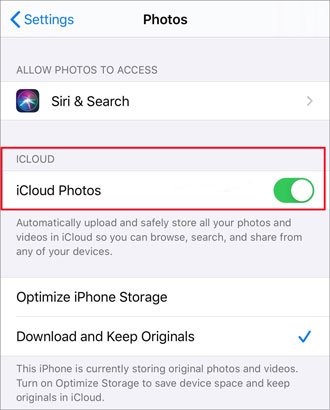
Step 3. Select "iCloud" and then "Photos".
Step 4. Toggle on "iCloud Photos".
Step 5. Once enabled, your photos and videos will be automatically uploaded to iCloud, and you can access them from any device linked to your iCloud account.
If you prefer the official method of performing iPhone picture backup, iTunes (for Windows and macOS Mojave or earlier) or Finder (for macOS Catalina and later) is a reliable option.
How to Back Up Pictures on iPhone Using iTunes:
Step 1. Connect your iPhone to your computer using a USB cable.
Step 2. Open iTunes on your computer (make sure you have the latest version of iTunes installed).
Step 3. Click on the iPhone icon in the upper-left corner of iTunes to access your device. (iPhone not showing up in iTunes?)
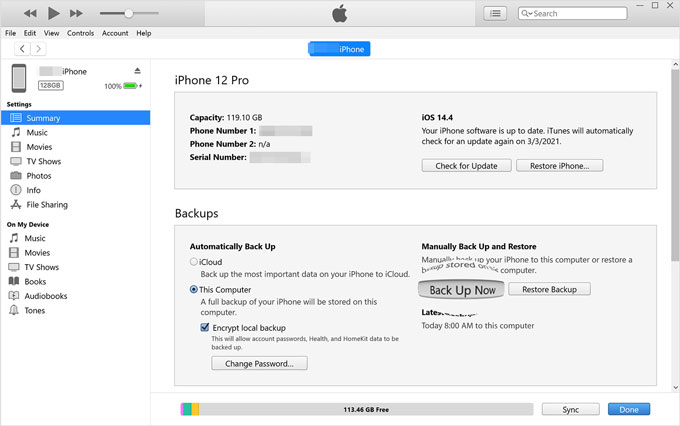
Step 3. In the left sidebar, under "Backups", choose "This Computer" to back up your iPhone to your computer.
Step 4. Under the "Manually Back Up and Restore" section, click on "Back Up Now".
Step 5. Wait for the backup process to complete. The time it takes will depend on the amount of data on your iPhone.
How to Store Pictures from iPhone Using Finder:
Step 1. Connect your iPhone to your Mac using a USB cable, then open Finder on your Mac.
Step 2. In the Finder sidebar, click on your iPhone under the "Locations" section.
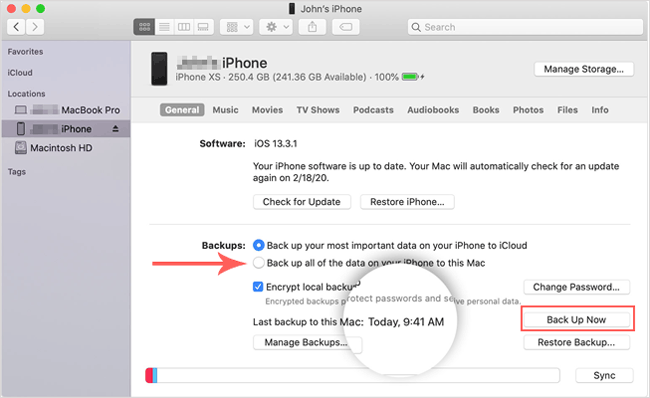
Step 3. In the main Finder window, click on the "General" tab.
Step 4. Under "Backups", select "Back up all of the data on your iPhone to this Mac".
Step 5. To start the backup, click on "Back Up Now".
Besides iCloud, you can also back up iPhone photos to Google Photos. Here is how to back up photos from iPhone without iCloud using Google Photos:
Step 1. Download and install Google Photos from the App Store.
Step 2. Open the app and sign in with your Google account.
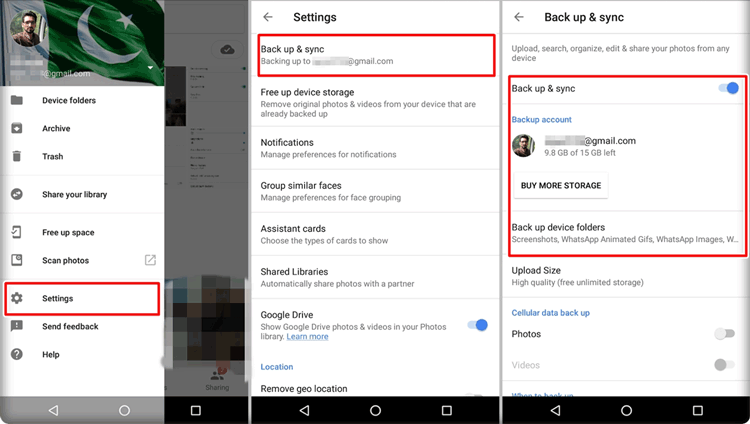
Step 3. Go to "Settings" > "Backup & Sync" and turn on the "Backup & Sync" option.
Step 4. Ensure your Wi-Fi connection is stable, and the photos will automatically upload to Google Photos. (Google Photos not backing up?)
If you want to know how to back up iPhone photos to external hard drive, you can read this step-by-step guide.
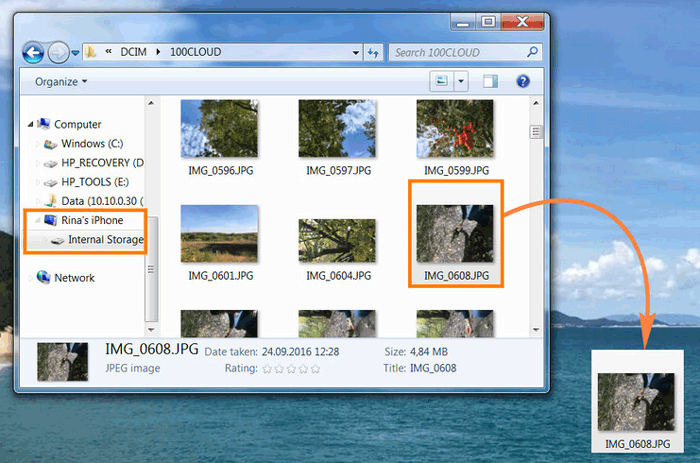
How to Back Up iPhone to External Hard Drive on Windows or MacWindows users can directly use File Explorer to access the iPhone's DCIM folder and manually copy photos to the computer. Here is how to back up photos from iPhone to Windows 10/11 using File Explorer:
Step 1. Connect the iPhone to the Windows computer using a USB cable.
Step 2. Open "This PC" on the computer and find the iPhone under the "Devices and Drives" section.
Step 3. Double-click the iPhone device to enter the "DCIM" folder, and locate the subfolder that stores the photos.
Step 4. Select the photos you want to back up, right-click and choose "Copy", then paste them into the target folder on the computer.
If you have a Mac and only want to back up certain photos, you can use AirDrop for wireless transfer. AirDrop is designed for file sharing between Apple devices, requiring no cables and offering a convenient process. Follow the steps below to back up photos from iPhone to Mac:
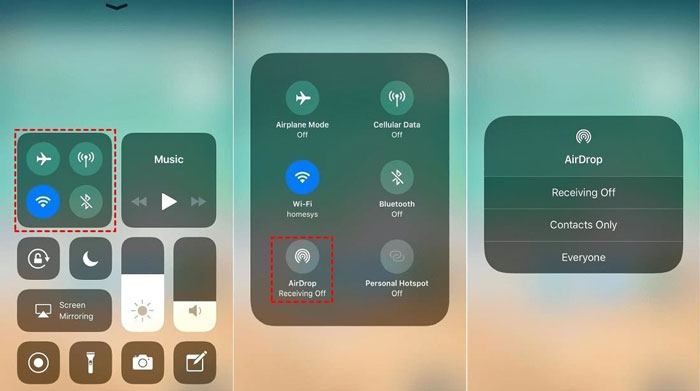
Step 1. Make sure both Wi-Fi and Bluetooth are enabled on both your iPhone and Mac.
Step 2. Swipe down from the upper right corner of your iPhone to open the "Control Center". Press and hold the network settings box in the top-left corner. Tap on "AirDrop" and select either "Contacts Only" or "Everyone" based on your preference. (Airdrop not working on iPhone?)
Step 3. Open Finder on your Mac. Click on "Go" in the menu bar and select "AirDrop". In the AirDrop window, set your Mac's visibility to "Everyone" or "Contacts Only".

Step 4. Open the "Photos" app on your iPhone. Navigate to the album or camera roll containing the photos you want to transfer.
Step 5. Select the photos you want to transfer. Tap the "share" icon (box with an arrow pointing up). From the available options, select your Mac's name or icon.

Step 6. On your Mac, a notification will appear, prompting you to accept the incoming photos. Click "Accept" to start the transfer.
Step 7. Once the transfer is complete, your iPhone will display "Sent" for the transferred photos.
Step 8. Open the "Downloads" folder or the location you specified on your Mac to access the transferred photos.
Backing up your iPhone photos is essential to ensure your memories are safe and accessible. Using the Photos app on either Windows or Mac, you can easily transfer and store your pictures. Here's how to do it on both platforms.
On Windows Photos App:
Step 1: Connect your iPhone to your Windows computer using a USB cable.
Step 2: Open the Photos app by pressing Windows Key + S, then searching for and selecting "Photos".
Step 3: Click on the "Import" button in the upper-right corner of the Photos app and choose "From a USB device".
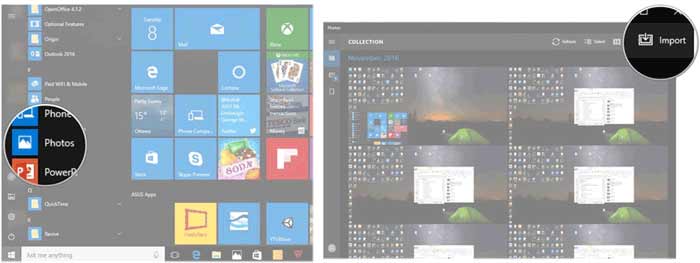
Step 4: The app will display all the photos on your iPhone. Select the photos you want to back up.
Step 5: Click "Import Selected" to start transferring the photos to your computer.
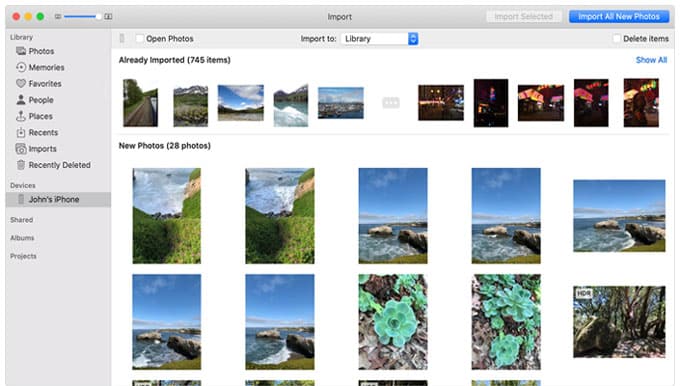
On Mac's Photos App:
Step 1: Connect your iPhone to your Mac using a USB cable.
Step 2: Open the "Photos" app on your Mac.
Step 3: Select your iPhone from the "Devices" section on the left sidebar of the Photos app.
Step 4: You'll see a preview of your iPhone's photos. Choose the ones you want to back up, or select "Import All New Photos" to transfer everything.
Step 5: Click "Import" to back up the selected photos to your Mac's Photos app.
The last option we offer you is to use Dropbox. It allows you to store and access your files from pretty much any device with an internet connection. Whether you're using your iPhone, iPad, or a computer, everything stays in sync, making it an excellent way to organize and back up your photos. Just keep in mind that while it offers 2 GB of free storage, it can get pricey if you need more space.
Here's how you can use Dropbox to back up your photos:
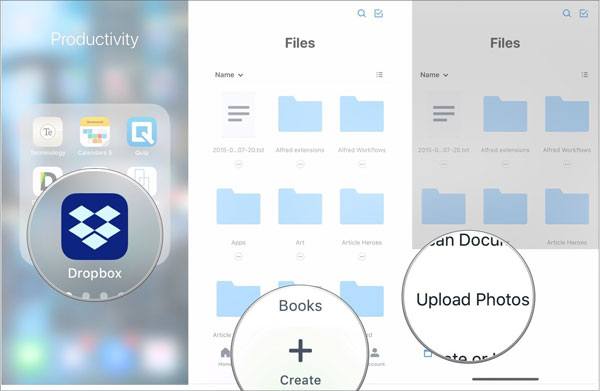
Step 1. Download and install the Dropbox app on your iPhone from the App Store.
Step 2. Once the app is installed, open it and tap the "+" icon at the bottom of the screen. From the options, select "Upload Photos."
Step 3. Choose the photos you want to upload, then tap "Set location" to select the destination folder where you'd like to sync your photos to Dropbox.
Step 4. On your laptop, open a web browser or install the Dropbox desktop application.
Step 5. Log in to your Dropbox account with the same credentials you used on your iPhone.
Step 6. Once logged in, go to the folder where you uploaded your photos. You should find them there. Select the photos or folders you want, then click "Download" to save them to your laptop.
Regularly backing up your iPhone photos is a crucial practice to ensure that your cherished memories are safe and accessible. We have introduced eight methods to back up iPhone photos in this guide, among which Coolmuster iOS Assistant stands out as the best way to back up iPhone photos. It provides two options: a one-click backup or selectively backing up photos from your iPhone to your computer. Quickly download it to give it a try.
Related Articles:
Does iTunes Backup Photos from iPhone? (Proven Tips)
6 Easy Ways on How to Transfer Photos from iPhone to iPhone (100% Success Rate)
How to Move Photos from iPhone to iCloud? [2025 Update]
3 Easy Ways to Extract Photos from iPhone Backup [iTunes & iCloud]


 Free Download for PC
  Free Download for Mac

