Summary: Here's an easy guide on how to sync your iPad with your Mac. This post covers everything you need to know about syncing your photos, messages, contacts, and more between the two devices, whether you're using a USB cable or doing it wirelessly.
Syncing your iPad or iPhone to your Mac is a great way to back up your data, protect it from accidental loss, or just have easy access to your music, photos, and files whenever you need them. If this is your first time syncing and backing up your iPad to your Mac, don't worry. This guide will walk you through the whole process.
You don't need any extra apps to sync your iPhone with your Mac, as the Finder app that comes with macOS can handle it all. Whether it's music, movies, podcasts, books, photos, files, contacts, or calendars, Finder can handle it all.
Here's how to use Finder to sync iPad to your Mac:
1. First, connect your iPhone or iPad to your Mac using a USB or USB-C cable.
2. Open the Finder app (it's the smiling face icon in your Dock).
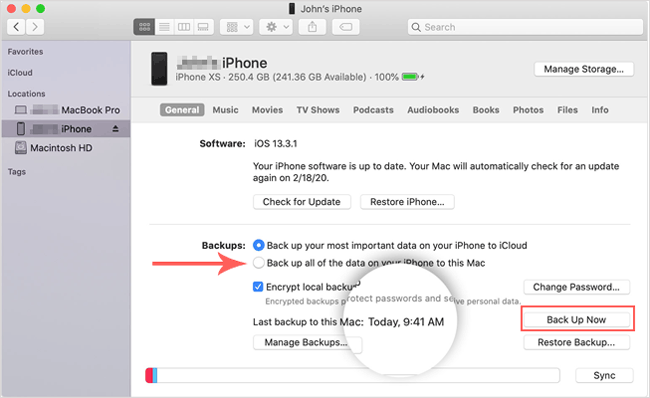
3. In the left sidebar, under "Locations," you'll see your device. Click on it.
4. The first time you do this, a message will pop up asking if you trust the device. Click "Trust" on both your Mac and your iPhone.
5. Want to skip the cable next time? In the top menu, click the "General" tab. Then check the box that says "Show this iPhone when on Wi-Fi" and hit Apply.
6. Now, go through the other tabs (like Music, Movies, Photos, etc.) to choose what you'd like to sync.
7. Check the box that says "Sync \[content type] onto \[device name]" and select what you want to include.
8. When you're ready, click Apply, then hit Sync.
That's it! Your iPhone and Mac will now stay in sync. After the first time, you can do it all wirelessly. (Want to know how to transfer files from Mac to iPad?)
You can also keep your iPhone or iPad in sync with your Mac wirelessly by using iCloud. iCloud works across most Apple devices—including iPhone, iPad, iPod touch, Mac, Apple TV, and more, as long as you're signed in with the same Apple ID.
With iCloud, your data automatically stays up-to-date across all your Apple devices. Things you can sync include:
Photos, iCloud Drive files, Mail, Passwords & Keychain, Notes, Find My, Contacts, Calendar, Reminders, Safari data, Wallet, Siri, Stocks, Freeform, and more.
For example, if you want your Calendar events to show up on both your iPhone and Mac, just make sure iCloud is turned on for the Calendar app on both devices.
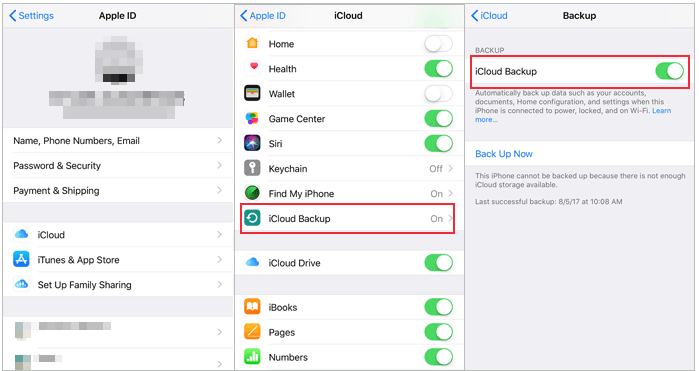
Here's how to turn on iCloud on your iPhone/iPad:
1. Open "Settings", tap your name at the top. (If you haven't signed in yet, tap "Sign in to your \[device]" and log in with your Apple ID.)
2. Tap "iCloud".
3. Find the apps or features you want to sync and toggle them on.
4. On iOS 16 or later, tap "Show All" to see the full list of apps.
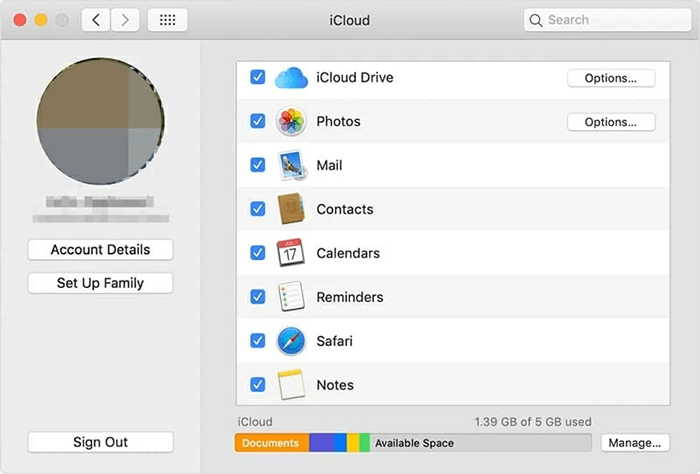
Here's how to turn on iCloud on your Mac:
1. Click the "Apple menu" and go to "System Preferences" (or "System Settings").
2. Click your "Apple ID" at the top (or sign in if you haven't yet).
3. Select "iCloud", and turn on the switches next to the features or apps you want to sync.
Some apps have their own iCloud settings too:
Once you set it up, iCloud takes care of everything in the background. Your stuff just stays in sync without you needing to do anything!
If you want to sync iPad or iPhone to Mac efficiently and manage the synced iPad files on Mac arbitrarily, you should try this Coolmuster iOS Assistant. This software allows you to get rid of the trouble of using Finder or iCloud and sync iPad with Mac easily and quickly. It is worth mentioning that this software supports almost all categories of files and does not require network conditions. No matter how many files you want to export to Mac computer, you can successfully sync iPad to Mac smoothly.
Key Features of iOS Assistant for Mac:
You can download the free trial version of Coolmuster iOS Assistant for Mac from below:
Steps to sync iPad to Mac with Coolmuster iOS Assistant:
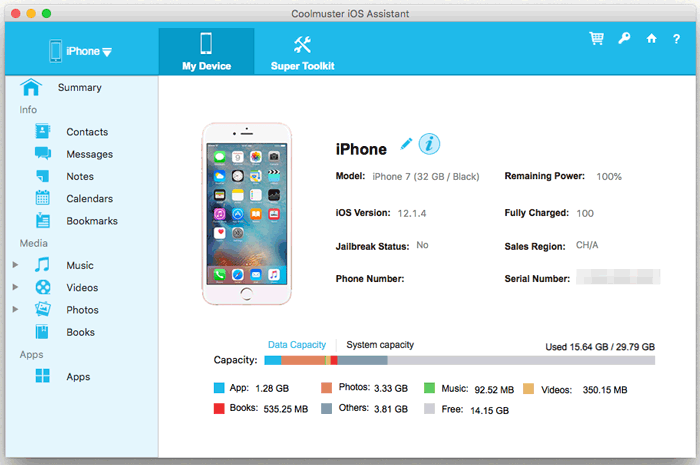
01 Open the installed software on the computer and get your iPad connected to the computer via the USB cord. Then this software will detect your iPad and scan for all files saved on it.
02 As you can see now, all the file folders are arranged on the left panel. You can then enter the right file tab to preview more detailed file information. While previewing, you can select the files you want to transfer from iPad to Mac by ticking them out.
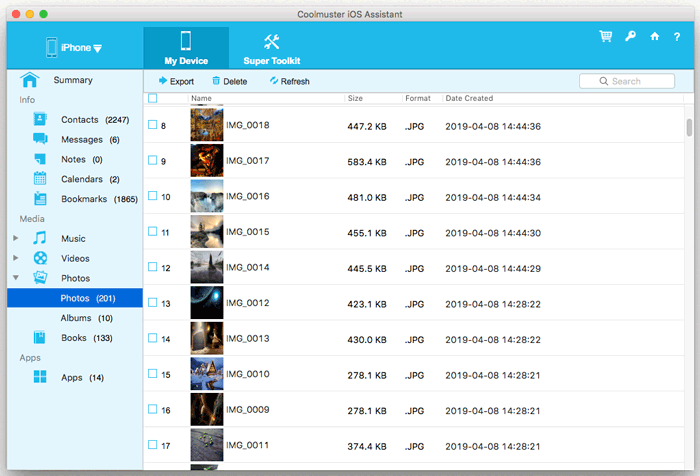
03 After selecting all the iPad data you want to sync, you can hit the "Export" option on the top menu to sync the iPad to your Mac immediately.
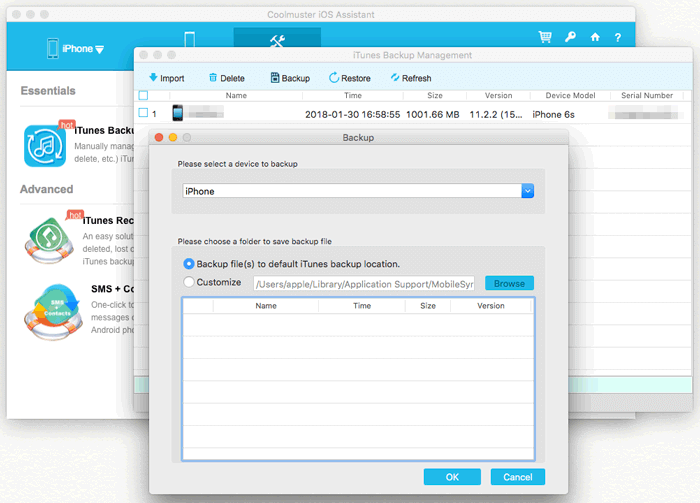
If you want to sync all the files on iPad to Mac in one click, you can click "Super Toolkit" > "iTunes Backup & Restore" > "Backup" in the upper navigation. After that, all the data on iPad will be automatically transferred to your Mac computer.
Video Guide:
Besides using Finder, your Apple devices come with some handy built-in features that make sharing and syncing even easier. Here are a few you might find useful:
Found this helpful? Share this post to help more people.
Related Articles:
5 Ways to Sync Notes from iPhone to Mac in 2025
How to Transfer Music from iPhone to Mac? (Top 4 Ways)


 Free Download for Mac
 Free Download for PC

