Do you want to transfer a large number of photos from your iPad to your Mac? If so, you might be wondering what the best method is. Whether using a USB cable or a WiFi connection, there are numerous ways to move images from an iPad to a Mac. This post will show how to transfer iPad photos to Mac with USB and wirelessly. Now let's get going.
Using a USB cable is one of the most common and reliable ways to transfer photos from iPad to Mac. Here are four ways you can try.
When it comes to transferring photos from an iPad to a Mac, we highly recommend using a professional iOS data manager - Coolmuster iOS Assistant. This comprehensive utility software allows you to quickly and easily transfer photos from your iPad to your Mac. It can also transfer other types of data, such as contacts, messages, music, videos, books, and more. Additionally, it can back up and restore your iOS data, manage your iOS files, and delete unwanted data from your iPad.
Key Features:
Download Coolmuster iOS Assistant, and let's see how to use it to transfer iPad photos to Mac.
How to Put Photos from iPad to Mac Selectively via iOS Assistant:
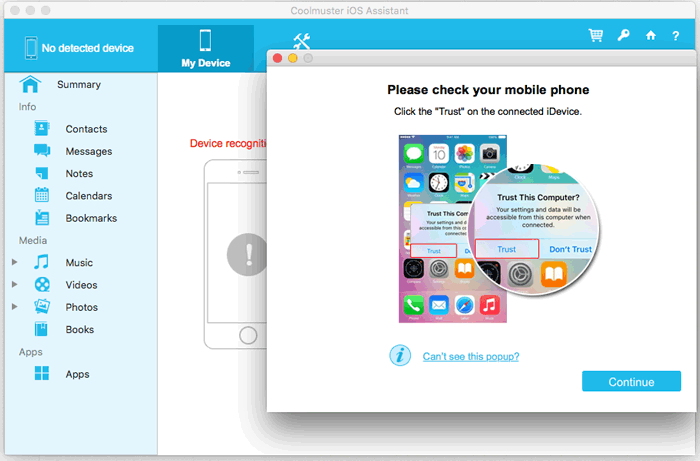
01Run the program on your Mac and then connect your iPad to your Mac via a USB cable. A notification window will emerge on your computer screen. Select the "Trust" option on your device, and subsequently, click on the "Continue" option to proceed.
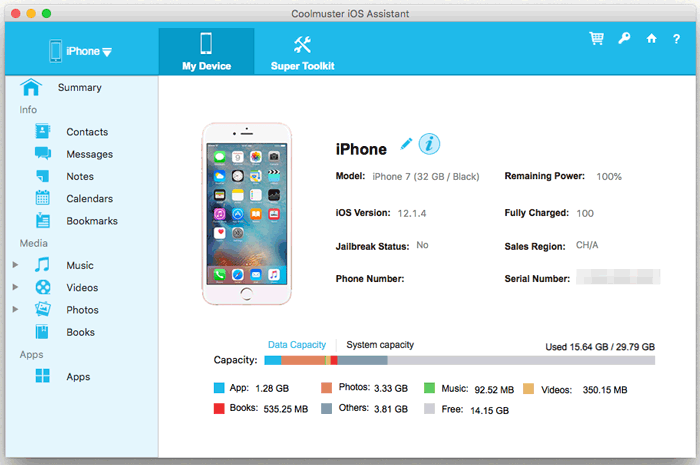
02Once your device is detected by the software, you will see the main interface as below.
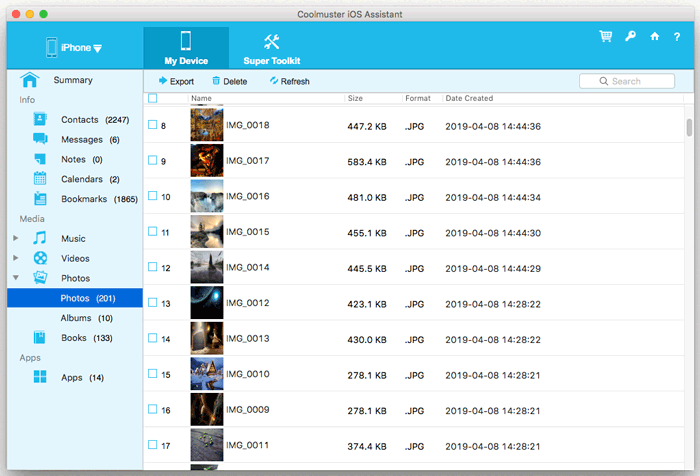
03Click "Photos", and you can access and preview all the photos that are stored on your iPad. Select the required photos and click the "Export" button to move photos from iPad to Mac.
iTunes is the default file manager on Mac that can also help you transfer photos from iPad to Mac. If you are going to transfer a huge amount of photos from iPad to Mac, you can use iTunes to complete the task. Here is how to get photos from iPad to Mac via iTunes:
Step 1. Connect your iPad to your Mac with a suitable USB cable.
Step 2. Open iTunes on your Mac. iTunes will soon recognize your iPad. Click the device icon on the top-left menu.

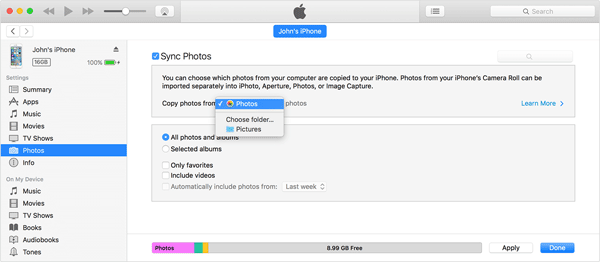
Step 3. Select "Photos" below the "Summary" tab and select "Sync Photos".
Step 4. Choose the folder to transfer photos from iPad to Mac.
Step 5. Click on the "Apply" button in the bottom right corner to start the sync process. The photos will be transferred to the Photos app on your Mac.
Photos app is the default photo management app on Mac that can also help you copy pictures from iPad to Mac. It can import photos from your iPad to your Mac library or a specific album. It can also delete the photos from your iPad after importing if you want. Here is how to import photos from iPad to Mac:
Step 1. Connect your iPad to your Mac with a USB cable. You may need to unlock your device and tap the "Trust" option on the pop-up window.
Step 2. Open the "Photos" app on your Mac if it doesn't automatically open.
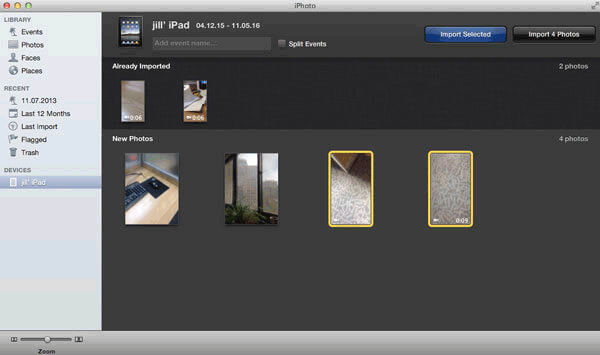
Step 3. Click the "Import" tab at the top of the Photos app.
Step 4. Select the photos you want and then click "Import Selected" to move photos from iPad to Mac. You can click "Import All New Photos" to import all the new photos from your iPad to your Mac.
Further Reading: How to Transfer Photos from iPad to External Hard Drive with/without Computer?
Image Capture is another built-in app on Mac that can help you get photos from iPad to Mac. It can import photos from your iPad to a folder on your Mac or an external drive. How do I transfer photos from iPad to Mac using Image Capture?
Step 1. Connect your iPad to your Mac with a USB cable.
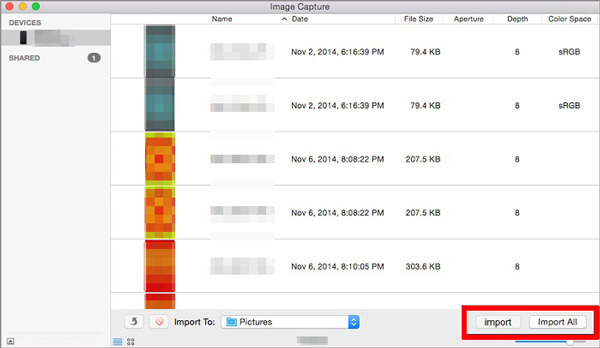
Step 2. On your Mac, open the Image Capture app and select your iPad from the list of devices.
Step 3. Transfer your photos from iPad to MacBook by choosing the "Import" or "Import All" button.
Also Read: Want to know how to import photos from an SD card to a Mac? Here is a step-by-step guide.
If you don't have a USB cable or prefer a wireless method to transfer photos from iPad to Mac, here are three ways you can try.
Apple's iCloud is a cloud tool that lets you back up and sync your data across all of your devices. If you turn on iCloud Photos on both your iPad and Mac, you can use iCloud to move pictures between the two. This way, as long as you have an internet link, you can always get to your photos on your Mac.
But this method needs enough space in iCloud, and the pictures may take a while to upload and download. Here is how to transfer iPad photos to Mac via iCloud:
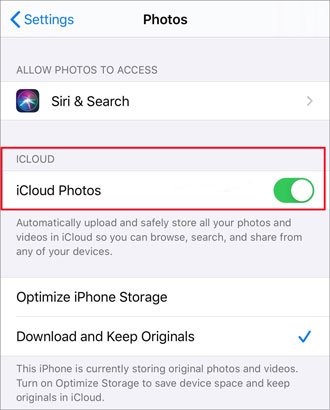
Step 1. On your iPad, open "Settings" > your name > "iCloud" > "Photos", and then enable turn on "iCloud Photos".
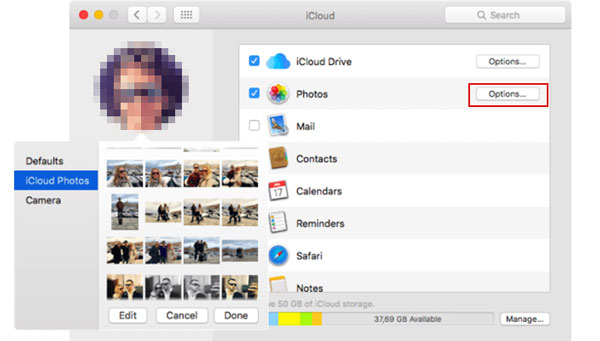
Step 2. On your Mac, go to the "System Preferences" and open "iCloud".
Step 3. Click "Options" and select "iCloud Photos".
Step 4. Select "Done" to initiate the transfer of photos from your iPad to your Mac. Subsequently, close the iCloud options window.
In this way, the photos from your iPad are uploaded to your Mac, and you are able to view and manage them on your Mac.
See More: Not enough iCloud storage space? Read this article to learn how to resolve this problem.
AirDrop is a useful function to share files, including photos, between iOS devices as long as your Wi-Fi connection is stable. But if you have a huge amount of photos to transfer, AirDrop won't be an ideal way as the transferring progress is slow. Here is how to transfer photos from iPad to Mac wirelessly using AirDrop:
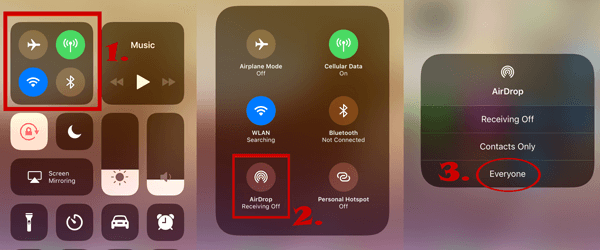
Step 1. On your iPad, swipe up from the bottom of the screen and tap "AirDrop", then select "Contacts Only" or "Everyone" according to your needs.
Step 2. On your Mac, open the "Finder" window and select "AirDrop". Set up "Allow me to be discovered by Contacts Only or Everyone".

Step 3. Choose the photos on your iPad that you want to transfer, and then tap the "Share" icon. Here, you will see your Mac; tap to share photos to your Mac with AirDrop.
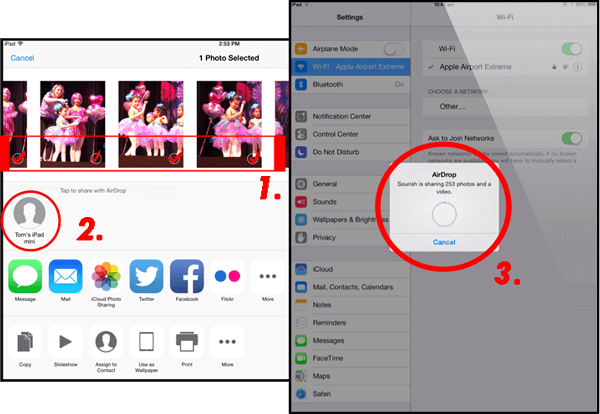
Step 4. On your Mac, choose to save the photos from your iPad. (AirDrop stuck on waiting?)
Another easy and popular way to move photos from iPad to Mac is to email them. You can use any iPad or Mac email app or service. Some things, like the size limit of the email attachment and the speed of the internet connection, can make this way less useful. To copy pictures from iPad to Mac using email, follow these steps:
Step 1. Open the "Photos" app on your iPad.
Step 2. Select the photos you want to transfer.
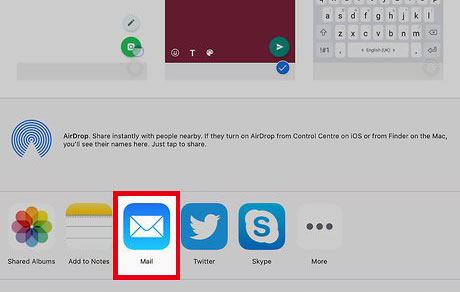
Step 3. Tap the "share" button and choose "Mail".
Step 4. Enter your email address, add a subject, and send the email.
Step 5. Open the email on your Mac and download the attached photos from the email to your Mac.
As you can see, there are many ways to transfer photos from iPad to Mac, both with USB and wirelessly. You can choose the way based on your preferences and needs. Without a doubt, Coolmuster iOS Assistant is the best way to do it. It can not only help you transfer photos and other data from iPad to Mac with just a few clicks but also can manage your iOS files. You can download it and try it for free.
Related Articles:
5 Ways to Teach You How to Transfer Videos from iPad to Mac Easily
How to Transfer Photos from iPad to PC without iTunes? 8 Easy Ways for You
How Do I Stop My iPhone Photos from Syncing to My iPad? (Easy to Solve)
7 Quick Ways to Transfer Photos from PC to iPad (With or Without iTunes)


 Free Download for Mac
 Free Download for PC

