"How to sync Voice Memo from iPhone to Mac after the latest Mac update? I can't seem to find any solutions for this online, that actually works. Can someone here help?"
- From Apple Support Community
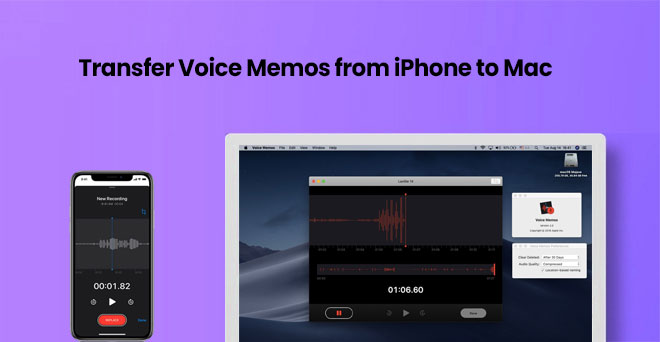
Voice memos are a handy way to capture interviews, reminders, notes for schoolwork, or even song ideas. Since these recordings can be very important, it's a good idea to save a copy somewhere safe. If you use a Mac, you might wonder how to transfer voice memos from iPhone to Mac.
Although iTunes is often used for transferring data, it's not the best option for voice memos. Luckily, there are several other easy ways to do it. In this guide, we'll share five simple methods to help you move voice memos from your iPhone to your Mac.
A common and long-time method to move files between your iPhone and your computer is by using iTunes (for Windows and older macOS versions) or Finder (for macOS Catalina and later). The procedure involves several steps.
1. If you're using a Windows PC or a Mac with an older system, go to Apple's website and install the latest version of iTunes. If your Mac has macOS Catalina or newer, you don't need iTunes — use the Finder app instead.
2. Use a USB cord to connect the iPhone and the Mac. Unlock your phone and tap "Trust This Computer" if a message pops up.
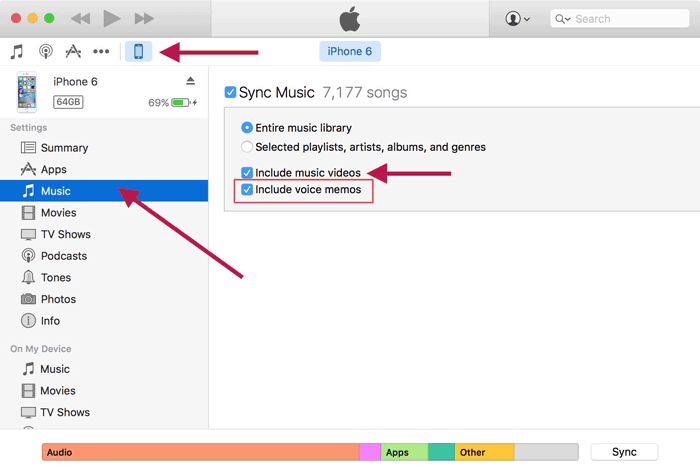
3. Launch iTunes on Windows or older Macs. On newer Macs, open the Finder from your dock or desktop.
4. In iTunes or Finder, your iPhone should appear. Click on it to open its settings.
5. In iTunes, click the "Music" section and check the box that says "Sync voice memos." In Finder, do the same in the "Music" section.
6. After you've selected the sync option, click the "Apply" button. This will start transferring your voice memos to the computer.
7. When syncing is done, go to your computer's Music folder. Then look for a folder called "iTunes" or "iTunes Media," and inside that, open the "Voice Memos" folder to find your files.
Tip: It's a good idea to back up your iPhone often so you don't lose anything important. However, if unfortunately, you have lost your voice memos, you can learn how to recover deleted iPhone voice memos here.
If you've turned on iCloud on your iPhone, it's easy to share files like voice memos between your devices. iCloud keeps things in sync, so your voice recordings can show up on your Mac too. Just remember that iCloud gives you a limited amount of free space, and large voice memos can take up a lot of it. So make sure you have enough space available. (iPhone Says Not Enough iCloud Storage But There Is?)
To move voice memos from iPhone to Mac using iCloud:
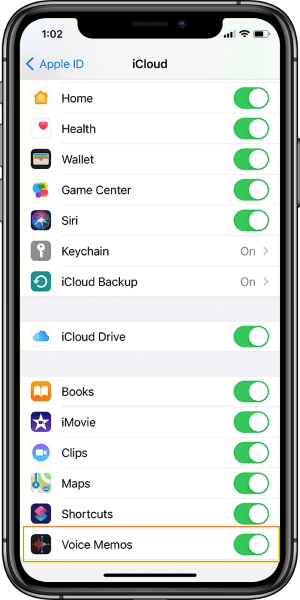
1. On your iPhone, go to Settings, tap your name at the top, then choose iCloud. Find "Voice Memos" and turn it on.
2. On your Mac, open a web browser and go to iCloud.com. Sign in with the same Apple ID you use on your iPhone.
3. Click on "Voice Memos." You'll see your recordings there.
4. Choose the voice memo you want and download it to your Mac.
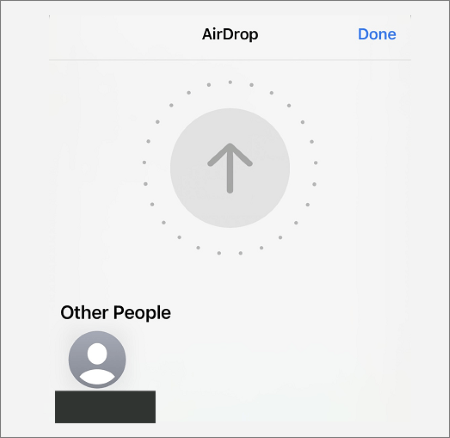
Another easy way to move voice memos from your iPhone to your Mac is by using AirDrop. AirDrop is a wireless tool built into Apple devices that lets you quickly share files without any cables or extra apps. Here's how to do it:
1. On your iPhone, open Control Center. If you have an iPhone X or newer, swipe down from the top right corner. If your iPhone is older, swipe up from the bottom.
2. Press and hold the area with the Wi-Fi and Bluetooth icons. Tap "AirDrop" and choose either "Contacts Only" or "Everyone."
3. On your Mac, open Finder. Click "Go" at the top of the screen, then choose "AirDrop." Make sure your Mac is set to be visible to the same group as your iPhone (Contacts Only or Everyone).
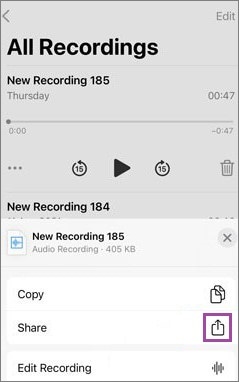
4. Open the Voice Memos app on your iPhone. Find the memo you want to send. Tap the three dots, then tap "Share" and choose "AirDrop." When your Mac appears, tap it.
5. Your Mac will get a message asking if you want to accept the file. Click "Accept," and the voice memo will transfer.
In addition to the common methods of transferring voice memos from iPhone to computer, there is an even easier way. It's called Coolmuster iOS Assistant. With just a USB cable and a few clicks, you can transfer voice memos quickly and safely.
Coolmuster iOS Assistant is a powerful tool that helps you manage and backup iPhone data easily. It can not only transfer voice memos, but also more than 15 types of files such as photos, videos, contacts, messages, etc.
Why Coolmuster iOS Assistant is your ideal choice:
The following are the steps involved in transferring voice memos from the iPhone to the Mac by using the Coolmuster iOS Assistant for Mac:
01 Start by downloading and installing the software to Mac by clicking the download button above. Launch it and connect your iPhone to the computer by using a USB cable. Tap on the "Trust" option that appears on your phone and click "Continue" to go to the next step.
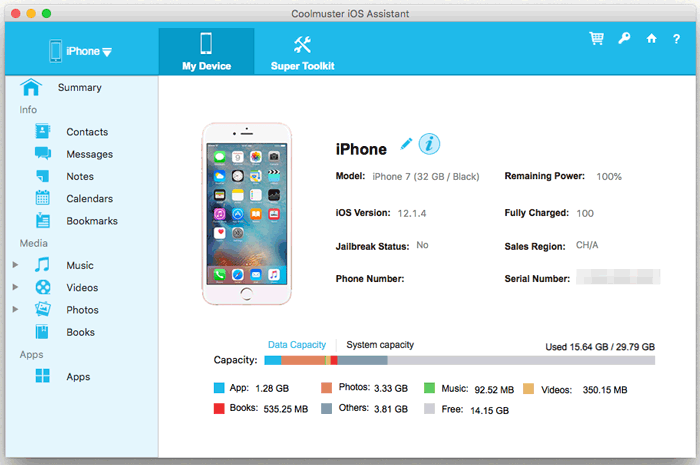
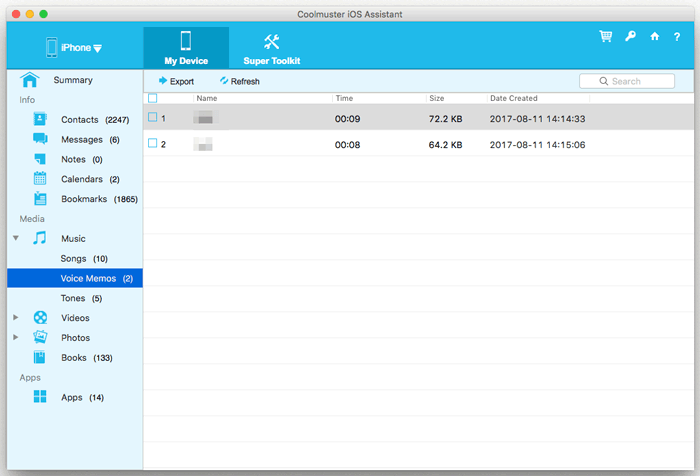
02 All files and folders on your iPhone are displayed once the device is detected by the software. To export the voice notes from your device to the Mac, enter the "Music" > "Voice Memos" folder and preview its details.
03 After choosing the memos that you want to move to the computer, click on the "Export" option and choose the best format and location for file output. Then, the transferring process will begin immediately.
Video Guide:
For Windows PC users, you can learn how to transfer iPhone voice memos to your PC using iOS Assistant, as long as you download the Windows version of it.
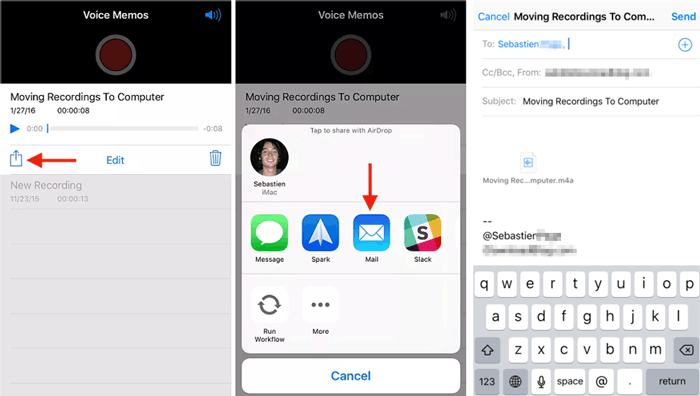
Using email to send voice memos from your iPhone to your Mac is one of the easiest ways. But there's a catch: you can only send one memo at a time. If you have many recordings, this method can become slow and repetitive. Still, if you only need to move one or two memos, here's how you can do it:
1. Download, install and launch the Voice Memos app on the iPhone.
2. Highlight on the memo that you want to transfer.
3. Click the "Share" icon and choose the Email option.
4. Add any basic or important information such as the email address of the recipient.
5. Click the "Send" button.
6. From the computer, you can log in to the email account and download the attachments.
According to most iPhone users, voice memos are great tools for recording important things such as meetings, interviews, and songs. If you have stored these voice memos in your computer and you want to ensure that you do not lose them, you should consider backing them up on your personal computer.
All the above methods can assist you in transferring the important voice memos from your iPhone to a Mac without any trouble. Among them, using the Coolmuster iOS Assistant is the best and the easiest.
Related Articles:
How to Make a Voice Memo a Ringtone (3 Easy Tricks)


 Free Download for Mac
  Free Download for PC

