TL;DR:
Easily upload your photos to Facebook using different methods depending on your device and system version.
Many Mac and iPhone users still want a simple way to upload photos to Facebook, especially those stored in older iPhoto libraries or the modern Apple Photos app. However, direct sharing options have changed over time, which can make the process a bit confusing. This guide walks you through different practical methods to upload your pictures smoothly. Whether you are using a Mac or iOS device, you'll also learn a more efficient workflow using Coolmuster for better photo management.
This method only applies to older Mac systems where iPhoto is still installed and functional. On these versions of macOS, Apple previously allowed direct sharing to Facebook from within the photo library.
Step 1: Launch iPhoto and choose the pictures you want to upload from your Photos library.
Step 2: Click the Share icon at the top of the window, then select "Facebook" from the available sharing options (such as Messages, Email, Flickr, or Twitter).
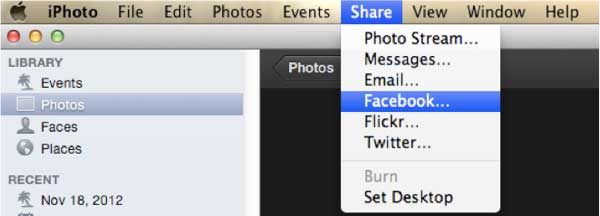
Step 3: Enter your email and password, then sign in and choose where to post your photos, such as a specific album or your Timeline (Wall).

Step 4: Adjust the "Photos Viewable by" setting to control who can see your uploaded images (this option may not appear when posting directly to your wall).
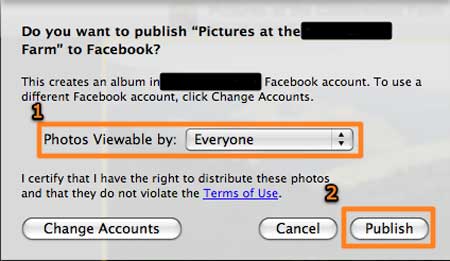
Step 5: Confirm your settings and click "Publish" to upload your photos to Facebook successfully.
Note: This workflow only works on older macOS versions. In newer systems, iPhoto has been replaced by Photos (Apple), and Facebook sharing is usually handled via browser upload or mobile apps instead of direct integration. (How to Transfer Photos from iPhone to Mac without iPhoto?)
Many Mac users now manage their images through Photos (Apple) instead of the discontinued iPhoto. Although direct Facebook integration is limited on newer macOS versions, you can still easily upload your photos using the built-in sharing or manual upload workflow.
Step 1: Launch the Photos app on your Mac and choose the photos or album you want to share on Facebook.
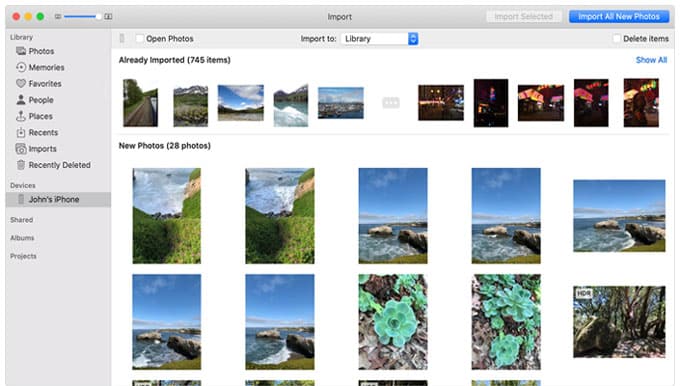
Step 2: Tap the "Share" button in the top-right corner of the window to view available sharing options.
Step 3: If Facebook appears, select it directly; otherwise, choose "Export" or "Save to Desktop" for manual upload.
Step 4: Log into your Facebook account and decide whether to post to your Timeline or a specific album.
Step 5: Add captions or descriptions, then confirm to publish your photos on Facebook.
This method is the most universal way to upload images when direct sharing is not available in Photos (Apple). It gives you full control over file selection, quality, and how your photos appear on Facebook.
Step 1: Open the Photos app and choose the images you want to upload. (iPhone Photos Not Showing Up on Mac?)
Step 2: Click "File > Export" and save the photos to a folder on your Desktop or another location.
Step 3: Log in to your Facebook account using Safari, Chrome, or any preferred browser.
Step 4: Click "Photo/Video" in the post box and select the exported images from your computer.
Step 5: Write your caption, adjust post settings if needed, then click "Post" to publish.
If you want a more efficient way to manage and transfer photos before uploading to Facebook, using Coolmuster iOS Assistant is a practical solution. It helps you easily export, organize, and back up photos from your iPhone or iPad to your computer, making the Facebook upload process faster and more controlled than relying on the default Photos workflow.
Key Features of Coolmuster iOS Assistant:
How to access iPhone files on PC without iTunes:
01Use a USB cable to connect your device and launch Coolmuster iOS Assistant so it can detect your iPhone or iPad.
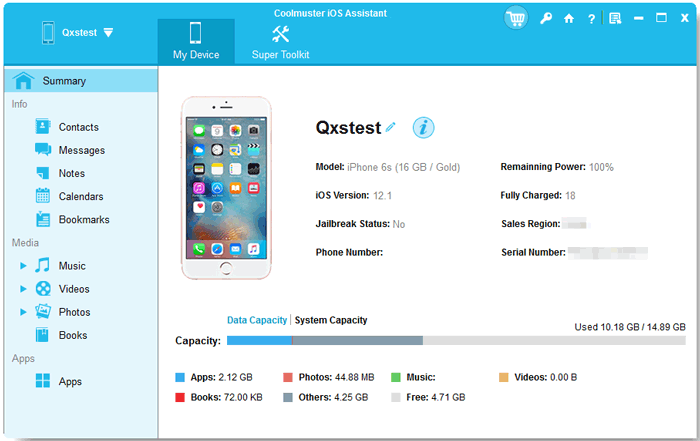
02 Go to the Photos section, preview your images, then choose the ones you want and click "Export" to transfer them to your computer.
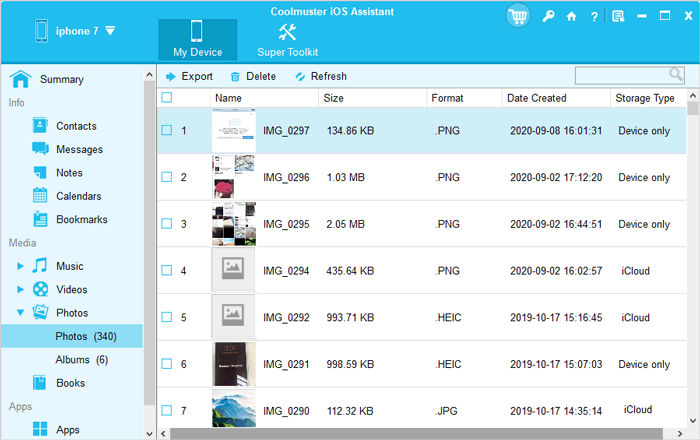
03After exporting, arrange your photos into folders or rename them if needed to make them easier to find for Facebook upload.
04Open Facebook in your browser, create a new post, and upload the organized photos from your computer for a smoother posting experience.
Video Guide:
Another quick way to share images is by uploading them directly through Facebook's official apps instead of exporting files manually. This method works well with photos stored in Photos (Apple) or on your iPhone/iPad.
Step 1: Launch the Facebook app on your iPhone, iPad, or Mac (if available via browser/app version). (How to Get Photos off iPhone to PC/Mac?)
Step 2: Tap "Photo" in the post composer or open a conversation in Messenger where you want to share images.
Step 3: Choose the images you want to upload directly from your Apple Photos library.
Step 4: Optionally add text, tags, or basic edits before posting or sending.
Step 5: Post or send your photos. Tap "Post" to publish on Facebook or "Send" to share via Messenger instantly.
Uploading photos from iPhoto or Apple Photos to Facebook is still simple, even though direct integration has changed over time. Older Mac users can follow legacy iPhoto sharing, while modern users rely on manual export or browser upload through Photos (Apple). For better efficiency and batch management, tools like Coolmuster iOS Assistant offer a smoother workflow, helping you organize and transfer photos before posting them on Facebook with greater control and flexibility.
Related Articles:
How to View iPhone Photos on PC in 4 Easy Ways
How to Transfer Photos from iPhone to Mac: 6 Easy Ways




 Free Download for PC
  Free Download for Mac


