"How do I move photos from my iMac onto my iPhone so that I can upload them to Instagram? As a photographer my images are loaded and stored on my iMac, but I wish to use Instagram as a social media outlet for my images".
- from Apple Community
After arranging your favorite photos on your Mac, you might want to move them to your iPhone so you can look through them anytime or share them with friends on social platforms. This guide walks you through different ways to transfer photos from a Mac to an iPhone. You can choose a wireless option or a USB connection, depending on what feels more convenient. Each method is explained clearly so you can pick the one that works best for you.

If you prefer using a cable for data transfer, here is how to transfer photos from Mac to iPhone with a cable in 2 easy ways.
iOS Transfer is a transfer software specifically designed for iOS users. It supports quickly importing photos, videos, contacts, and more from a Mac to an iPhone without overwriting the existing data on the device. Compared to the cumbersome iTunes syncing method, it offers a more intuitive interface and faster transfer speeds, making it especially suitable for users who don't want to be limited by the Apple ecosystem.
Key features of iOS Transfer:
Here is how to move photos from MacBook to iPhone using iOS Transfer:
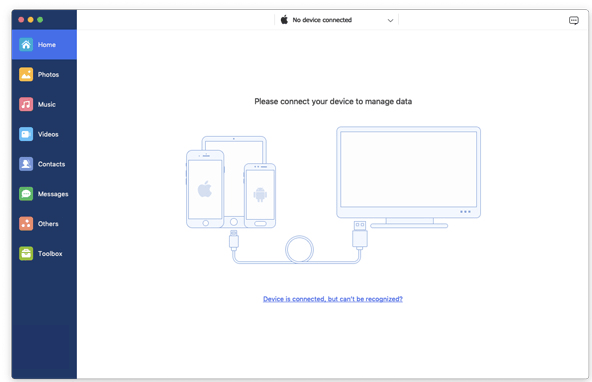
01Download and install iOS Transfer on your Mac. Connect your iPhone to the Mac using a USB cable, then launch the program and wait for the device to be recognized.
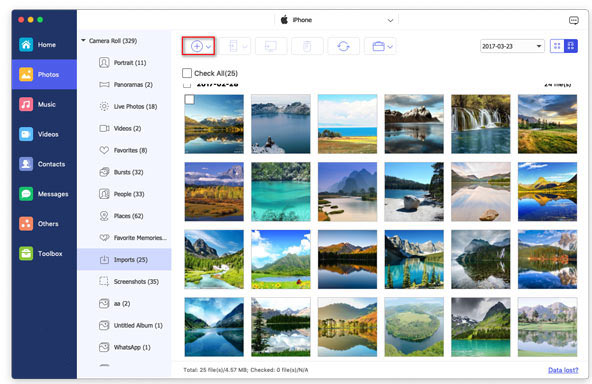
02Click on the "Photos" category on the left, then click the "Add" button. Select the photo files or folders you want to upload from your Mac, and once you've confirmed everything is correct, click "Open" to complete the import.
If you prefer using Apple's official tools, you can also choose to use iTunes (for macOS Mojave and earlier) or Finder (for macOS Catalina and later) to sync photos. However, please note that during the sync process, it may overwrite the existing photos on your iPhone.
How to Import Photos from Mac/MacBook to iPhone Using iTunes:
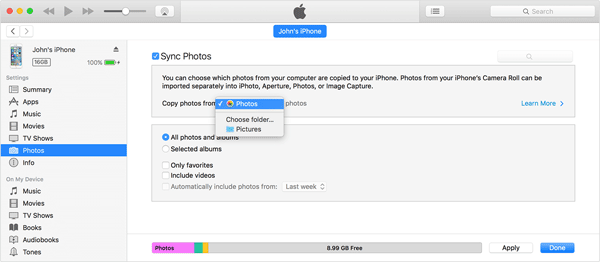
Step 1. Connect the iPhone to the Mac computer. Once iTunes opens, click the device button and select "Photos". (iPhone Not Showing Up in iTunes?)
Step 2. Check the "Sync Photos" option and choose the source folder under "Copy photos from".
Step 3. Click "Apply" to begin syncing your photos from your Mac to your iPhone via iTunes.
How to Add Photos from Mac/MacBook to iPhone Using Finder:
Step 1. Connect your iPhone to your MacBook using a USB cable.
Step 2. Open Finder on your MacBook. You should see your iPhone listed in the sidebar under "Locations".
Step 3. Click on your iPhone in the Finder sidebar to open its details.
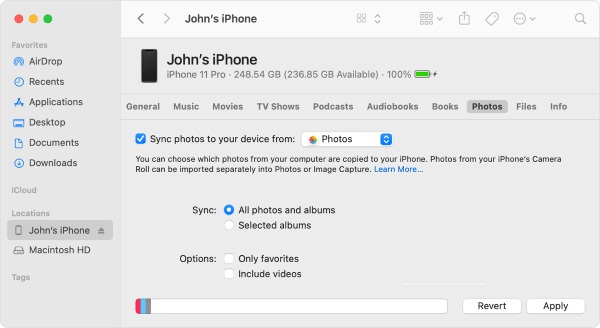
Step 4. In the Finder window, click on the "Photos" tab at the top.
Step 5. Enable the option "Sync photos to your device from" and choose the folder or app from which you'd like to transfer photos (such as the Photos app or a specific folder on your Mac).
Step 6. Select the albums or folders you want to sync to your iPhone.
Step 7. Click the "Apply" button in the lower right corner to start the sync process.
If you don't like using a data cable or don't have a device connected at the moment, you can also transfer photos between your Mac and iPhone wirelessly. In this section, we will introduce three popular methods.
iCloud is Apple's official cloud service, which supports automatically syncing photos from your Mac to your iPhone. As long as both devices are logged into the same Apple ID, photos will be updated in real-time. This is ideal for users who want their photos to stay synced and automatically backed up. But make sure there is enough space in iCloud. (How to free up iCloud storage?)
Here is how to sync photos from MacBook to iPhone with iCloud:
Step 1. Make sure both your Mac and iPhone are logged into the same Apple ID.
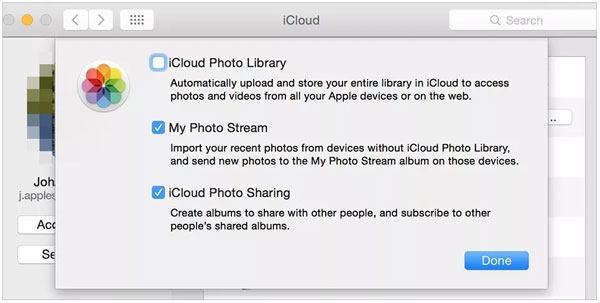
Step 2. On your Mac, click "System Settings" > "Apple ID" > "iCloud".
Step 3. Enable the "Photos" option and check "iCloud Photo Library".
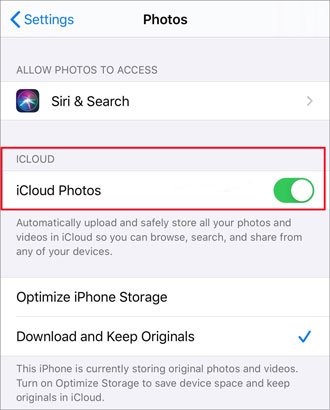
Step 4. On your iPhone, go to "Settings" > "[Your Apple ID]" > "iCloud" > "Photos".
Step 5. Turn on "iCloud Photos" and wait for the sync to complete.
All photos uploaded to iCloud will automatically appear in the Photos app on your iPhone, without manual intervention. This is ideal for users who prefer automation.
How to transfer photos from Mac to iPhone without iCloud? Google Photos is also a great option. It supports syncing photos across multiple devices and provides 15GB of free cloud storage. To transfer photos between a Mac and an iPhone using Google Photos, make sure you're using the same account on both Apple devices.
Here is how to transfer photos from Mac to iPhone using Google Photos:
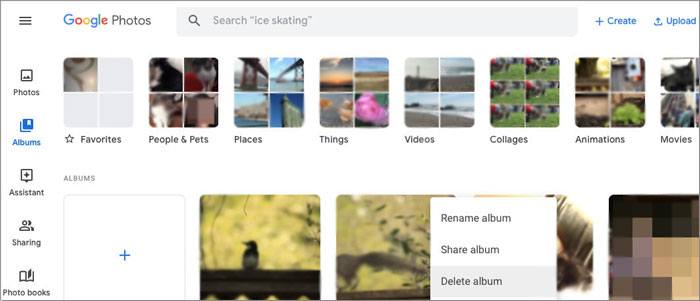
Step 1. Open a browser on your Mac, go to photos.google.com, and sign in to your Google account.
Step 2. Click the "Upload" button and select the photos on your Mac to upload.
Step 3. Install and open the Google Photos app on your iPhone.
Step 4. Log in with the same Google account, and you'll be able to view and download the photos.
You can also transfer photos from your Mac to your iPhone using AirDrop. AirDrop is a convenient way to quickly transfer files between Apple devices without the need for cloud services or third-party software. As long as both devices are within Bluetooth and Wi-Fi range, efficient transfers can be made.
Here is how to export photos from MacBook to iPhone via AirDrop:
Step 1. Enable Wi-Fi and Bluetooth on both your Mac and iPhone.
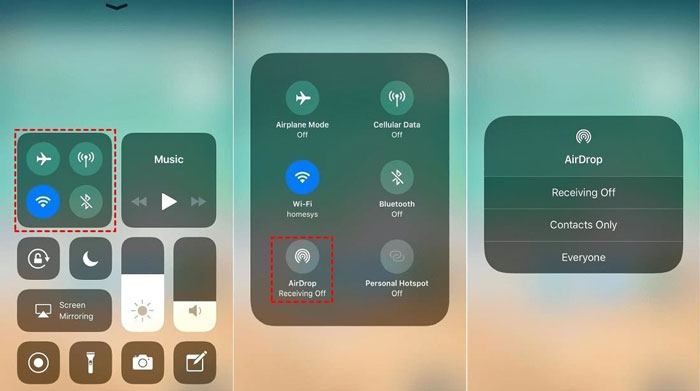
Step 2. On your iPhone, open the "Control Center" and make sure AirDrop is set to "Everyone" or "Contacts Only". (AirDrop not working on iPhone?)
Step 3. On your Mac, head to "Finder" > "Go" > "AirDrop". Under the "Allow to be discovered by" option, choose "Everyone" or "Contacts Only".

Step 4. On your Mac, select the photos you want to send, right-click, and choose "Share" > "AirDrop".

Step 5. Choose your iPhone and confirm the sending.
Step 6. On your iPhone, tap "Accept", and the photos will be saved directly to the Photos app.
Most people use email to share pictures and other files, for personal use or work communication. You can also use Gmail to transfer photos from your Mac to your iPhone, as long as the file size does not exceed 25MB.
If your photo files are larger, you can upload them to Google Drive and then share the link via email to access the files on your iPhone. The following steps will clearly explain the process.
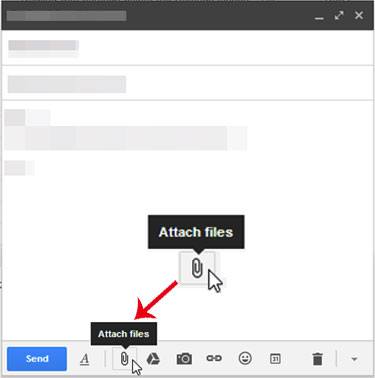
Step 1: Log in to your Gmail account on your Mac and select the "Compose" button to create a new email. Enter the recipient's address, subject, and email content.
Step 2: Select the "Attach files" icon to upload your photos. Once the photos have been uploaded, select "Send".
Step 3: On your iPhone, open the email you sent from your Mac and tap the attachment.
Step 4: Open the image, then select the "three dots" icon in the upper right corner. Select "Save to Photos" from the menu to download the photo to your iPhone.
Q1. Why is AirDrop not working on my Mac?
AirDrop may stop working if Bluetooth or Wi-Fi is turned off on your Mac. These settings can sometimes be disabled by accident or when airplane mode is activated. Make sure both Bluetooth and Wi-Fi are turned on before trying to use AirDrop again.
Q2. How many photos can I AirDrop at once?
There is no official limit to the number of photos you can send between Apple devices using AirDrop. However, many users have reported problems when trying to transfer a very large number of photos in one attempt.
Q3. Why are my photos not syncing from my Mac to my iPhone through iCloud?
You can often fix syncing issues by turning the "iCloud Photos" option off and then on again. Open the Settings app on your iPhone, tap your Apple ID, choose iCloud, and select Photos. Turn "iCloud Photos" off, then turn it back on to see if your photos start syncing properly.
That's all about how to transfer photos from Mac to iPhone. Which method works best for you depends on your usage habits and needs. If you want a simple, offline solution that won't overwrite your original photos, iOS Transfer is the most recommended tool. It not only supports photo transfer but also works with videos, music, contacts, and other data formats, making it an all-in-one iOS data management solution.
Try any of the above methods now to make transferring photos between your Mac and iPhone easier and more seamless!
Related Articles:
How to Transfer Files from Mac to iPhone? Solved in 5 Proven Ways
[Step-by-Step Guide] How to Transfer Videos from Mac to iPhone?
How to Transfer Photos from One iCloud Account to Another on PC/Mac, iPhone/iPad?
How to Transfer Photos from Mac to iPad with or without iTunes?


 Free Download for Mac
 Free Download for PC

