If you have been using your iPhone for a while, chances are you've downloaded, created, or purchased multiple ringtones to personalize your device. However, over time, these ringtones may clutter your phone or take up unnecessary storage. That's why many users search for how to delete ringtones from iPhone. In this guide, we'll walk you through three effective ways to help you quickly delete ringtones from your iPhone effortlessly.

If your device is running iOS 13 or later, you can easily delete unwanted custom ringtones directly on your iPhone via the Settings app. The process is simple and straightforward. However, if you have many ringtones to remove, it might be time-consuming.
Here's how to delete custom ringtones from iPhone via the Settings app:
Step 1. Unlock your iPhone and navigate to "Settings" > "Sounds & Haptics" > "Ringtone".
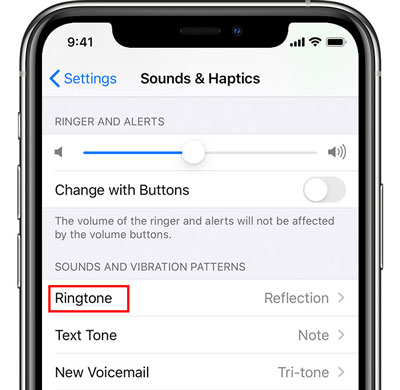
Step 2. Your custom ringtones will appear above the default ones. Locate the ringtone you want to remove and swipe left on it.
Step 3. Tap the "Delete" button to remove the ringtone from your device.
If you've purchased ringtones from the iTunes Store, they may not appear as removable in Settings. In that case, the best way is to use iTunes on your computer to manage and delete them.
Here is how to delete purchased ringtones from iPhone using iTunes:
Step 1. Install and launch the latest version of iTunes on your computer.
Step 2. Connect your iPhone to the computer via USB.
Step 3. Click the device icon in iTunes to open the device management screen.
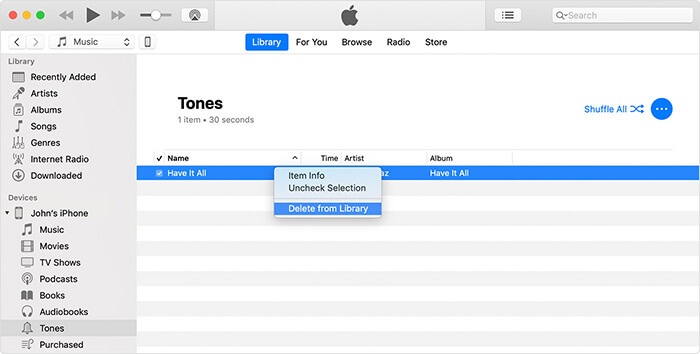
Step 4. In the sidebar, select "Tones".
Step 5. Browse the list of ringtones and right-click the one you want to remove.
Step 6. Choose "Delete from Library", then confirm.
Step 7. Click "Apply" or "Sync" to update changes on your iPhone.
If you have many ringtones to clean up, deleting them one by one can be tedious. That's where iPhone Ringtone Manager comes in. It's a professional iOS data management tool that allows you to batch delete ringtones, transfer tones between iPhone and computer, and even back them up before deletion.
Why choose iPhone Ringtone Manager?
Here is how to delete ringtone from iPhone without iTunes:
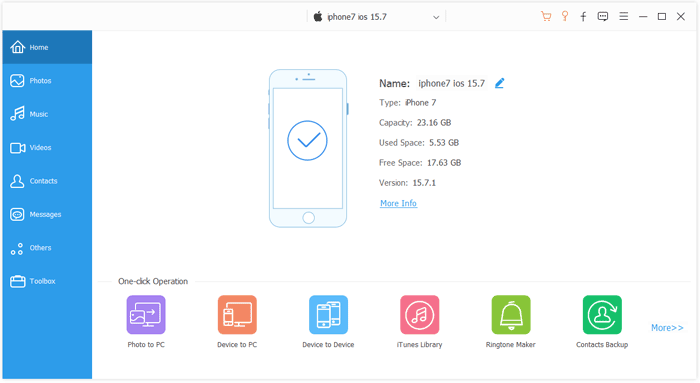
01Download, install, and launch the software on your computer. Then, connect your iPhone using a USB cable. The program will automatically detect your device.
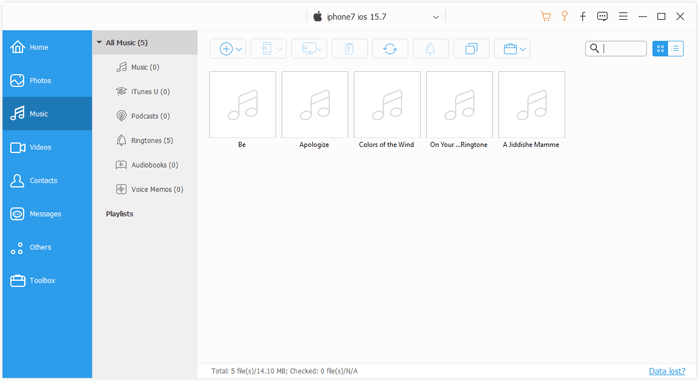
02On the main interface, go to "Music" > "Ringtones" to view all ringtones stored on your iPhone. Select the ones you want to delete by checking the boxes, then click "Delete" to remove them.
Once the deletion is complete, you can unplug your iPhone and check to confirm that the ringtones have been successfully removed.
Now you know three effective methods for how to delete ringtones from iPhone. If you only need to delete a small number of custom ringtones, you can do it directly in the Settings app. If the ringtones were purchased from the iTunes Store, you can remove them via iTunes. However, if you're looking for a more efficient way to delete ringtones in bulk, the most recommended method is using iPhone Ringtone Manager.
Not only does it allow you to quickly delete multiple ringtones at once, but it also supports backup and data transfer between your iPhone and computer, making it a highly practical iOS data management tool.
Related Articles:
How to Add Ringtone to iPhone without iTunes: A Complete Guide
How to Transfer Ringtones from iPhone to iPhone? (iPhone 16 Included)
[SOLVED] How to Make MP3 Ringtones on iPhone 16/15/14/13/12/11/X Easily?
[3 Proven Ways] How to Set Custom Song Ringtone Without iTunes on iPhone?


 Free Download for PC
  Free Download for Mac

