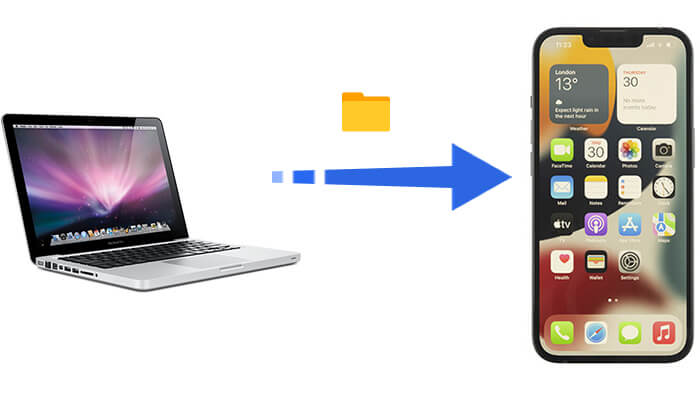
Macs are a top choice for professional use thanks to their speed, reliability, and robust security. However, carrying a Mac everywhere isn't always practical, especially for quick meetings or presentations. In such situations, many people prefer transferring files from their Mac to their iPhone. Yet, finding the most reliable method can be challenging.
Don't worry! This guide covers six of the most effective ways to transfer files from Mac to iPhone, including both wired and wireless options, with simple step-by-step instructions to help you choose the method that best suits your needs.
If you want a quick and easy way to transfer files from a Mac to an iPhone, Coolmuster iOS Assistant is an excellent iMac to iPhone transfer tool. With this software, users can transfer various types of files from Mac to iPhone or from iPhone to Mac with just one click. Additionally, Coolmuster iOS Assistant allows users to back up and manage iPhone data on computer directly, providing a more comprehensive management solution for your devices.
Highlights of Coolmuster iOS Assistant:
How do I transfer files from Mac to iPhone using iOS Assistant? Follow the steps below:
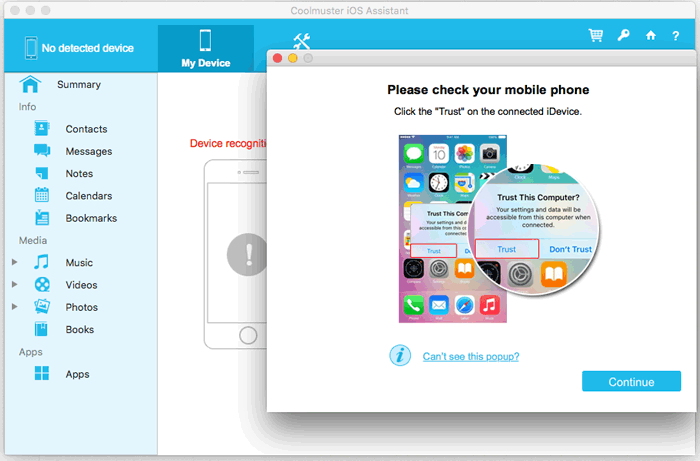
01Download the Mac version of this tool on your Mac computer, launch it, and connect your iPhone to your Mac using a USB cable. When a pop-up window appears on your computer, simply select the "Trust" option on your device, then click "Continue" on your computer to proceed.
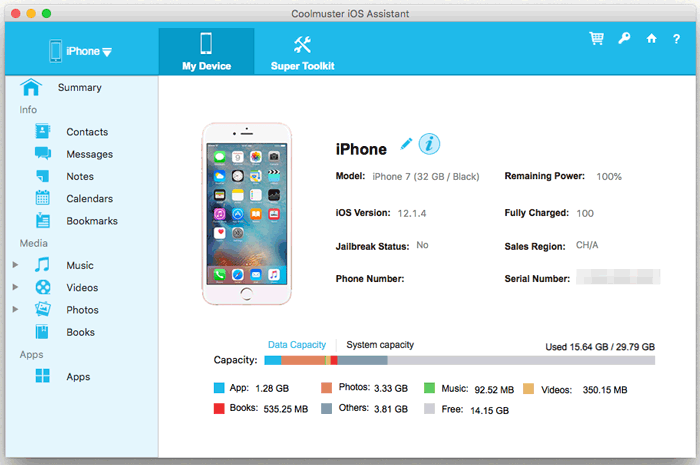
02Once the software detects your iPhone, you'll see the main interface as shown below. The different file folders will be neatly arranged on the main screen.
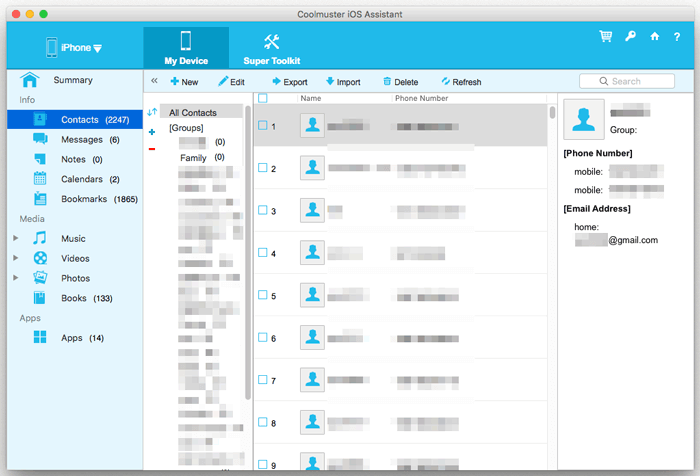
03Click on the type of file you want to transfer to your iPhone from the left sidebar. Then, preview and select the specific items on the right, and click the "Import" button to start the transfer.
Video Tutorial:
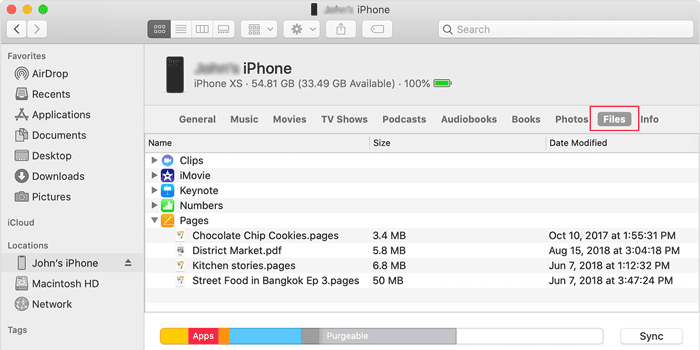
If you're using a Mac with macOS Mojave or later, Finder can assist you in transferring files from Mac to iPhone.
Here is how to transfer data from MacBook to iPhone using Finder:
Step 1. Connect your iPhone to the Mac using a USB cable. (iPhone won't connect to Mac?)
Step 2. In Finder, select your device from the sidebar.
Step 3. Navigate to the "Files" tab to view a list of apps on your iPhone that support file sharing.
Step 4. Drag files from Finder to the desired app.
Step 5. After syncing, open the corresponding app on your mobile device to access the files.
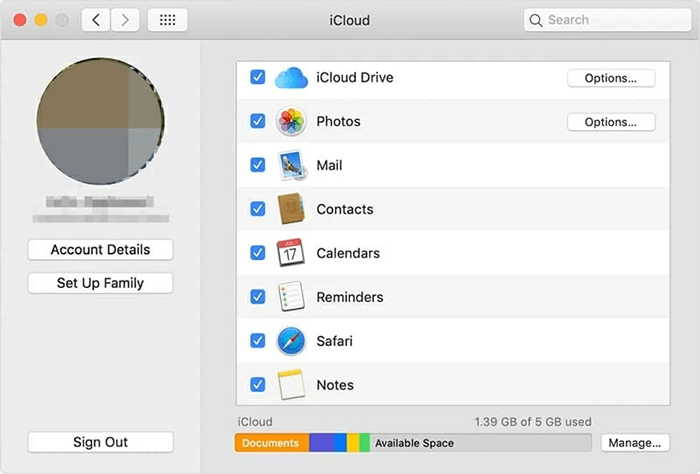
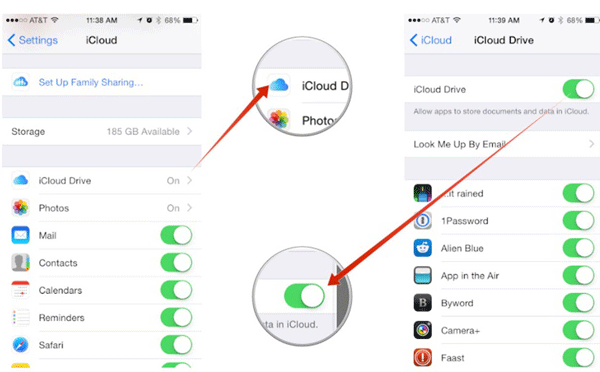
Another method is to use iCloud. iCloud is Apple's cloud storage service that allows you to transfer files wirelessly between your Mac and iPhone. Just ensure that both devices are signed in with the same Apple ID and have iCloud sync enabled.
Here is how to do file transfer from Mac to iPhone with iCloud:
Step 1. On your Mac, open "System Preferences", click "Apple ID", then select "iCloud", and ensure that "iCloud Drive" is enabled.
Step 2. On your iPhone, navigate to "Settings" > [your name] > "iCloud" and turn on "iCloud Drive".
Step 3. Select and upload the files from your Mac to iCloud Drive.
Step 4. On your iPhone, open the "Files" app and locate the files in iCloud Drive.
Is your iCloud storage full? If you don't want to purchase more storage, you can read this article to learn how to free up iCloud space.
iCloud Storage Full? Here's What to Do to Free up iCloud StorageBesides the iCloud, you can also use AirDrop to transfer files from your Mac to your iPhone. Simply bring the two devices close together and ensure that both Wi-Fi and Bluetooth are turned on for an easy file transfer.
Here is how to send a file from Mac to iPhone via AirDrop:
Step 1. On your iPhone, open the Control Center, press and hold the network settings box, then select "Contacts Only" or "Everyone" for AirDrop visibility.
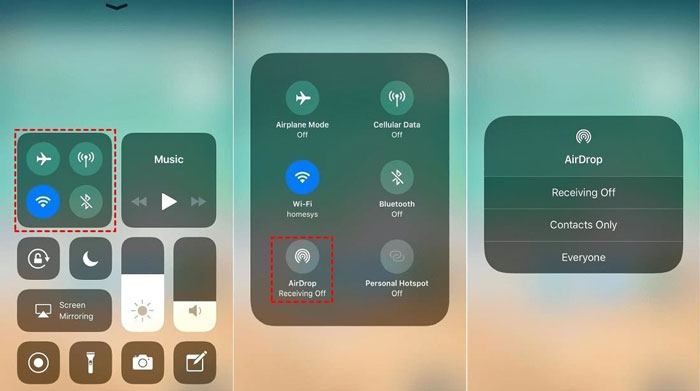
Step 2. On your Mac, open Finder, click "AirDrop" in the sidebar, and set the visibility option at the bottom to "Contacts Only" or "Everyone".

Step 3. Select the files you want to transfer from your Mac, click the "Share" icon, and choose your iPhone's name from the AirDrop options.
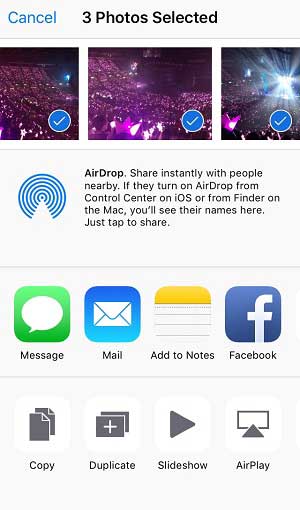
Step 4. On your iPhone, accept the incoming file, and it will be saved automatically. (Where do AirDrop files go?)
If the file you want to transfer is small, email is a simple and convenient option. Just attach the file to an email sent to yourself, and then download the attachment on your iPhone.
Here is how to send a file from Mac to iPhone using email:
Step 1. Open your email client on the Mac and compose a new email.
Step 2. Attach the file you want to transfer and send it to your own email address.
Step 3. On your iPhone, open the Mail app, locate the email, and download the attachment.

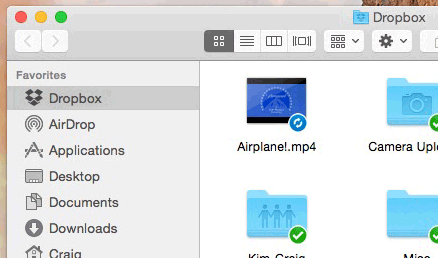
If you already have Dropbox or another cloud service like Google Drive or Box on your iOS device, you can transfer files from your Mac to the cloud and then access them on your iPhone or iPad.
Step 1: On your Mac, visit the Dropbox website to download and install the desktop app. Also, get the Dropbox app on your iPhone from the App Store.
Step 2: Sign in to Dropbox using your Apple ID, Google account, or the credentials you use for Dropbox.
Step 3: Open "Finder" on your Mac and locate the Dropbox folder.
Step 4: Simply drag and drop the files you want to move into the Dropbox folder.
Step 5: Launch the Dropbox app on your iPhone and log in with the same account you used on your Mac.
Step 6: Find the uploaded files in the app, where you can view, download, or share them directly from your iPhone.
There are several methods to transfer files from Mac to iPhone, whether using Coolmuster iOS Assistant for a one-click solution or opting for Finder, iCloud, Dropbox, email or AirDrop, depending on your needs. Considering all factors, if you need a powerful and easy-to-use file transfer tool, Coolmuster iOS Assistant is undoubtedly the best recommendation.
Related Articles:
How to Transfer Videos from Mac to iPhone with 5 Methods
How to Transfer Files from Mac to iPad? 6 Ways for You


 Free Download for Mac
 Free Download for PC

