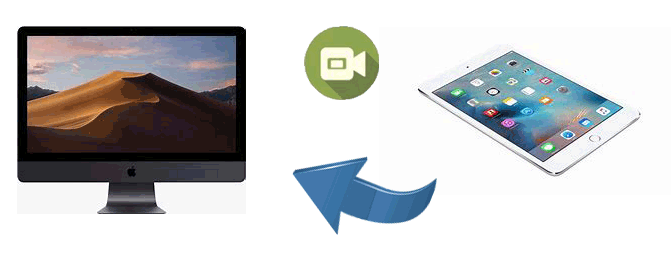
Maybe there are many different kinds of videos on your iPad like movies, music videos, home videos, or TV shows. Often these videos would occupy a large space which may influence your iPad use and storage. So, what will you do? You must not be willing to delete them from your iPad. Then, transferring these videos from your iPad to your Mac for the backup will be a good choice. It can make room for your iPad and prepare it for long-term use. Now you may start to be confused about how to transfer videos from iPad to Mac. Here are 6 solutions in this article to help you solve the problem.
Looking for a professional tool with powerful functions to help transfer videos from iPad to Mac? Coolmuster iOS Assistant is recommended to you. Using this third-party software, you can choose which files you'd like to transfer from your iPad to your Mac, or you can also choose to back up all your data on your iPad to your Mac or PC in 1 click.
Why choose Coolmuster iOS Assistant?
Now, just download the iOS Assistant Mac version to transfer videos from iPad to Mac. If you have a Windows PC, you can also download the iOS Assistant Windows version to transfer video from iPad to PC.
How do I transfer videos from iPad to Mac in one click? Here are the steps:
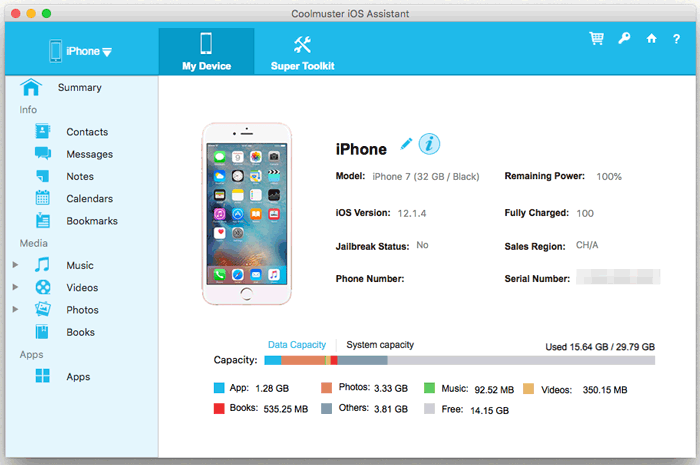
01Launch this tool on your Mac and connect your iPad to the Mac via a USB cord and the software starts to detect your linked device automatically. Then, a pop-up window will appear on your computer. Tap the "Trust" option on your iPad and then click the "Continue" option to go on. After your iPad is detected by this software, all your file folders on the iPad will be displayed on the interface.
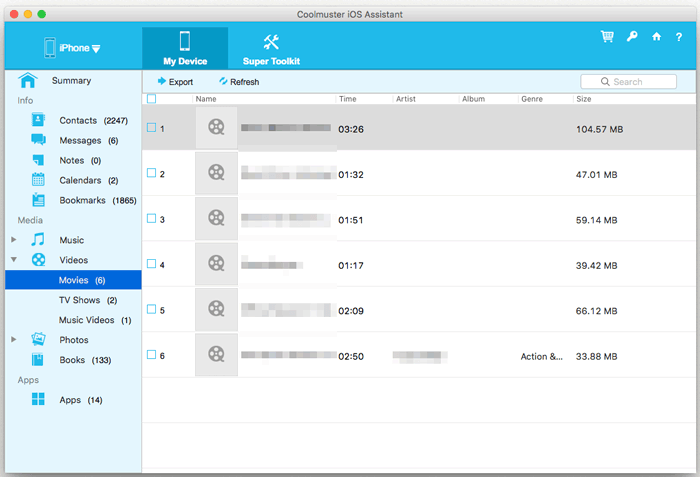
02Now click "Videos" from these files, and choose which videos you want to transfer from iPad to Mac. After selection, click the "Export" option and choose the right file output format. Then your videos on your iPad will be transferred to your Mac automatically.
Video Tutorial:
Using iTunes to transfer your videos from iPad to Mac is another helpful way. But unluckily, you can only transfer the purchased videos because it is involved with copyright problems. However, if you have a lot of videos purchased from the iTunes Store, this method is very suitable for you. Let's see how to transfer videos from iPad to Mac using iTunes together.
Step 1. Make sure you have the latest version of iTunes on your Mac and launch it.
Step 2. Connect your iPad to your Mac with a USB cable and iTunes will automatically recognize your device.
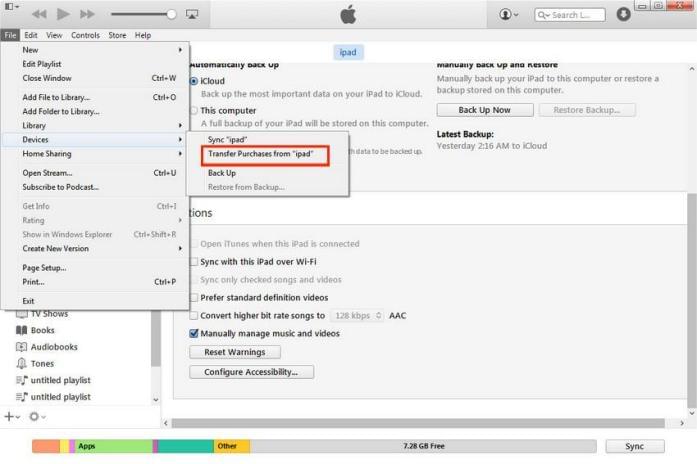
Step 3. Click "Files" > "Devices" > "Transfer Purchases from iPad". This will transfer all purchased content, including videos, from your iPad to the iTunes Library on your Mac, allowing you to enjoy your iPad videos on your computer.
If your cable is available, you can also use the built-in Photos app on your Mac to transfer videos and photos from your iPad to your Mac. But be careful, when using this method you can only transfer your camera shot to the computer.
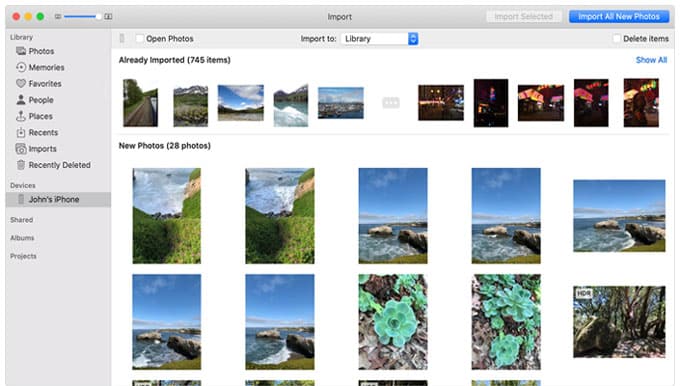
Here is how to transfer videos from iPad to iMac using the Photos app:
Step 1. Connect your iPad to your Mac using a USB cable and select "Trust This Computer" on the iPad.
Step 2. Open the "Photos" app on your Mac and click the "Import" button in the top-left corner.
Step 3. Browse the video files on your iPad and select the videos you want to import.
Step 4. Click "Import Selected" to save the files to your Mac's "Photos" library. (Photos not importing from iPad/iPhone to Mac?)
Now maybe you are curious about whether there is a wireless way to transfer your videos from iPad to Mac. Then why not consider using iCloud? If you have your iCloud enabled, the videos and photos in your iDevice will be automatically synced to the iCloud Photos, and you can access these files on your Mac with the same Apple ID.
How do you transfer videos from iPad to Mac via iCloud? Follow these steps:
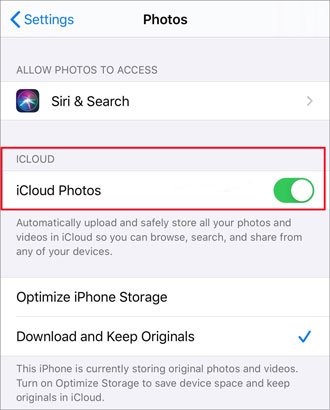
Step 1. Open "Settings" on your iPad and go to the "Apple ID" section, then select "iCloud".
Step 2. Enable the "Photos" option and turn on "iCloud Photos".
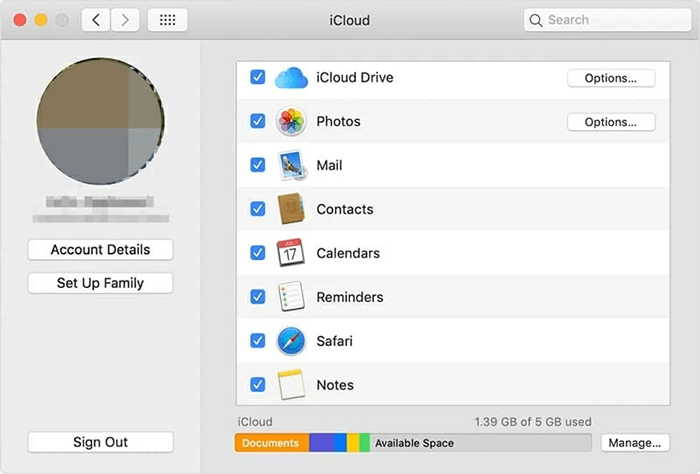
Step 3. On your Mac, open "System Preferences" and log in with the same Apple ID as on your iPad.
Step 4. In the "iCloud" section, check the "Photos" option, then open the "Photos" app to view and download the synced videos. (iCloud photos not syncing?)
Besides using iCloud to transfer videos from iPad to Mac wirelessly, you can also use AirDrop to transfer files between iPad/iPhone and Mac. But you can only transfer them one by one. Here is how to transfer videos from iPad to MacBook Air via AirDrop:
Step 1. On the iPad, open the "Control Center", ensure that Wi-Fi and Bluetooth are turned on, and enable AirDrop. Set the receiving permission to "Everyone" or "Contacts Only". (AirDrop not working on iPhone/iPad?)
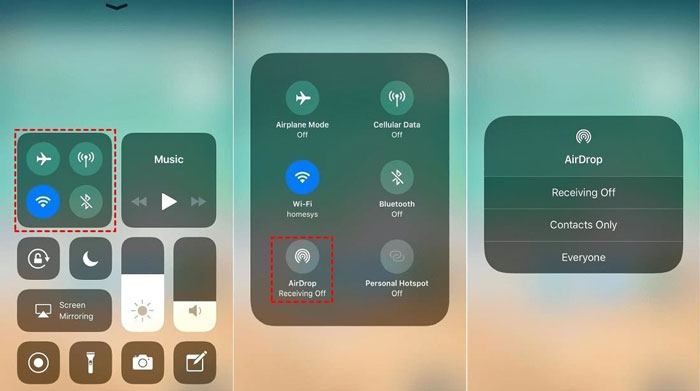
Step 2. On the Mac, ensure that Wi-Fi and Bluetooth are turned on, and enable AirDrop. Set the receiving permission to match the iPad's settings.

Step 3. Open the "Photos" app on the iPad, select the video you want to transfer, tap the "share" icon, and then choose the Mac's device name.
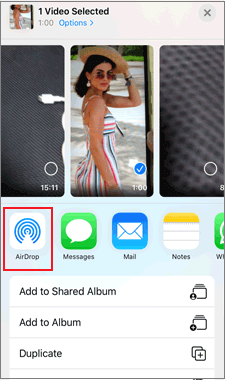
Step 4. When a prompt appears on the Mac, click "Accept", and the video will be saved to the "Downloads" folder.
Email is one of the most traditional methods of file transfer, suitable for sending smaller video files. However, the file size is limited, and the transfer speed depends on the network. Here is how to export video from iPad to Mac using email:
Step 1. Open the Mail app on the iPad and create a new email.
Step 2. Tap "Attach File" and select the video file you want to send.
Step 3. Enter your own email address and send the email.
Step 4. On the Mac, log in to your email and download the attachment to your local storage.

Generally, all these methods can be helpful if you are trying to find a way to transfer your videos from iPad to Mac. But compared to other methods, Coolmuster iOS Assistant has a prominent advantage. It seldom has limits on the types of video and you can transfer any videos as you like. Just trust it and have a try if you need your videos transferred from iPad to Mac.
Related Articles:
How to Transfer Videos from Mac to iPad? (Step-by-step Tutorial)
[Guide] How to Transfer iPad Photos to Mac via USB and Wirelessly?
How to Transfer Files from Mac to iPad? 4 Easy Ways for You
[Step-by-Step Guide] How to Transfer Videos from Mac to iPhone?


 Free Download for Mac
 Free Download for PC

