iCloud is Apple's official cloud storage service that lets you securely store and sync photos, videos, contacts, documents, music, apps, and more across your iPhone, iPad, iPod touch, Mac, and even Windows PC. Once enabled, it automatically keeps your data updated on all devices using the same Apple ID and creates backups for easy restoration. However, some users prefer to disable iCloud due to privacy concerns, limited storage space, or syncing issues.
Whether you want to turn iCloud on for seamless data access or switch it off to stop syncing, this step-by-step guide will show you how to enable or disable iCloud on iOS, Mac, and Windows safely and correctly.
![]()
Before turning iCloud on or off, it's important to understand how it affects your data, backups, and device syncing. Many users worry about losing files or exposing personal information. Here's what actually happens.
When you enable iCloud on your iPhone, iPad, Mac, or Windows PC:
This is ideal for users who own multiple Apple devices and want seamless data management.
Disabling iCloud does not immediately delete everything, but it changes how your data is handled:
Important: Turning off iCloud does not delete data already stored in your iCloud account unless you manually remove it.
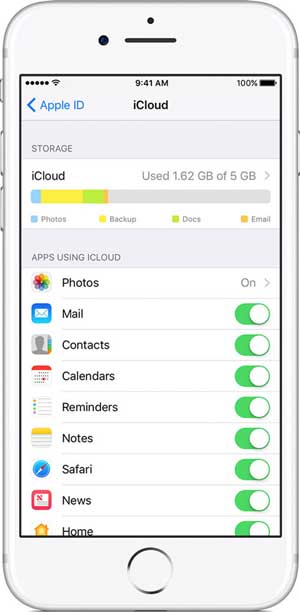
If you're using an iPhone, iPad, or iPod touch, you can enable or disable iCloud directly from Settings. You can either sign in or out of iCloud completely, or simply turn off specific features like Photos or Backup.
If you haven't signed in with your Apple ID:
After signing in, iCloud will automatically activate default syncing options.
If you want to disable iCloud entirely:
Once signed out, iCloud syncing and backup will stop on that device. (iCloud Drive Not Syncing?)
If you only want to manage certain services:
Turning off a specific feature stops syncing for that data only.
If your goal is just to stop automatic backups:
This prevents future cloud backups but keeps other iCloud services active.
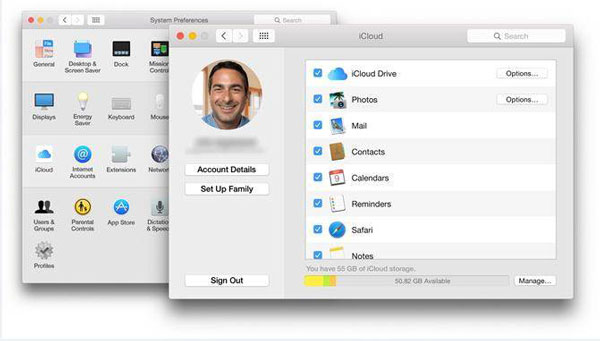
On a Mac, you can manage iCloud through System Settings (or System Preferences on older macOS versions). You can sign in or out completely, or simply turn off selected iCloud features.
If you haven't signed in with your Apple ID:
For macOS Ventura and later:
For macOS Monterey or earlier:
After signing in, your Mac will begin syncing selected data automatically.
If you want to disable iCloud entirely:
On macOS Ventura and later:
On macOS Monterey or earlier:
After signing out, iCloud syncing and backups will stop on that Mac.
If you only want to manage certain services:
Disabling a specific feature only stops syncing that category of data while keeping your Apple ID signed in.
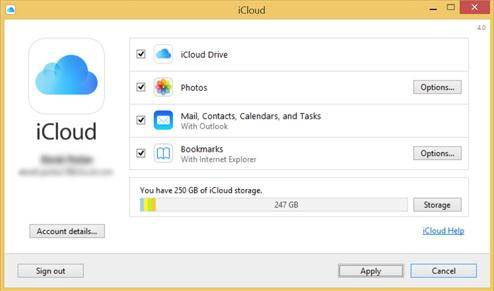
If you use a Windows computer, you can still access and manage iCloud by installing iCloud for Windows. This allows you to sync photos, mail, contacts, calendars, bookmarks, and iCloud Drive files between your PC and Apple devices.
Before getting started, make sure you have installed iCloud for Windows from the Microsoft Store or Apple's official website.
Your selected data will now sync between your Windows PC and Apple devices. (How to Download iCloud Backup Files to PC?)
If you only want to stop syncing certain data:
This stops syncing that specific category but keeps your Apple ID signed in.
To fully turn off iCloud on your PC:
After signing out, all iCloud syncing will stop on that computer. Your data stored in iCloud will remain safe in your account unless you manually delete it.
What if you didn't enable iCloud backup, or your iCloud storage was already full? Don't worry. You can still recover lost data using other methods - even without an iCloud backup. One reliable solution is Coolmuster iPhone Data Recovery, a professional tool designed to retrieve deleted or lost data from iPhone, iPad, and iPod touch.
Why Choose Coolmuster iPhone Data Recovery?
How to Recover Data from iPhone or iPad Directly without iCloud Backup:
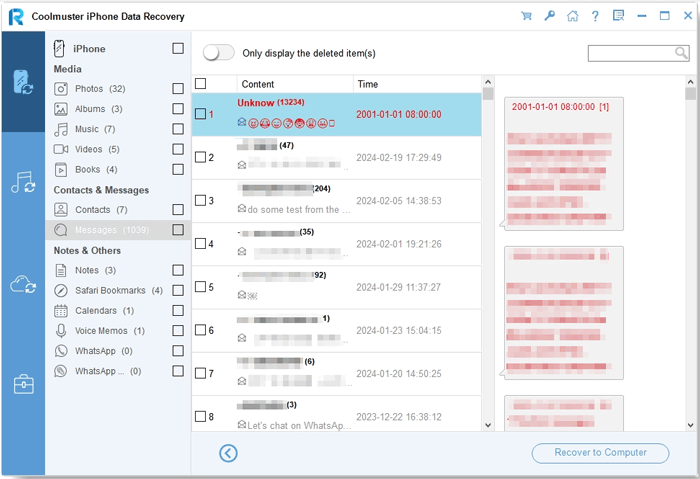
01 Download and install Coolmuster iPhone Data Recovery on your computer. Launch the program and select "Recover from iOS Device" mode.
02 Connect your iPhone via USB, and wait for the program to detect your iPhone.

03 Choose the data types you want to recover and click "Start Scan".
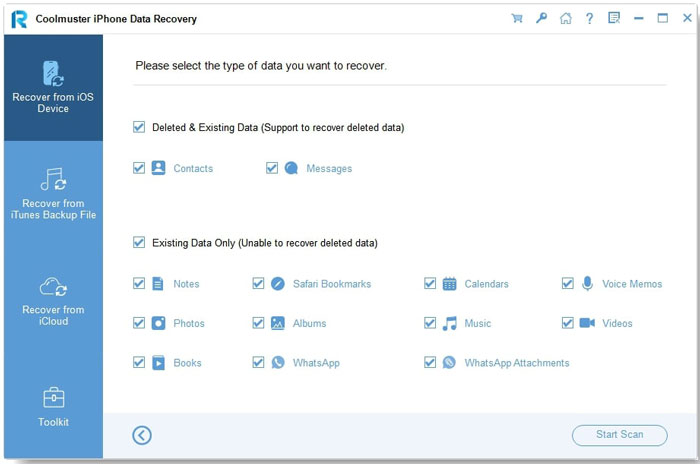
04 Preview the found files and select the ones you need. Click "Recover to Computer" to save them.
How to Recover Data from iTunes Backup without iCloud:
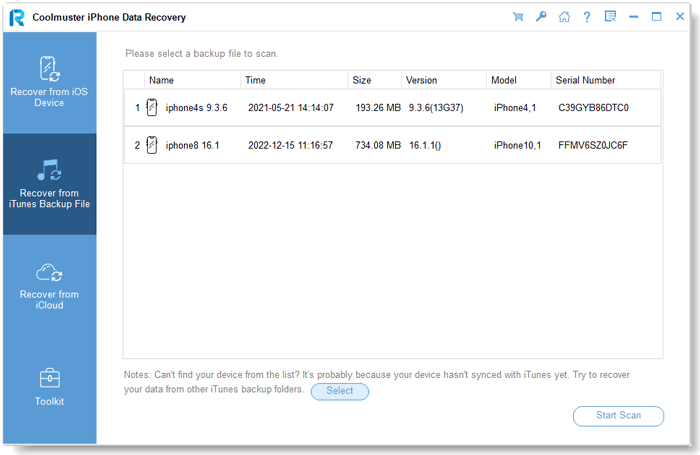
01If you previously made an iTunes backup, open the program and choose "Recover from iTunes Backup File". Select the iTunes backup file you need and click "Start Scan".
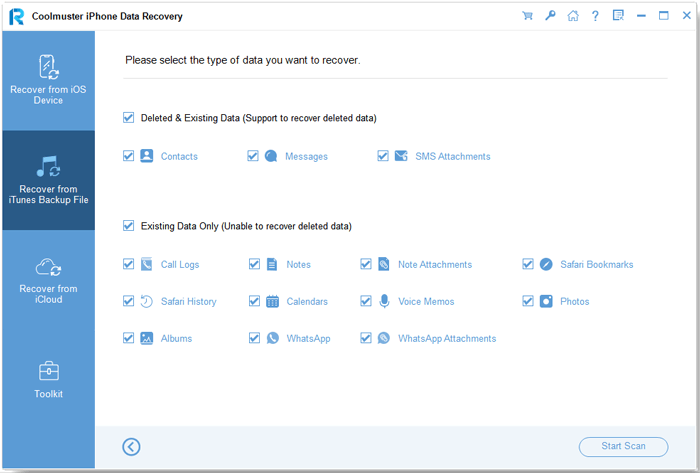
02Select the data types you wish to recover, and click on the "Start Scan" button.
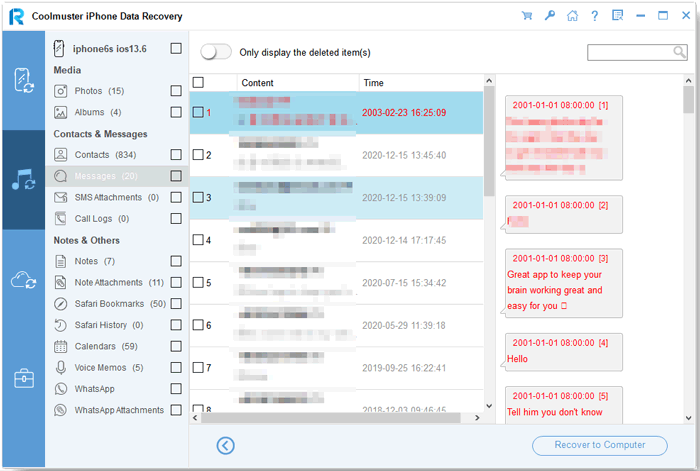
03Preview and select the data you want, and finally click the "Recover to Computer" option.
Video Guide:
Enabling or disabling iCloud on iPhone, iPad, Mac, or Windows is simple once you understand how it affects syncing and backups. Whether you want seamless cross-device access or prefer more control over your privacy and storage, you can adjust iCloud settings anytime. Before turning it off, always make sure your important data is safely backed up. And if you lose files without an iCloud backup, tools like Coolmuster iPhone Data Recovery can help you restore your data quickly and securely.
Related Articles:
[Updated] How to Download iCloud Backup in 4 Easy Methods
How to Access iCloud Photos on iPhone/PC/Mac Seamlessly


 Free Download for PC
  Free Download for Mac

