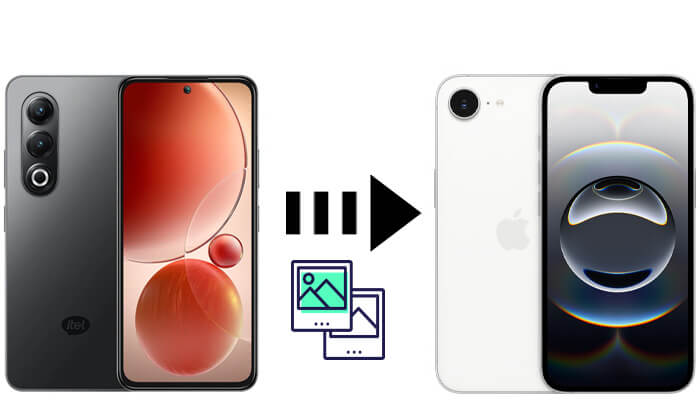
itel smartphones are known for their affordability and solid camera features, making them popular for capturing everyday moments. But if you recently switched to an iPhone or simply want to edit, save, or share your itel photos on iOS, you may be wondering how to transfer photos from itel to iPhone/iPad.
Since itel runs on Android and iPhone/iPad runs on iOS, there's no direct Bluetooth transfer available. The good news is that there are several reliable methods to move your pictures across platforms. Below, we'll walk you through five effective ways.
The most efficient way to transfer photos from itel to iPhone/iPad is by using a professional third-party tool like Phone Transfer. This software is designed for seamless data transfer between Android and iOS devices. It supports photos, videos, contacts, music, and more, making it a one-stop solution. Unlike manual methods, it is user-friendly, fast, and ideal for bulk transfers.
Highlights of Phone Transfer:
How do I transfer photos from itel to iPhone using Phone Transfer? Follow the steps below:
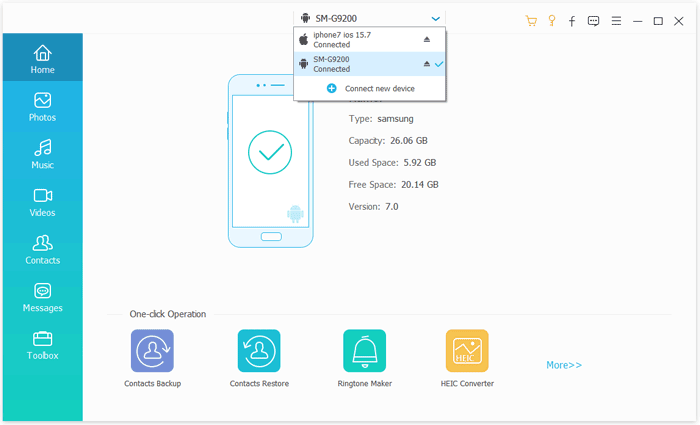
01Download, install, and open Phone Transfer on your computer. Connect both your itel and iPhone (or iPad) using USB cables.
02Once the devices are detected, they will show up on the screen. Ensure your itel is selected as the source. If not, use the drop-down menu to swap the source and destination.
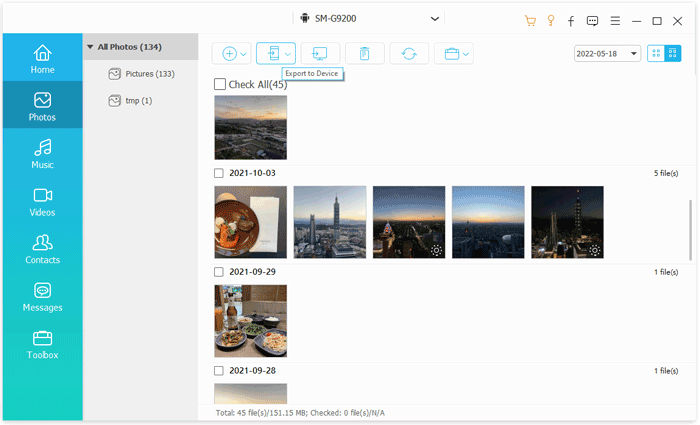
03Select the "Photos" option. Choose the photos you wish to transfer, then click "Export to Device". Your selected photos will be transferred to your iPad or iPhone instantly.
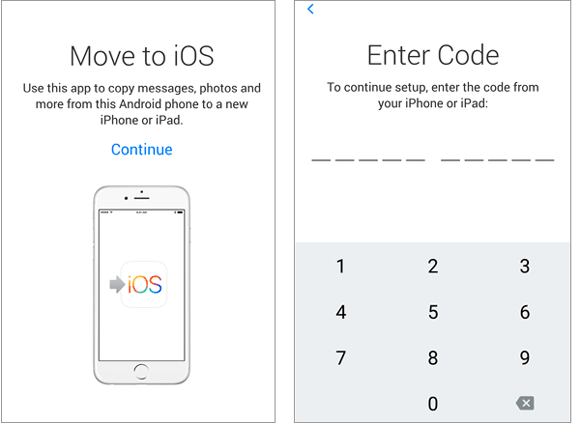
Apple provides its own migration tool called Move to iOS, designed to help Android users transfer data when setting up a brand-new iPhone/iPad. This app works wirelessly and can transfer photos, contacts, messages, and more. However, it can only be used during the initial setup of your iPhone/iPad, not afterward. (Move to iOS not working?)
Here is how to move photos from itel to iPhone via Move to iOS:
Step 1. On your itel phone, download and install the Move to iOS app from Google Play.
Step 2. Turn on your new iPhone/iPad and go through the setup process until you reach the "Apps & Data" screen.
Step 3. Select "Move Data from Android".

Step 4. On the itel phone, open the Move to iOS app and enter the code displayed on your iPhone/iPad.
Step 5. Choose "Photos" from the data list and tap "Continue".
Step 6. Wait for the transfer to finish. Your photos will then appear in the iPhone's Photos app.
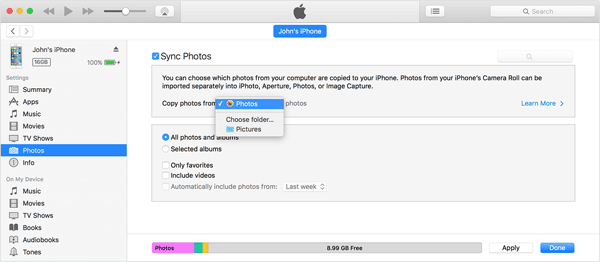
For those who prefer using a computer, iTunes provides another method to transfer photos from itel to iPhone. This process involves moving photos from your itel to your computer first and then syncing them to your iPhone with iTunes. Though not the fastest method, it remains a reliable option for iTunes users. (How to sync itel to PC?)
Here is how to do it:
Step 1. Connect your itel phone to the computer and copy the desired photos into a folder.
Step 2. Open iTunes and connect your iPhone/iPad.
Step 3. Click the device icon in iTunes and go to the "Photos" section.
Step 4. Tick "Sync Photos" and choose the folder containing your itel photos.
Step 5. Click "Apply" and wait for iTunes to sync.
If you prefer a wireless solution and don't mind using cloud storage, Google Drive can help you sync and access your itel photos on an iPhone/iPad. By uploading photos to the cloud on your itel and downloading them on your iPhone/iPad, you can complete the transfer without cables.
Here is how to sync photos from itel to iPhone/iPad using Google Drive:
Step 1. On your itel phone, download and install the Google Drive app from the Google Play Store.
Step 2. Open the app and log in with your Google account (create one if you don't already have one).
Step 3. Tap the "+" button and select "Upload", then choose the photos from your itel gallery that you want to move.
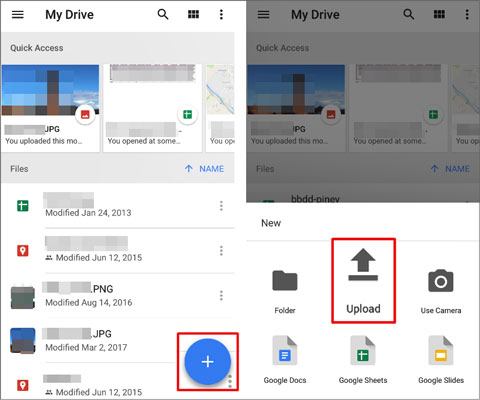
Step 4. Wait until all the photos are fully uploaded to Google Drive. This may take some time, depending on your internet speed and the number of pictures.
Step 5. On your iPhone, download and install the Google Drive app from the App Store.
Step 6. Open the app and log in with the same Google account used on your itel phone.
Step 7. Browse to the folder where you uploaded the photos, tap on each one, and choose "Save Image" or "Save to Camera Roll".
Step 8. After downloading, the photos will now appear in your iPhone's Photos app.
If you only need to send a handful of pictures, email is one of the simplest ways to transfer photos from itel to iPhone/iPad. By attaching photos to an email and sending it to yourself, you can easily download them on your iPhone/iPad.
Here is how to do it:
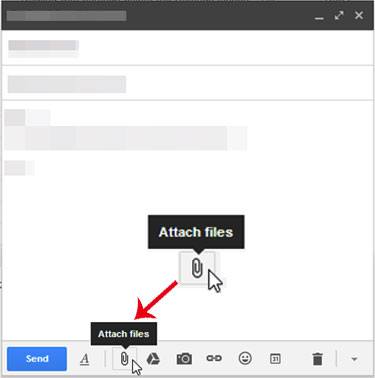
Step 1. On your itel phone, open your email app and compose a new message.
Step 2. Attach the photos you want to transfer.
Step 3. Send the email to your own email address.
Step 4. On your iPhone/iPad, open the same email account and download the attachments.
Step 5. Save the photos to your Camera Roll.
There are several ways to transfer photos from itel to iPhone/iPad, including Email, Google Drive, Move to iOS, and iTunes. Each method has its own advantages depending on your situation, but if you want the fastest, easiest, and most reliable solution, Phone Transfer is the top choice. It not only ensures quick photo transfer but also supports other data types, giving you a smooth transition from itel to iPhone/iPad without hassle.
Related Articles:
How to Transfer Photos from Android to iPhone Wirelessly
How to Transfer Text Messages from itel to iPhone? Solved in 2 Easy Ways
How to Transfer Apps from Android to iPhone [Ultimate Guide 2025]


 Free Download for PC
  Free Download for Mac

