TL;DR: Want to know how to delete files without sending them to the Recycle Bin? This guide covers four built-in Windows methods, including changing Recycle Bin settings, using Shift + Delete, Command Prompt, and PowerShell. If you need to permanently delete files without sending them to the Recycle Bin and prevent data recovery, Coolmuster Data Erasure provides a secure solution by permanently wiping files with advanced erasing technology.
In Windows, when you delete a file normally, it is not removed immediately. Instead, it is moved to the Recycle Bin. While this design allows users to recover accidentally deleted files, it can also become inconvenient when you need to quickly remove unnecessary files, free up storage space, or permanently delete sensitive data. So, how to delete files without sending to Recycle Bin? This guide introduces several simple and effective methods.
Windows provides several ways to delete files while bypassing the Recycle Bin. Below are four simple and effective methods. You can choose the one that best suits your needs.
If you frequently delete files and don't want Windows to store them in the Recycle Bin, changing the Recycle Bin settings is the simplest solution. After adjusting this option, Windows will permanently delete deleted files immediately instead of moving them to the Recycle Bin.
How do I delete a file without going to the Recycle Bin?
Step 1. Right-click the "Recycle Bin" icon on your desktop.
Step 2. Select "Properties" from the context menu.
Step 3. Choose the drive where you want to change the deletion behavior and select "Don't move files to the Recycle Bin. Remove files immediately when deleted".
Step 4. Click "Apply" and then select "OK" to confirm the changes.
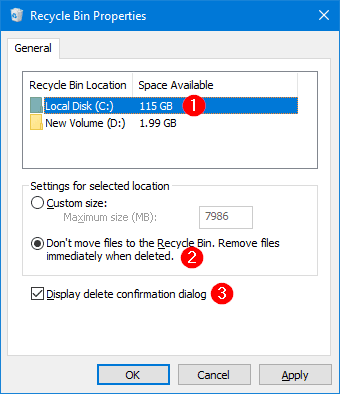
After completing these steps, deleted files will no longer go through the Recycle Bin. Instead, they will be removed immediately after deletion.
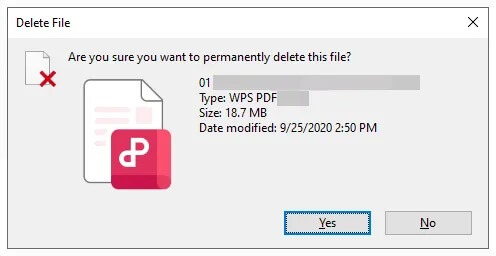
If you only want to temporarily delete a file without changing system settings, you can use the Windows shortcut Shift + Delete. It bypasses the Recycle Bin and directly deletes the selected file or folder.
How to delete without sending to the recycling bin?
Step 1. Open File Explorer and locate the file or folder you want to delete.
Step 2. Select the target file and press "Shift" + "Delete" on your keyboard.
Step 3. A confirmation window will appear asking whether you want to permanently delete the file; click "Yes" to confirm. The selected file will be deleted immediately without being moved to the Recycle Bin.
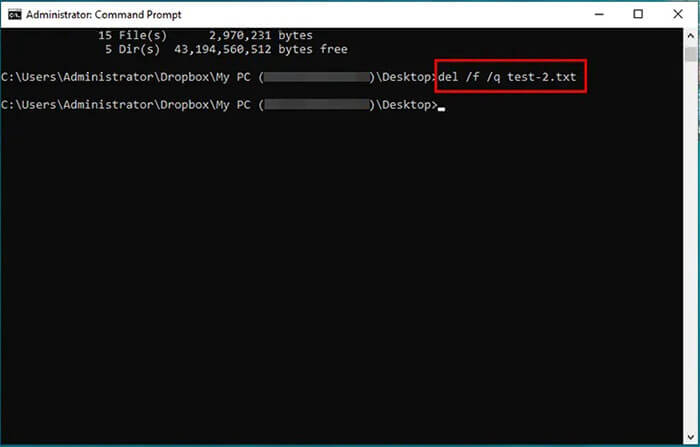
Windows Command Prompt can also help users delete files without sending them to the Recycle Bin. This method is suitable for users who are familiar with command-line operations and is especially convenient when deleting files in batches.
How to delete without moving to the Bin?
Step 1. Press "Windows" + "R" to open the Run dialog box.
Step 2. Type "cmd" and press "Enter" to launch Command Prompt.
Step 3. To delete a file, enter the following command: del /f /q "file path". (For example: del /f /q "C:\Users\Example\Desktop\sample.txt")
Step 4. Press "Enter" to execute the command.
Step 5. To delete an entire folder, use: rmdir /s /q "folder path".
PowerShell is another built-in Windows tool that can help users permanently delete files without sending them to the Recycle Bin. Compared with Command Prompt, PowerShell provides more advanced features and is commonly used for automation and batch file management.
Here is how to delete files without sending them to the Recycle Bin via PowerShell:
Step 1. Search for PowerShell in the Windows search bar.
Step 2. Right-click "Windows PowerShell" and select "Run as administrator".
Step 3. Enter the following command: Remove-Item -Path "file path". (For example: Remove-Item -Path "C:\Users\Example\Desktop\test.txt")
Step 4. Press "Enter" to delete the file.
Step 5. To delete a folder and all files inside it, use: Remove-Item -Path "folder path" -Recurse.
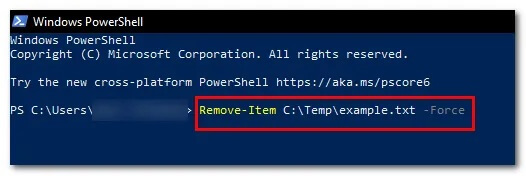
Although Windows built-in methods allow files to bypass the Recycle Bin during deletion, these methods usually only remove the file access path rather than actually overwriting the data stored on the hard drive. If the files contain private information, such as personal photos, work documents, account details, or financial records, they may still be recovered using data recovery tools even after deletion.
If you want to permanently delete files and ensure that the data cannot be recovered, you can use a professional data erasure tool, such as Coolmuster Data Erasure. Coolmuster Data Erasure focuses on secure data deletion and helps users permanently erase files, folders, and sensitive information from their computers. It uses professional data erasure technology to overwrite original data, making deleted files impossible to recover. This makes it an ideal choice for users who need to protect their privacy.
Main features of Coolmuster Data Erasure:
Here is how to permanently delete files without sending them to the Recycle Bin:
01Launch Coolmuster Data Erasure and choose the "File Shredder" mode to permanently delete files without sending them to the Recycle Bin.
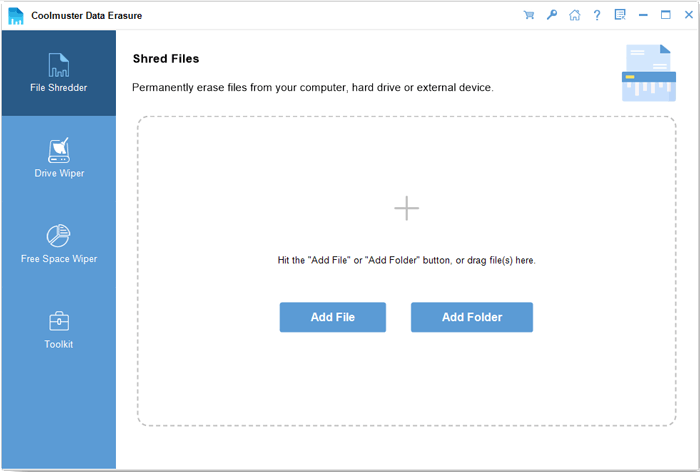
02Add the files or folders you want to delete securely, then browse your computer and select the specific items you need to erase.
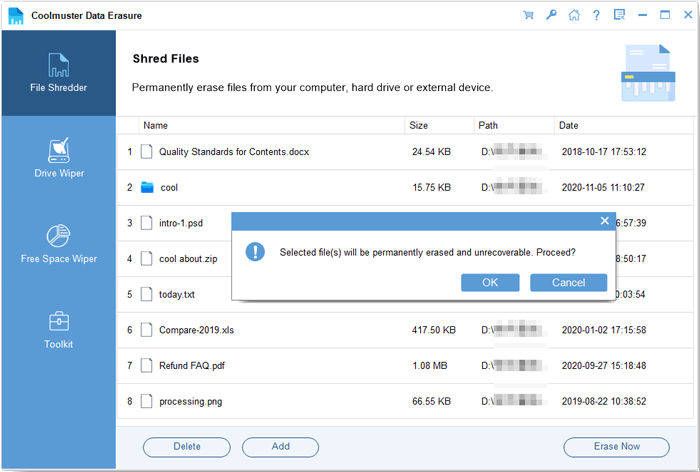
03Click "Erase Now" and confirm the deletion. The selected files will be permanently removed and cannot be recovered, so make sure you have chosen the correct files before proceeding.
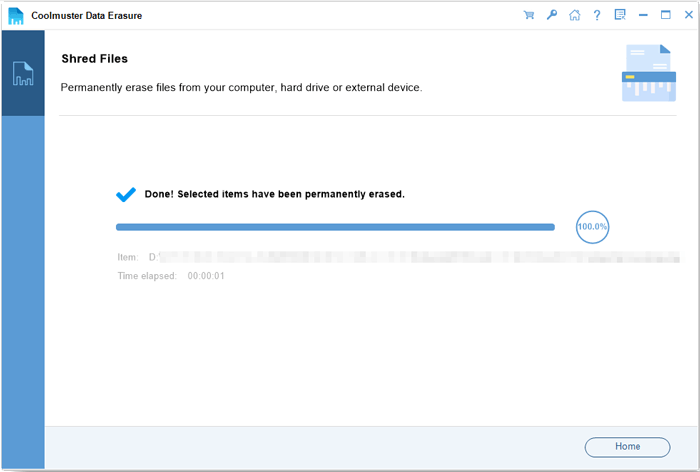
Video Tutorial:
After learning how to delete files without sending them to the Recycle Bin, you can choose the right method based on your needs.
No matter which method you choose, it is always recommended to double-check the file contents before deleting important files to avoid accidentally removing data that cannot be recovered.
Related Articles:
How to Prevent Deleted File Recovery on Windows/Mac: Full Guide
How to Permanently Delete Word Documents on Windows & Mac?
[Ultimate Guide] How to Permanently Delete PDF Files on Computer?
How to Permanently Shred PowerPoint Files on PC: 3 Reliable Methods






 Free Download for PC


