If you're using an iPhone or modern Mac, you've likely noticed photos saved in HEIC format instead of JPG. While HEIC offers better compression and high quality, it's not widely supported across all platforms. This can make it difficult to open HEIC images on some devices or programs. That's why many users search for ways to convert HEIC to JPG on a Mac. JPG is one of the most compatible image formats, making it easier to upload, share, or edit photos.
In this guide, we'll show you how to convert HEIC to JPG on Mac using five different methods, including built-in tools and professional software. Let's look together.
If you need to convert a large number of HEIC images at once, using professional tools is usually the most time-efficient method. Coolmuster HEIC Converter is a software specifically designed for HEIC format conversion, allowing you to quickly batch convert HEIC to JPG or PNG on both Mac and Windows.
The main advantage of this tool is its ability to batch convert while maintaining the original image quality. You can import multiple HEIC images at once and complete the conversion in seconds. Additionally, it preserves the EXIF data, such as capture time and device information, making it ideal for users who need to manage a large collection of photos.
The key features of Coolmuster HEIC Converter:
Here is how to convert HEIC to JPG on Mac without losing quality using Coolmuster HEIC Converter:
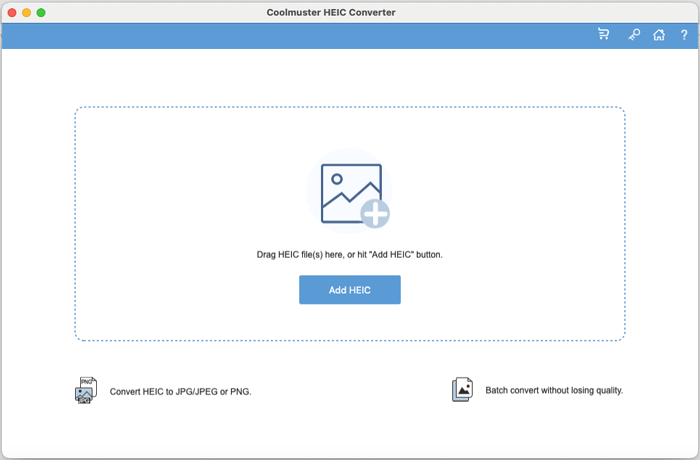
01Download and install the software on your Mac, then open it.
02Add your HEIC files by clicking "Add HEIC" or dragging and dropping them into the area marked "Drop files here".
03Choose your desired output format (JPG/JPEG or PNG) and enable "Keep Exif Data" if you want to preserve metadata.
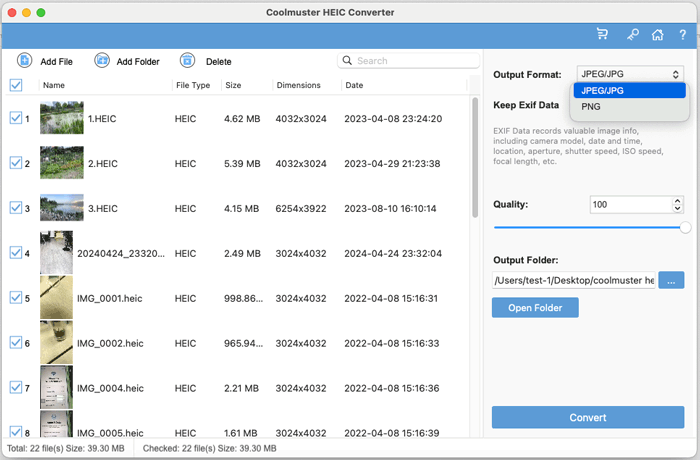
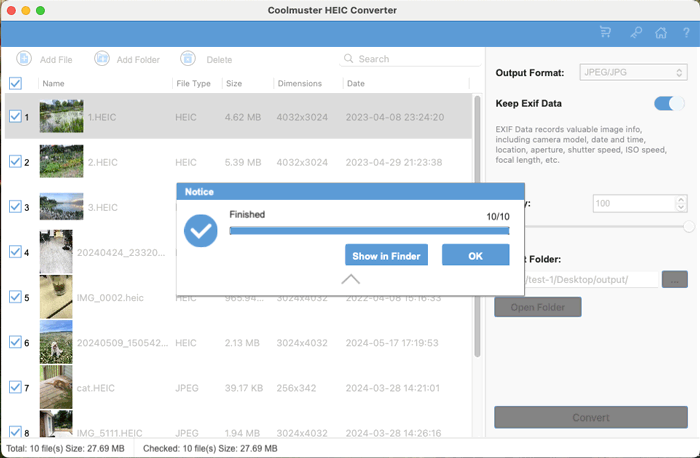
04Adjust the quality, set a destination folder, and click "Convert" to instantly convert your HEIC files.
Video Tutorial:
If you only need to convert a few HEIC images, the built-in Preview tool on your Mac will do the job. Preview is the default image and PDF viewer in macOS, and in addition to viewing images, it also supports basic image editing and format conversion.
The advantage of using Preview is that no additional software is required, and the process is simple and intuitive. However, this method is better suited for converting a single image or a small number of images. If you need to process a large batch of HEIC files, it may be less efficient.
How do I change a HEIC to JPG on Mac? Follow these steps:
Step 1. Locate the HEIC image you want to convert on your Mac.
Step 2. Right-click on the image and select "Open With" > "Preview".
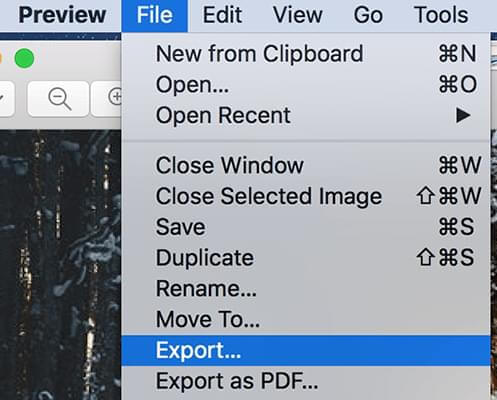
Step 3. Once the image opens in Preview, click "File" in the menu bar.
Step 4. From the drop-down menu, choose "Export".
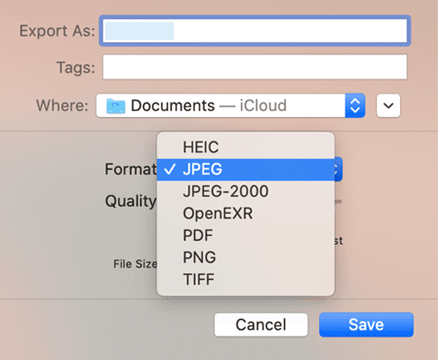
Step 5. In the "Format" drop-down, select "JPEG".
Step 6. Adjust the image quality if needed and choose the save location.
Step 7. Click "Save" to convert the HEIC image to JPG.
If your HEIC photos are stored in the Photos app, you can also convert them to JPG directly using the export feature. Here is how to convert HEIC to JPG on a MacBook Air using the Photos app:
Step 1. Open the Photos app on your Mac and import your HEIC photo if it's not already in the app. (Can't import photos from iPhone to Mac?)
Step 2. Select the HEIC photo you want to convert.
Step 3. Click "File" in the menu bar, then choose "Export" > "Export X Photos".
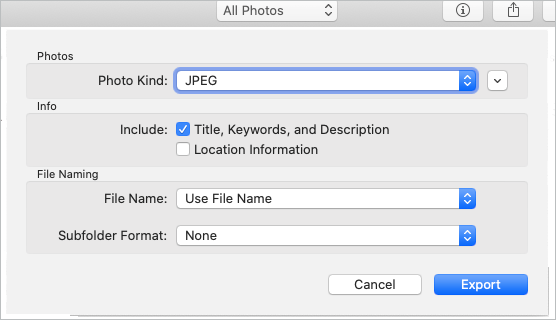
Step 4. In the export settings, set "Photo Kind" to "JPEG" and adjust the image quality.
Step 5. Select a destination folder and click "Export" to save the photo as a JPG file.
For users who need to automate image format conversion, they can use the built-in Automator tool on macOS. Automator allows you to create workflows that automatically perform certain tasks, such as batch converting image formats. Although setting up Automator can be a bit complex, once the workflow is created, it enables quick processing of large numbers of HEIC images.
Here is how to convert HEIC to JPG on Mac in bulk with Automator:
Step 1. Open "Finder" > "Applications" > "Automator".
Step 2. Select "Quick Action" or "Service" and click "Choose".
Step 3. Set "Workflow receives current" to "image files".
Step 4. In the "Actions Library", select "Photos" and drag "Change Type of Images" to the workflow area.
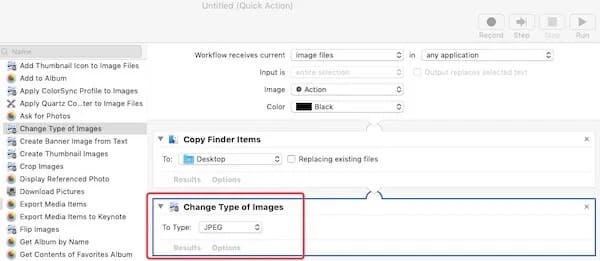
Step 5. Click "Add" to confirm, then set the image type to "JPEG".
Step 6. In the "File" menu, choose "Export", name the workflow, and save it.
Step 7. Double-click the saved workflow and click "Install".
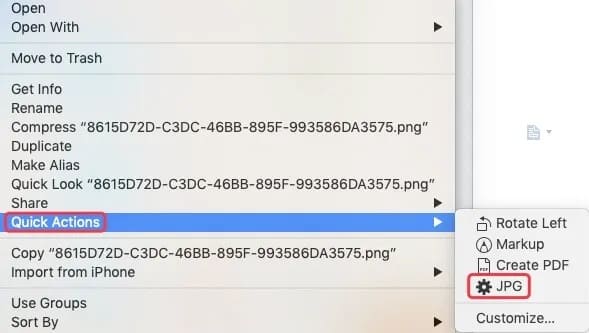
Step 8. In Finder, right-click your HEIC images, choose "Quick Actions" or "Services", and select the gear icon with JPG.
Step 9. The converted JPGs will be saved in the same location as the workflow.
macOS also offers a very convenient feature called Quick Actions. Through the right-click menu in Finder, you can directly convert the format of images without opening any applications. This method is ideal for quickly converting a single image or a small number of images.
How do I convert HEIC to JPG on Mac via Quick Actions?
Step 1. Open Finder and locate the HEIC image.
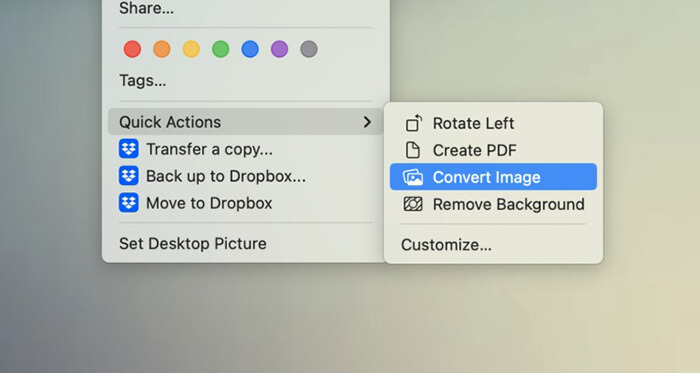
Step 2. Right-click the image and select "Quick Actions".
Step 3. Choose "Convert Image".
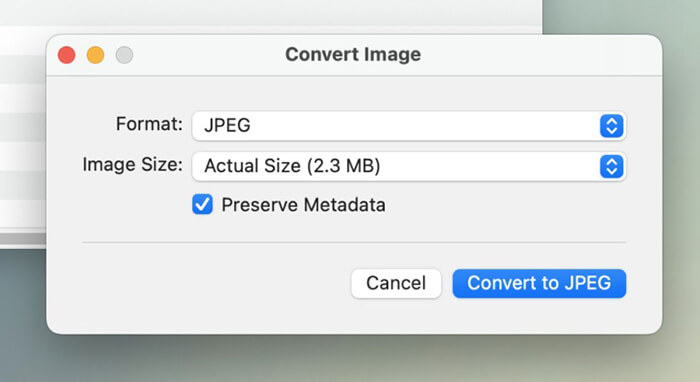
Step 4. Select "JPEG" as the output format.
Step 5. Click "Convert to JPEG" to finish. The JPG will be saved in the same folder.
Now you know several effective ways to convert HEIC to JPG on Mac. If you only need to convert a few images occasionally, built-in tools like Preview, Photos, or Quick Actions can handle the task without installing additional software. However, if you regularly deal with large numbers of HEIC files, a dedicated tool such as Coolmuster HEIC Converter is the most efficient solution. It allows you to batch convert HEIC to JPG on Mac, preserve EXIF data, and maintain high image quality—all with just a few clicks.
Choosing the right method depends on your needs, but with the solutions above, converting HEIC images on Mac should be quick and hassle-free.
Related Articles:
12 Best HEIC to JPG Converter on Windows/Mac/Online [Latest Update]
[Solved] How to Print HEIC Photos on Windows and Mac Easily?
[Easy Guide] How to Open HEIC Files in Photoshop on Windows/Mac?
How to Convert HEIC to JPG on Google Drive - 4 Effective Ways


 Free Download for Mac
 Free Download for PC

