Why are my photos HEIC instead of JPG on iPhone? That's because Apple defaults to using HEIC, aiming to optimize both image quality and storage efficiency. However, if you prefer the widespread compatibility of JPEG or need to use applications that support this format, you'll need to explore how to take JPEG on iPhone. This article provides four simple methods, so let's take a look together.
Are iPhone photos JPEG? The answer is no. iPhone photos are typically captured and stored in the High-Efficiency Image Format (HEIC). HEIC is the default photo format used by Apple devices, starting from iOS 11 and later. It is a modern image format that offers efficient compression without compromising image quality. The HEIC format is known for producing smaller file sizes compared to JPEG while maintaining excellent detail and color accuracy.
Why does the iPhone use HEIC? Here are some reasons:
While HEIC offers these advantages, Apple recognizes that compatibility with other platforms and devices is essential for users. Therefore, it is essential to learn how to take a JPEG on iPhone.
If you want to learn more about the difference between HEIC and JPEG, you can read the following article.
HEIC V.S. JPEG: What Is the Difference between HEIC and JPG?Converting your iPhone photos to JPEG can be achieved directly on your device or with the assistance of a computer.
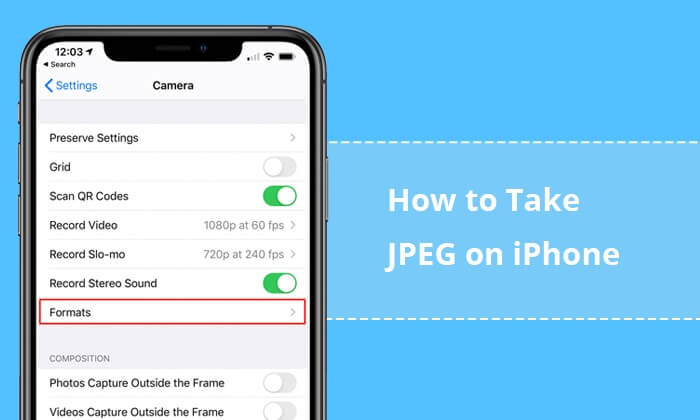
Your iPhone settings offer a quick solution to automatically capture images in the JPEG format. Follow these steps to configure your settings accordingly:
Step 1. Launch the "Settings" app on your iPhone.
Step 2. Scroll down and tap on "Camera" to access camera settings.
Step 3. Under the Camera settings, find and tap on "Formats".
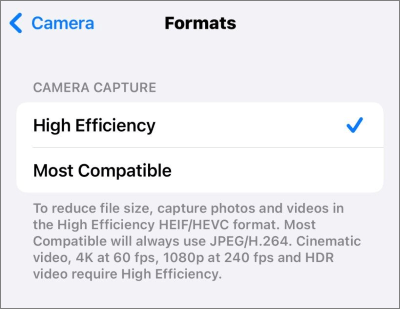
Step 4. Choose the "Most Compatible" option. This ensures that your iPhone captures photos in JPEG format.
If you prefer capturing HEIC files but wish to avoid compatibility issues on devices that do not natively support the format, there's a hidden toggle in your settings that can automatically convert images to a compatible format during transfer. Here is how to do it:
Step 1. Open the "Settings" app and navigate to "Photos".
Step 2. Tap on "Automatic", located at the bottom of the screen under "Transfer to Mac or PC".
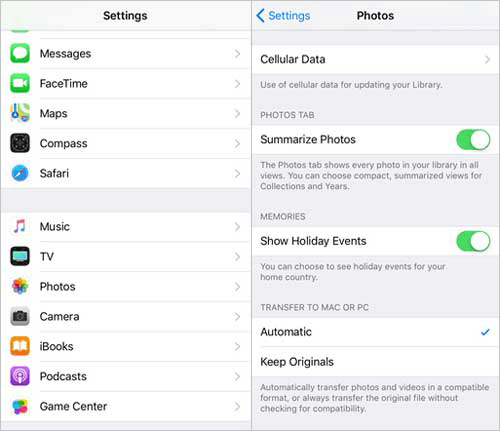
This setting proves highly beneficial, ensuring that whenever you transfer photos from your iPhone to a Mac or PC, they will be automatically sent in JPEG format instead of HEIC.
Coolmuster HEIC Converter is a user-friendly and efficient software specifically crafted for seamless HEIC to JPEG conversion. Not only does Coolmuster excel in maintaining image quality throughout the conversion process, but it also offers the convenience of batch processing. This feature enables users to convert multiple HEIC files to JPEG simultaneously, streamlining the overall workflow.
Key Features:
Here is how to take JPEG on iPhone using Coolmuster HEIC Converter:
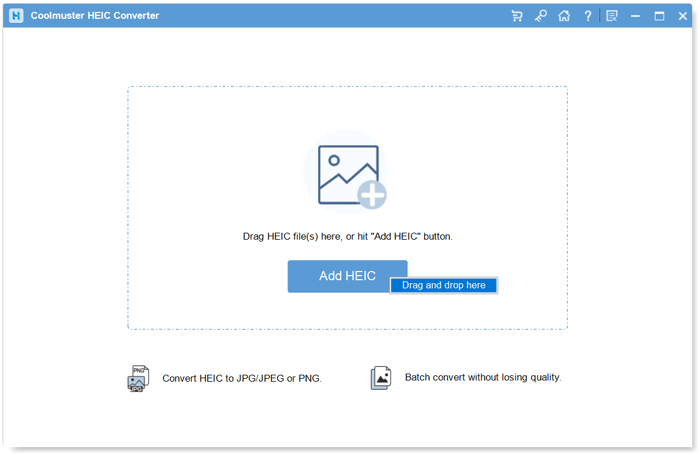
01Download, install, and launch Coolmuster HEIC Converter on your computer.
02Click the "Add HEIC" button to add the HEIC image you want to convert. Alternatively, you can also drag your images into the frame with a dotted line and select the "Drag and drop here" icon.
03Once you've imported the HEIC photos, choose "JPG" as the output format, enable "Keep Exif Data" to preserve the original information, and specify the destination folder by clicking on "Browse".
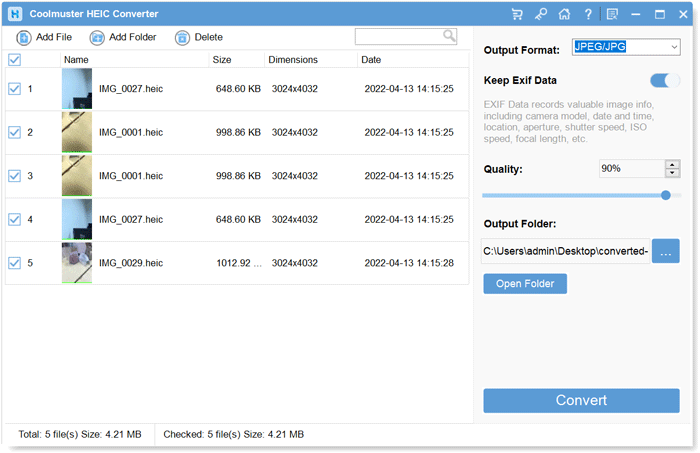
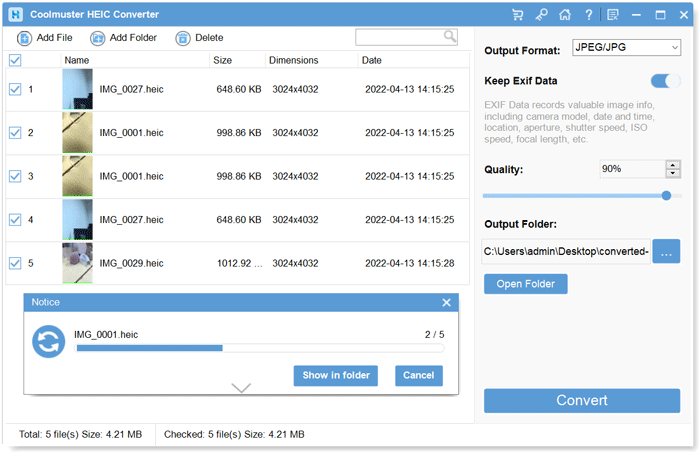
04After adjusting the settings, initiate the conversion process by clicking the "Convert" button.
Video Tutorial:
Copying photos from the Photos app to the Files app allows for the immediate saving of files as JPEG. Consequently, this method could be the fastest way to convert HEIC photos to JPEG on iPhone. Here is how to take a JPEG on iPhone using the Files app:
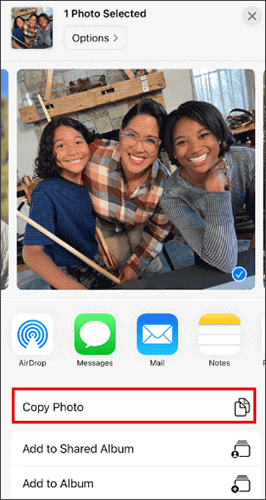
Step 1. Open the Photos app on your iPhone and select the photos you want to convert.
Step 2. Tap the "Share" icon at the bottom of the screen and choose "Copy Photo".
Step 3. Navigate to the Files app, tap "Browse", select "On My iPhone", and choose a folder to save the JPEG photos.
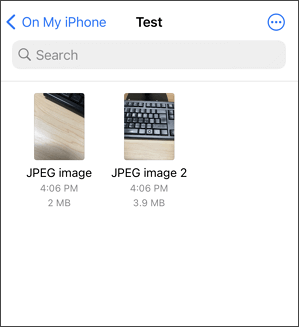
Step 4. Press and hold any blank area, then tap "Paste". Now, you'll find the photos saved as JPEG files on your iPhone.
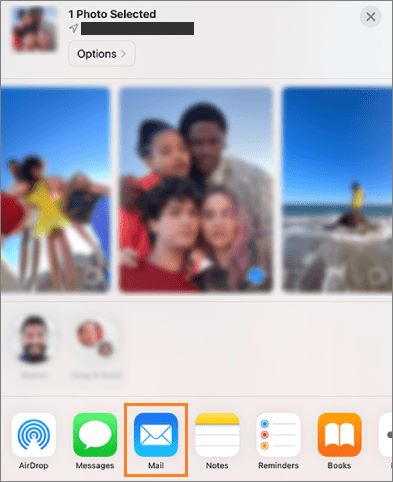
Surprisingly, Apple's default Mail app serves more than just sending emails. It can also be employed to convert HEIC to JPEG on iPhone effortlessly. The process is straightforward. When you transmit HEIC images via email, the email application automatically transforms them into a universal format, ensuring easy accessibility on any device. Here are the steps:
Step 1. Launch the Photos app on your iPhone. Select the HEIC files you want to convert, then tap the "Share" button. Choose "Mail" as the sharing option.
Step 2. Enter your email address in the mail app and send the selected pictures as attachments.
Step 3. Access the email containing the pictures on your iPhone. Download the images, and they will now be in JPEG format.
Now you know how to take JPEG on iPhone. With the various methods explored in this article, you can seamlessly capture and convert images to the widely compatible JPEG format. Among the solutions discussed, for multiple HEIC files, Coolmuster HEIC Converter is a good choice.
Related Articles:
How to Print HEIC Photos by Converting Them to JPEG in 3 Easy Methods
Top 12 Best HEIC to JPG Converter on Windows/Mac/Online [Latest Update]
[Solved] 5 Ways to Convert HEIC to JPG in Google Photos
How to Convert HEIC to JPG on Google Drive? [3 Effective Ways]


 Free Download for PC
  Free Download for Mac

