Backing up your iPhone is essential for protecting your data. With a backup, you can easily restore your iPhone, whether you're switching to a new device or recovering from a system issue. However, sometimes things don't go as planned, and you might get an "iPhone backup failed" notification. So, why does this happen, and how can you stop these notifications from appearing?
If you're facing this issue, you're in the right place. In this article, we'll walk you through how to get rid of the "iPhone backup failed" notification and get your backup working again. Let's check it out.
Before we explore how to turn off iPhone backup failed notification, it's essential to know why iPhone backup failed notification won't go away. The iPhone backup failed notification is typically caused by the following reasons:
Now we know the reasons why the iPhone backup failed notification won't go away; it's easy to resolve this problem. Consider attempting the following methods to resolve the issue.
Backing up your iPhone requires a stable and fast Wi-Fi network. If your network connection is poor, you may receive a backup failure notification. Therefore, you need to ensure that your device is connected to a stable Wi-Fi network and that the network speed is sufficient to support the backup.
If your Wi-Fi network is functioning normally but the backup still fails, you can try resetting your network settings. This will clear your network cache and preferences, potentially resolving some network-related issues. Here is how to get rid of iPhone backup failed notification by resetting your network settings:
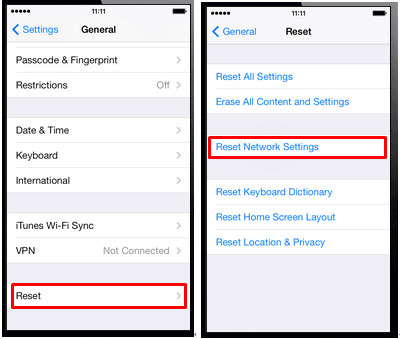
Step 1. Open the "Settings" on your iPhone, select "General", and then choose "Reset".
Step 2. Select "Reset Network Settings", enter your password, and confirm the reset.
Step 3. After the reset is complete, your iPhone will automatically restart. Reconnect to the Wi-Fi network and attempt the backup again. (iPhone won't connect to internet?)
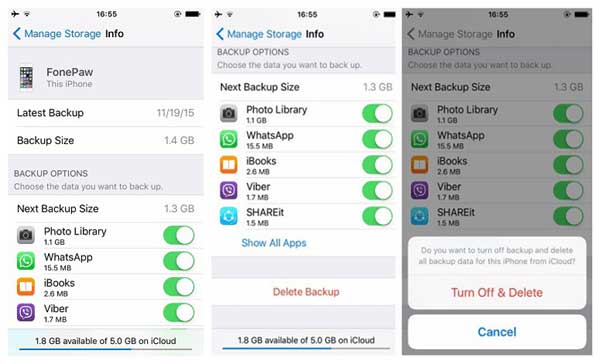
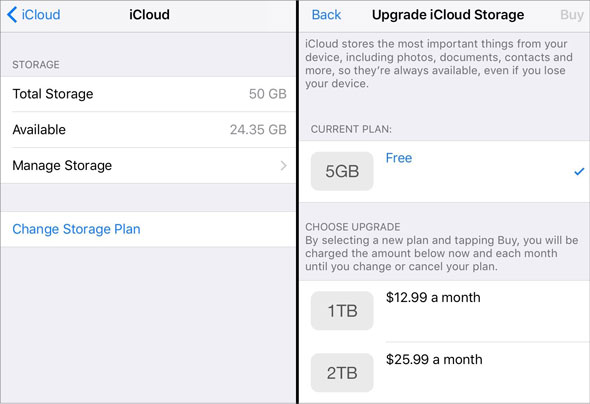
If your iCloud storage space is insufficient, you will also receive a backup failure notification. You can check your iCloud storage space by following these steps:
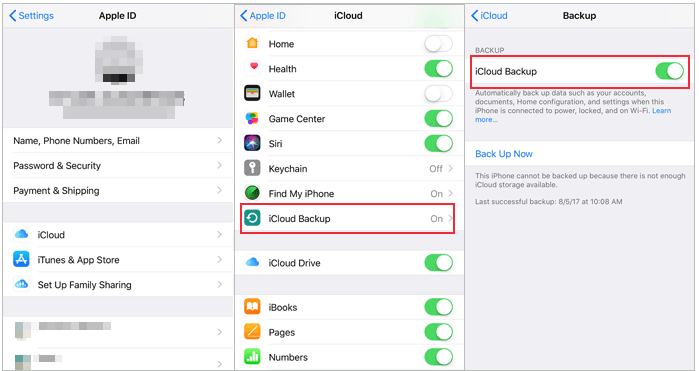
Step 1. Open the "Settings" on your iPhone, tap on your "Apple ID", and then select "iCloud".
Step 2. Check the usage of your iCloud storage space. If your available space is less than the size of your backup data, you need to free up some space.

You can free up iCloud storage space in the following ways:
Sometimes, issues with your Apple ID may arise, preventing you from verifying your identity or syncing your data. You can try re-signing into your Apple ID to resolve this problem. Here is how to turn off iPhone backup failed notification by resigning:
Step 1. Open "Settings", then tap on "Your Name". Scroll down and click "Sign Out".
Step 2. Enter your Apple ID password, then tap "Turn Off". (Forget your Apple ID password?)
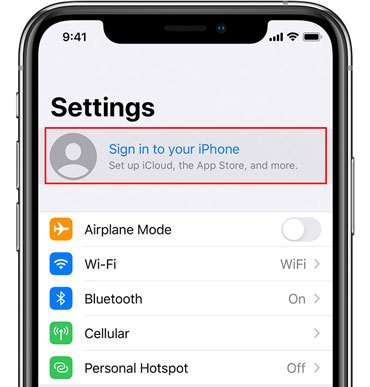
Step 3. Reopen "Settings" and tap "Sign in to your iPhone".
Step 4. Enter your Apple ID and password, then tap "Sign In".
To stop iPhone backup failed messages, a direct solution is to disable the "iCloud Backup" feature. This way, when your iPhone is locked, connected to Wi-Fi, and plugged into power, iCloud will not attempt to create a backup. Here is how to remove iPhone backup failed notification:
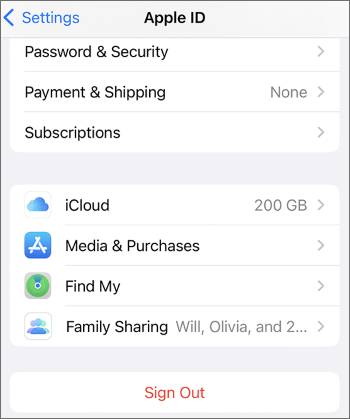
Step 1. Go to "Settings" and tap on your name.
Step 2. Navigate to the "iCloud" option and select "iCloud Backup".
Step 3. Within this menu, toggle off the "iCloud Backup" option.
Note: It's crucial to regularly back up data on your iPhone to mitigate the risk of losing essential information such as photos, videos, and contacts. Even if you choose to turn off automatic iCloud backup, you can still use iTunes to back up your iPhone or back up your iPhone to a computer.
If your iOS version is too old, it may lead to compatibility or stability issues. You can try updating your iOS version to address this problem. Here is how to stop iPhone backup failed notification by updating:
Step 1. Open "Settings", go to "General", and select "Software Update".
Step 2. Check for available updates, and if there are any, click "Download and Install".
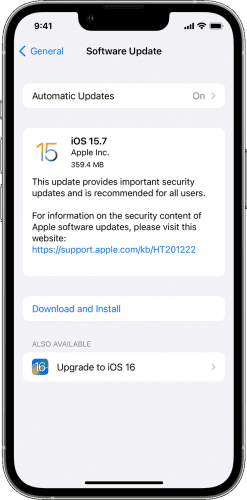
Step 3. Enter your password and follow the prompts to complete the update.
Sometimes, iPhone backup failures may occur due to minor software glitches. Restarting or force restarting your iPhone can clear some caches or errors, restoring the normal operation of your iPhone. Here is how to remove iPhone backup failed notification by restarting:
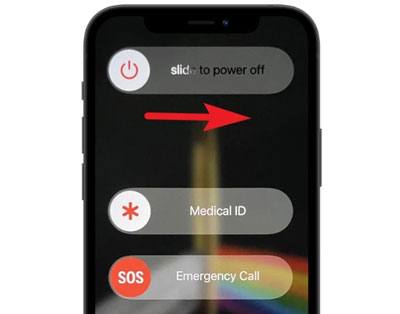
Step 1. Long-press the "Power" button until the "slide to power off" prompt appears, then swipe right to turn off your device.
Step 2. Wait for a few seconds, then long-press the power button again until the Apple logo appears. Release the "Power" button and wait for your device to restart.
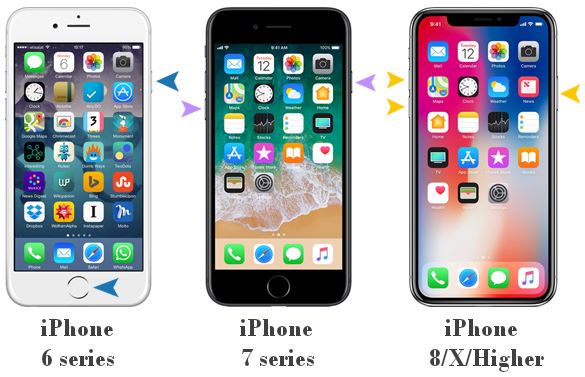
The method to force restart an iPhone varies depending on the iPhone model:
For iPhone 8 and later models:
For iPhone 7 and 7 Plus:
For iPhone 6s and earlier models:
If none of the previously mentioned methods addresses your issue, you may need to contact Apple Support for professional assistance. You can find Apple Support's contact information in "Settings" > "Your Name" > "Apple ID" > "Support", or visit Apple's official website and choose the appropriate service category and channel.
If you're seeing the "iPhone Backup Failed" message, you might think about turning off iCloud backup or freeing up iCloud storage. However, these aren't the best solutions.
So, is there a better way to back up your iPhone data without worrying about storage limits? The good news is - yes, there is! Coolmuster iOS Assistant is a powerful tool for PC that makes backing up your iPhone easy. Unlike iCloud, it offers several key advantages that can make your backup process smoother and more efficient.
Coolmuster iOS Assistant – Trusted iPhone Backup Tool:
Install Coolmuster iOS Assistant on your computer and choose the backup methods you like to start the progress.
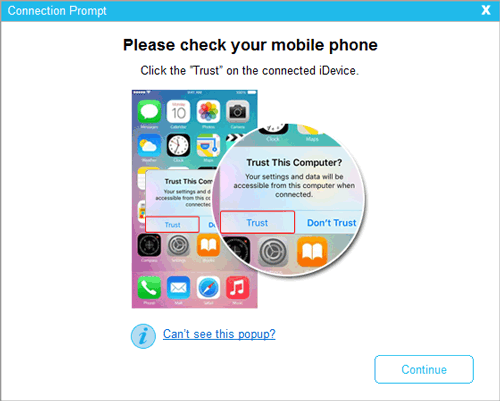
01Download and install Coolmuster iOS Assistant on your computer, then launch it. Connect your iOS device to your computer using a USB cable, and follow the prompts on your device to trust this computer.
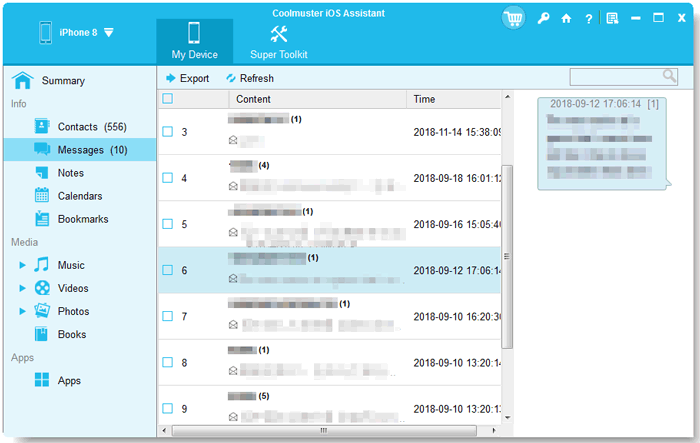
02Wait for the program to recognize your device. Once successfully recognized, you will see the main interface, as shown in the figure below, with all different folders arranged on the main screen.

03Select the specific file category you want to back up, choose the content you want to export, and click the "Export" button.
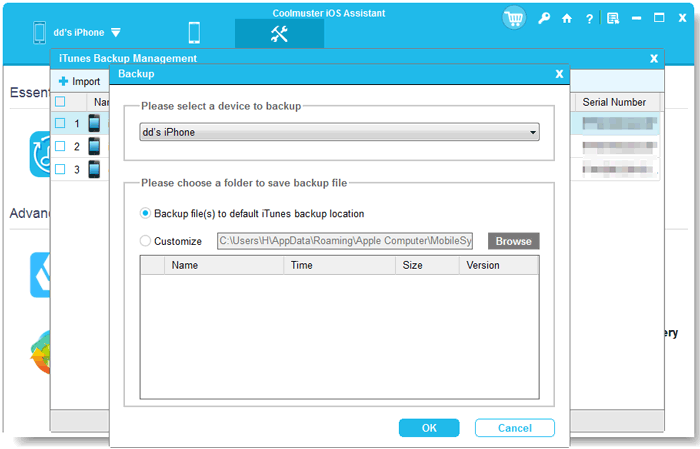
01When the software detects your device, switch to the "Super Toolkit" section. Click on the "iTunes Backup & Restore" tab on the interface.
02Click on the "Backup" tab, then select the device you want to back up from the drop-down menu.
03Select the destination for saving the new backup file, whether it's in the default iTunes backup location or another location on your computer. Click the "Browse" option to choose your preferred location, and then click "OK" to commence the iOS data backup process.
Video Tutorial:
If you are receiving the iPhone backup failed notification, you don't need to panic. This article explores the potential reasons and the corresponding solutions to help you resolve this issue. You can follow the step-by-step guide listed above to do it. However, if you want to avoid receiving an iPhone backup failed notification, you can choose Coolmuster iOS Assistant as an alternative backup method to back up your iPhone.
Related Articles:
[Solved] How to Fix Repeated iCloud Sign-in Request on iPhone/iPad?
iPhone Back Tap Not Working? Fix It in 9 Effective Methods
13 Practical Ways to Fix iPhone Keeps Turning On and Off Randomly (Updated Tips)
How to Free up Space on iPhone/iPad without Deleting Apps [9 Possible Ways]


 Free Download for PC
  Free Download for Mac

