TL;DR:
Quick Guide to iPhone to PC File Transfer:
Transferring files from an iPhone to a Windows PC (Windows 11 or 10) requires navigating iOS file system restrictions, whether you are managing high-res HEIC photos, ideos, documents, contacts, or music. Since iPhones have only 5GB of free iCloud storage, and running out of iCloud space or switching to Android can complicate data backup, using a computer remains the most secure, fast, and flexible way to manage your files.
In this guide, we detail 6 proven methods to transfer files from iPhone to PC - both wired (USB Lightning/USB-C) and wireless (iCloud, Cloud, Email) - along with fixes for common connection errors like missing DCIM folders or driver glitches.
Many iPhone users avoid using iTunes on Windows because of its slow syncing performance, rigid full-device overwrite policies, and frequent connection errors. So, how can you transfer data from your iPhone to your PC seamlessly without relying on iTunes?
A fast, software-based solution is Coolmuster iOS Assistant. It acts as an all-in-one iOS file manager that bridges your iPhone and Windows PC directly. Unlike iTunes, it lets you preview specific files and export them to your computer in user-friendly formats (such as CSV/VCF/TXT for contacts, JPG/HEIC for photos, MP4/MOV for videos, and MP3 for audio).
Download the right version on your computer and follow the steps below to transfer files from iPhone to PC.
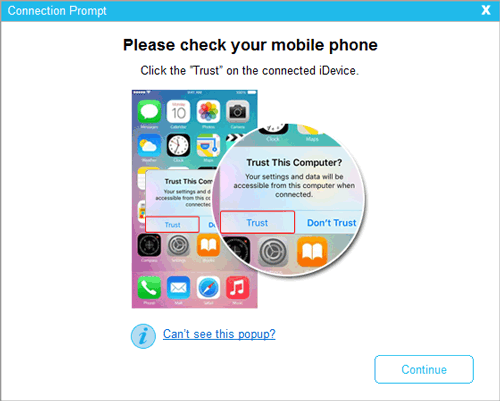
01 Launch Coolmuster iOS Assistant on your PC and connect your iPhone using a USB cable. Unlock your iPhone and tap "Trust" when prompted. Click "Continue" on the program to detect your device.
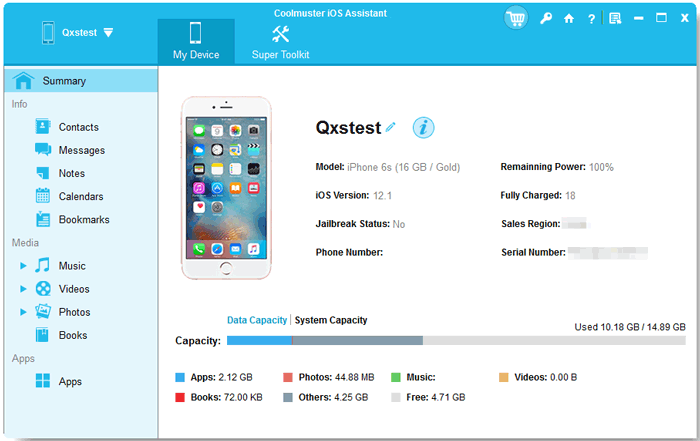
02 Once detected, your iPhone's summary and categories (Photos, Videos, Music, Contacts, Messages, etc.) will appear on the main dashboard.
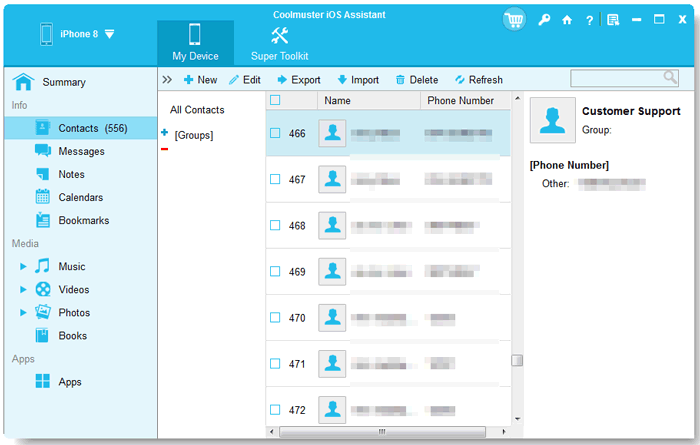
03 Click on a category on the left panel (e.g., "Contacts" or "Photos"). Preview the specific items, select the checkboxes next to the files you wish to transfer, click the "Export" button at the top, select your desired export format, and save them to your PC.
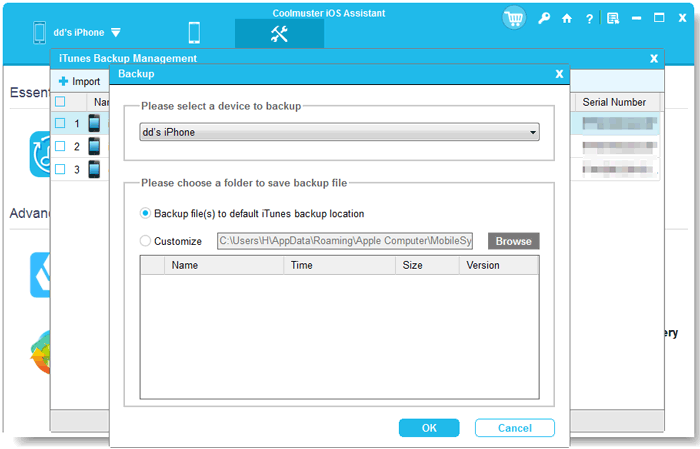
01 Navigate to the "Super Toolkit" tab on the main interface.
02 Click "iTunes Backup & Restore", then select the "Backup" tab from the top menu.
03 Select your target iPhone, choose a custom storage location on your PC using the "Browse" button, and click "OK" to start backing up all iOS data.
Video Guide:
See how to transfer files from iPhone to PC without iTunes via Coolmuster iOS Assistant.
iTunes for Windows allows you to transfer documents created in supported apps (such as Keynote, Pages, Kindle, or VLC) or sync entire device backups.
Note: iTunes File Sharing only works for documents stored within specific file-sharing enabled apps, not for native system files or direct photo folders.
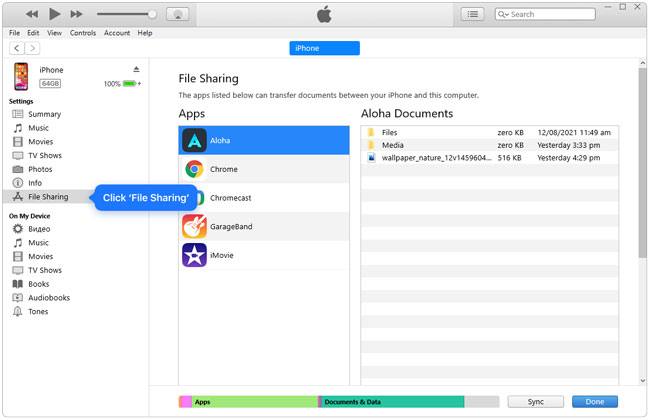
Step 1. Connect your iPhone to your PC with a USB cable and open the latest version of iTunes.
Step 2. Click the iPhone icon near the top left corner of the iTunes window.
Step 3. Select "File Sharing" from the left sidebar. You will see a list of apps on your iPhone that support desktop file transfer.
Step 4. Select the app containing your files, choose the specific file in the right-hand panel, click "Save to...", pick a destination folder on your PC, and click "Select Folder".
Step 1. Connect your iPhone to PC and unlock your device screen.
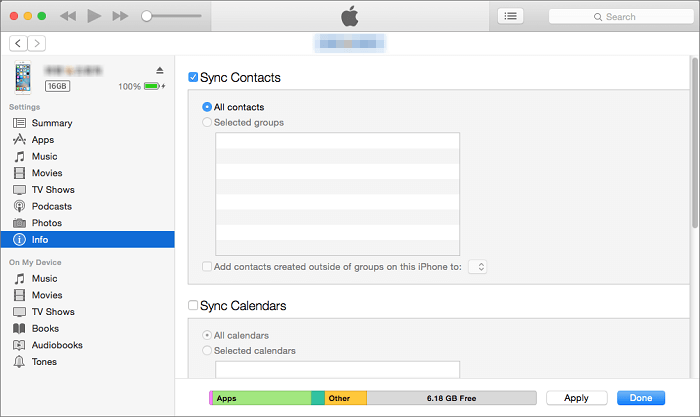
Step 2. Open iTunes, tap your device icon, and navigate to categories like Music, Movies, or Photos.
Step 3. Check "Sync" and select the folders you want to sync. Click "Apply" at the bottom right to begin syncing.
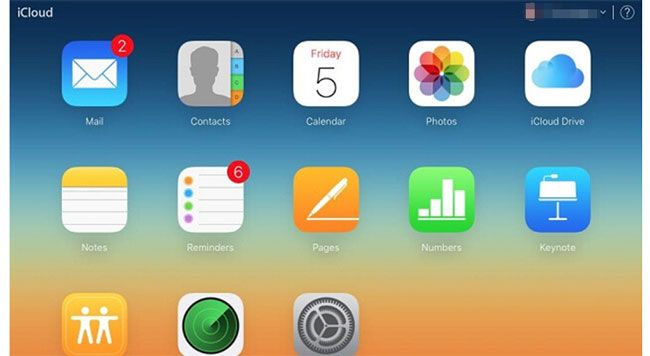
If you prefer to transfer files from iPhone to computer wirelessly, Apple's cloud infrastructure offers two methods: iCloud for Windows desktop app or iCloud.com via web browser. Keep in mind that free Apple Accounts only include 5GB of storage.
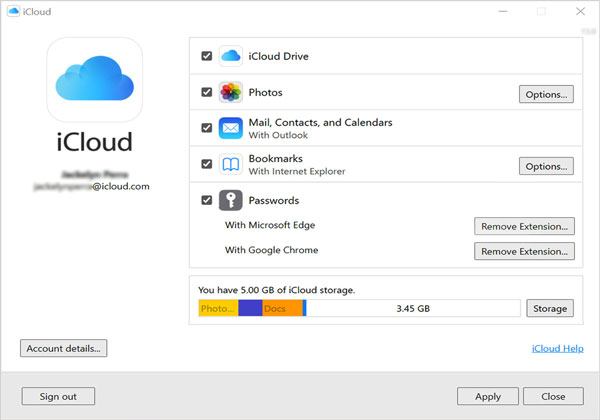
Step 1. Download and install iCloud for Windows from the Microsoft Store.
Step 2. Sign in with the same Apple ID used on your iPhone.
Step 3. Check the boxes for iCloud Drive, Photos, Contacts, or Bookmarks, then click "Apply". Your selected data will automatically sync into a designated folder inside Windows File Explorer.
Step 1. On your iPhone, go to Settings > [Your Name] > iCloud and turn on sync for Photos, Drive, or Notes.
Step 2. On your PC, open any browser and navigate to iCloud.com. Sign in with your Apple ID.
Step 3. Click the icon for Photos, iCloud Drive, or Notes, select the items you need, and click the Download icon (cloud with an down arrow) at the top to save them to your PC download folder.
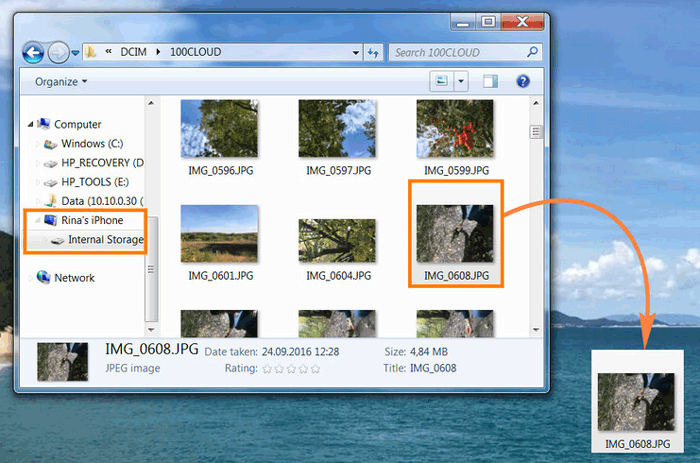
If you don't want to install extra software, Windows File Explorer provides direct access to your iPhone's camera roll over USB.
Note: Windows File Explorer only allows reading and copying media files (Photos and Videos in HEIC/JPG/MP4 formats) stored in the DCIM directory. You cannot access messages, contacts, or documents through this method.
Step 1. Plug your iPhone into your PC via a USB-C or Lightning cable. Unlock your iPhone screen and tap "Trust This Computer".
Step 2. Press Windows Key + E to open Windows File Explorer. Click "This PC" on the left pane and select your Apple iPhone under Devices and Drives.
Step 3. Double-click Internal Storage > DCIM folder. You will see subfolders (e.g., 100APPLE, 101APPLE).
Step 4. Open the folders, select the desired photos or videos, right-click and select "Copy" (or press Ctrl+C), then "Paste" (Ctrl+V) them into a local folder on your PC.
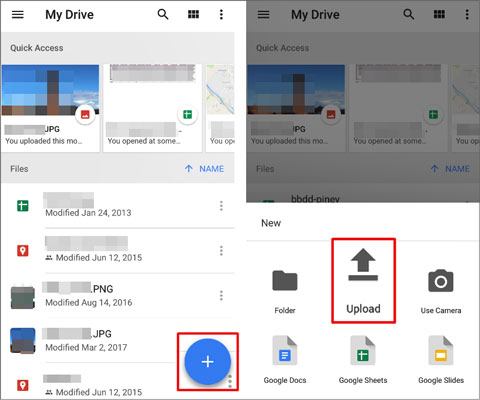
Cross-platform cloud storage options like Google Drive, Microsoft OneDrive, or Dropbox offer seamless wireless file sharing across iOS and Windows. Google Drive provides 15GB of free storage, making it ideal for large documents, PDFs, and compressed folders.
Step 1. Download and open the Google Drive app on your iPhone. Sign in with your Google Account.
Step 2. Tap the "+" (Add) icon at the bottom right corner and choose "Upload".
Step 3. Browse and upload the files, documents, or photos from your iPhone to Drive.
Step 4. On your Windows PC, visit Google Drive on Web, log in, locate your uploaded files, right-click, and select "Download".
For quick transfers of lightweight files, word documents, or individual photos, emailing attachments to yourself requires no setup.
Step 1. Open your preferred email app (Apple Mail, Gmail, Outlook) on your iPhone and compose a new email.
Step 2. Tap the Attachment icon, attach the target file (ensure total file size is under the 25MB limit), and enter your own email address in the "To" field.
Step 3. Send the email, open your email client on your Windows PC browser, and download the attached file directly.

When transferring files between iPhone and Windows 11/10 over USB, you may run into technical errors. Here are direct solutions to the most common issues:
This occurs when Windows attempts to convert HEIC/HEVC media files on the fly.
Fix: On your iPhone, go to Settings > Photos, scroll down to the "Transfer to Mac or PC" section, and switch the setting from "Automatic" to "Keep Originals". Then reconnect your cable.
Fix: Ensure your iPhone screen is unlocked when plugging in USB. If photos are offloaded to iCloud, go to Settings > Photos and select "Download and Keep Originals" so full files exist locally on device storage.
Fix: Open Device Manager on Windows, expand "Universal Serial Bus controllers" or "Portable Devices", right-click Apple iPhone / Apple Mobile Device USB Device, and select "Update driver". Ensure iTunes or Apple Devices app is updated.
You cannot transfer files directly between an iPhone and a Windows PC via Bluetooth. Although both devices possess Bluetooth hardware, Apple's iOS limits Bluetooth profiles strictly to audio devices, accessories, and Apple-to-Apple AirDrop protocols. To transfer files wirelessly to PC, use iCloud, Google Drive, or local Wi-Fi transfer services (like Snapdrop/LocalSend) instead.
Yes. You can use third-party cloud platforms (Google Drive, OneDrive, Dropbox), local network web tools (LocalSend, PairDrop), or send files under 25MB via email. For bulk local data transfer without internet overhead, dedicated desktop tools like Coolmuster iOS Assistant over Wi-Fi/USB remain the most reliable choice.
iPhones capture photos in high-efficiency HEIC format by default. Windows 10/11 may require the "HEIF Image Extensions" plugin from the Microsoft Store to preview HEIC natively. Alternatively, you can use Coolmuster iOS Assistant to automatically export HEIC images into widely compatible JPG formats during transfer.
For large 4K videos, avoid email or cloud options that compress video files. Connect your iPhone via USB, set Settings > Photos > Keep Originals, and copy the raw MP4/MOV file directly using Coolmuster iOS Assistant or Windows File Explorer.
Transferring files from your iPhone to a Windows PC doesn't have to be frustrating. Whether you rely on direct USB connections via Windows File Explorer, official iTunes app document sharing, or cloud convenience with iCloud and Google Drive, you can choose the method that best matches your file types and network speed.
If you prefer a fast, transparent, and comprehensive solution without iTunes limits or file type restrictions, we strongly recommend Coolmuster iOS Assistant. It empowers you to selectively preview, export, and back up contacts, media, messages, and notes to your computer in seconds with one click. Download the free trial today to experience effortless iOS data management!
Related Articles:
[5 Ways] How to Transfer Videos from iPhone to PC Windows 10/11?
7 Effective Ways to Transfer Files from iPhone to Mac with Ease
How to Transfer Notes from iPhone to Computer Easily? (Top 4 Ways)
How to Transfer Music from iPhone to Computer Effectively? (5 Tips)







 Free Download for PC
  Free Download for Mac


