TL;DR:
Wondering where your AirDrop files are saved on iPhone and Mac? This guide will explain AirDrop locations, usage steps, and better transfer options.
AirDrop is a convenient way to transfer photos, videos, documents, and other files between Apple devices wirelessly. However, many users may wonder: where do AirDrop files go on iPhone and Mac? If you cannot find your received AirDrop files, this guide is here to help. In this article, we will explain how to enable and use AirDrop, where AirDrop files are saved on iPhone and Mac, and introduce some reliable AirDrop alternatives for easier file transfer.

Before checking where AirDrop files are stored, make sure AirDrop is enabled on your device first. Below are the detailed steps to turn on AirDrop on your iPhone and Mac.
On iPhone
Method 1: Enable AirDrop from Settings
Step 1. Open "Settings" on your iPhone.
Step 2. Tap "General" and select "AirDrop".
Step 3. Choose "Contacts Only" or "Everyone for 10 Minutes" to enable AirDrop.
Method 2: Enable AirDrop from Control Center
Step 1. Swipe down from the top-right corner of your iPhone screen to open "Control Center".
Step 2. Press and hold the network settings box in Control Center.
Step 3. Tap "AirDrop".
Step 4. Select "Contacts Only" or "Everyone for 10 Minutes".

On Mac
Step 1. Open Finder on your Mac.
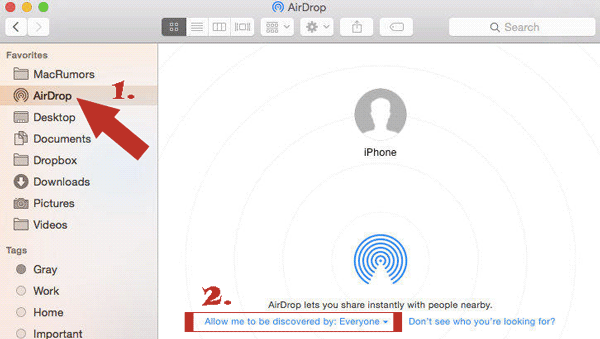
Step 2. Click "AirDrop" from the sidebar on the left.
Step 3. Click the dropdown menu next to "Allow me to be discovered by" at the bottom of the window.
Step 4. Choose "Contacts Only" or "Everyone".
After turning on AirDrop, you can easily send files between Apple devices.
On iPhone:
Step 1. Open the app containing the file you want to share, such as Photos.
Step 2. Select the file and tap the "Share" icon.
Step 3. Tap "AirDrop" and choose the target device.
On Mac:
Step 1. Open Finder and locate the file you want to send.
Step 2. Right-click the file and select "Share" > "AirDrop".
Step 3. Select the device you want to send the file to.
Once AirDrop is enabled and you know how to send files, the next step is finding where the received AirDrop files are saved on your iPhone and Mac.
Is your AirDrop not working on your iPhone or iPad? Read this article fo find the reasons and solutions.
AirDrop Not Working on iPhone or iPad, How to Fix?Once AirDrop is enabled, received files are automatically saved or opened in different locations depending on the file type and the app you choose. Unlike a traditional file transfer tool, AirDrop does not store all received files in one specific folder on your iPhone. Below are the common locations where different types of AirDrop files are saved.
Photos received through AirDrop are automatically saved in the "Photos" app on your iPhone. You can find them by opening the "Photos" app and checking the "Recents" album or the "Albums" section.
Videos received via AirDrop are also stored in the "Photos" app. You can open "Photos" and find the transferred videos under "Recents" or the related video albums.
For documents and other file types, AirDrop does not save them to a fixed location. Instead, you can choose an app to open and save the files when accepting the transfer.
Common AirDrop file locations include:
If the required app is not installed on your iPhone, AirDrop may redirect you to the App Store to download a compatible app. You can also choose another available app to open the file.

Unlike iPhone, AirDrop files received on Mac are usually saved in the "Downloads" folder by default. Whether you transfer photos, videos, documents, or other file types, you can find them in the same location. Follow the steps below to locate your AirDrop files on Mac.
Photos and videos received through AirDrop are automatically stored in the "Downloads" folder. To find them, follow these steps:
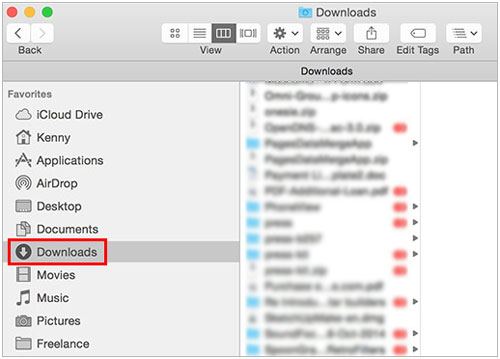
Other files received via AirDrop, such as documents, PDFs, ZIP files, and spreadsheets, are also saved in the "Downloads" folder by default.
You can open the file directly from the "Downloads" folder or move it to another location on your Mac if needed. (AirDrop on Mac Is Not Working?)
AirDrop is a convenient way to share files between Apple devices. However, it has some limitations, such as being unavailable on Windows and Android devices. In addition, transferring a large amount of data may not always be the most efficient option. If you need to move files between different devices or transfer data in bulk, a professional transfer tool can be a better choice.
Below are two reliable AirDrop alternatives for transferring files between iPhones, Android devices, and computers.
Coolmuster Mobile Transfer is a dedicated phone transfer tool that helps you move data between mobile devices directly. It supports iOS and Android devices, allowing you to transfer various types of files without relying on cloud storage or complicated settings.
Key features of Coolmuster Mobile Transfer:
Follow the steps below to transfer data between two devices:
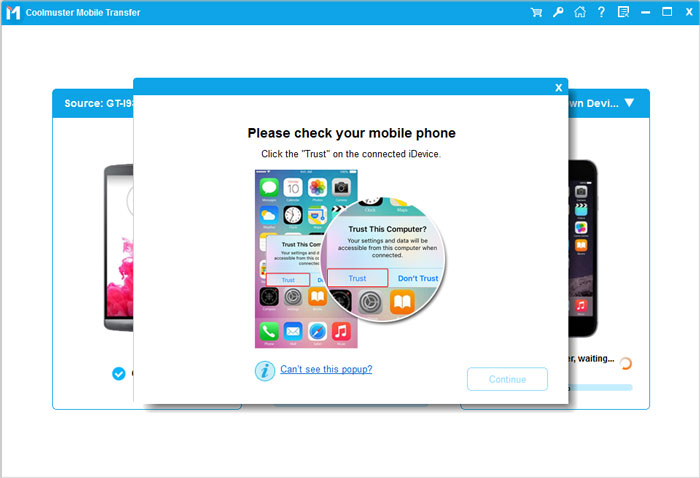
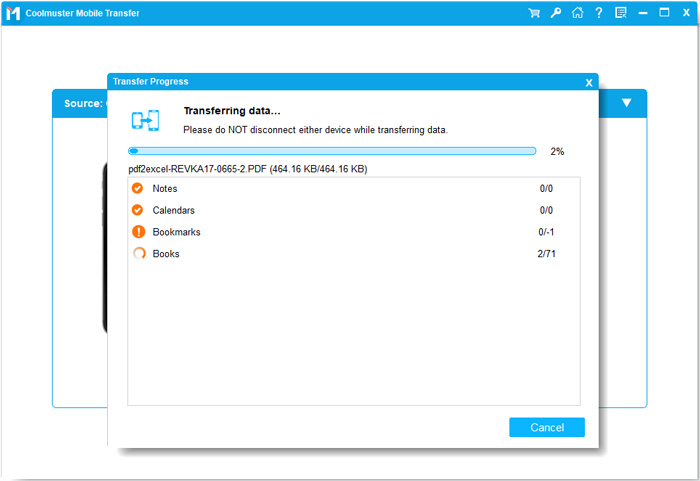
01Download, install, and launch Coolmuster Mobile Transfer on your computer. Connect both phones to the computer using USB cables. Tap "Trust" on your devices if prompted.
02Once both phones are detected, check the device positions on the program interface. Make sure the source and target devices are displayed correctly. If needed, click the "Flip" button to switch their positions.
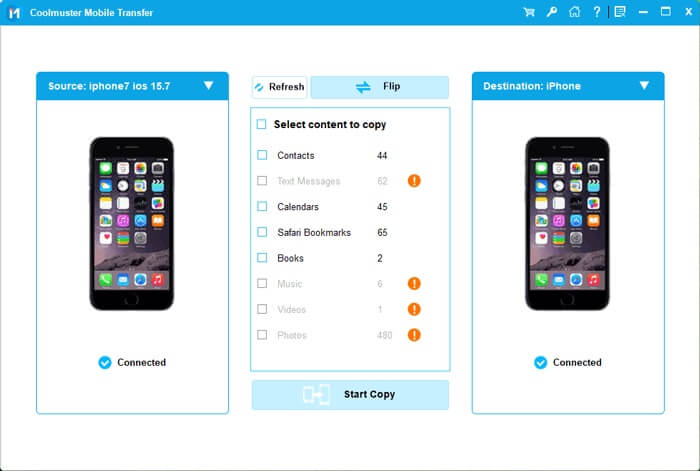
03Select the data types you want to transfer, such as Contacts, Notes, Calendars, Bookmarks, and Books. Then click the "Start Copy" button to begin transferring data.
Video Tutorial:
For users who need to transfer files between an iPhone and a Mac, Coolmuster iOS Assistant provides an easy way to manage iPhone data. It allows you to export files from iPhone to Mac, import files from Mac to iPhone, and back up your device without using iTunes or iCloud.
Highlights of Coolmuster iOS Assistant:
Follow the steps below to transfer files between your iPhone and Mac:
01Download, install, and open Coolmuster iOS Assistant on your Mac. Connect your iPhone to the computer with a USB cable and tap "Trust" when prompted.
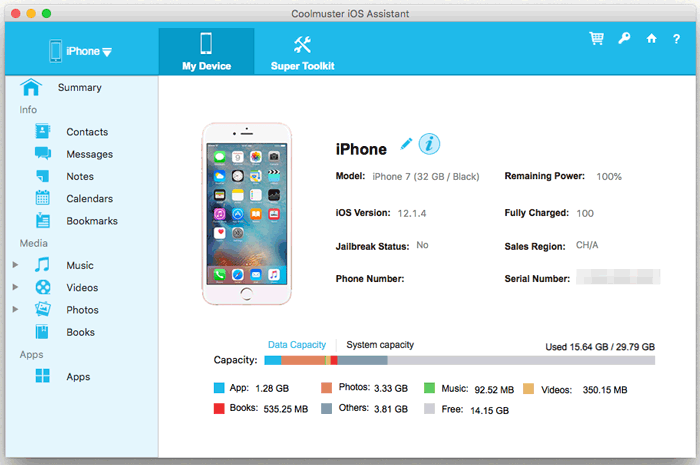
02After your iPhone is detected, select a data category from the left panel. Choose the files you need, then click "Export" to transfer data from iPhone to Mac or click "Import" to move files from Mac to iPhone.

Video Tutorial:
Q1. Why can't I find AirDrop files on my iPhone?
If you cannot find AirDrop files on your iPhone, they may have been saved in different apps depending on the file type. Photos and videos are usually stored in the "Photos" app, while documents may be saved in the "Files" app or other compatible apps.
You can also use Spotlight Search to look for the file name, check recently opened apps, or confirm that the AirDrop transfer was completed successfully.
Q2: Why can't Find AirDrop Files on Mac?
If you cannot find your AirDrop files in the "Downloads" folder, try the following solutions:
Q3. Can I change the AirDrop download location?
No. macOS does not provide a built-in option to change the default AirDrop storage location. All received AirDrop files are automatically saved in the "Downloads" folder.
However, you can manually move the files to another folder after receiving them.
Q4. Can I change the AirDrop name on my iPhone?
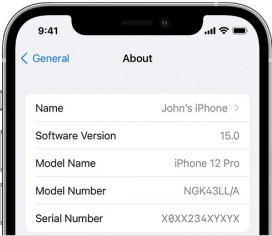
Yes. The AirDrop name is based on your iPhone device name. To change it, open "Settings" > "General" > "About", then tap "Name" and enter a new device name.
The updated name will appear when other users discover your iPhone through AirDrop.
Q5. How to Find Missing AirDrop Files on iPhone?
If you cannot find an AirDrop file on your iPhone, try the following methods:
Now you know where AirDrop files go on iPhone and Mac. While AirDrop makes it easy to share photos, videos, and other files between Apple devices, the saved location depends on the file type and device you use. If you need a more flexible way to transfer data across different devices, tools like Coolmuster Mobile Transfer and Coolmuster iOS Assistant can help you move files quickly and efficiently.
Related Articles:
[100% Works] How to Fix AirDrop No People Found Problem
How to AirDrop from iPhone to Windows in 6 Practical Ways







 Free Download for PC
  Free Download for Mac


