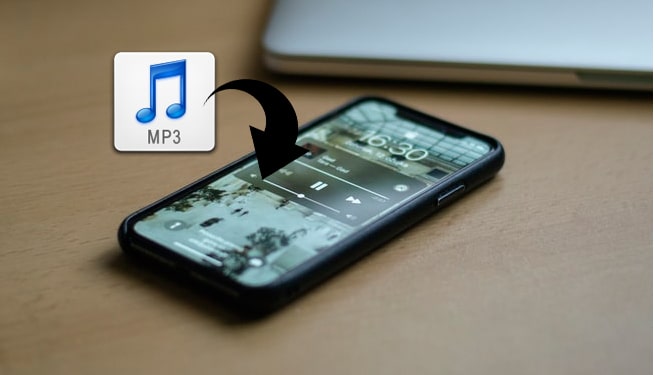
MP3 is one of the most popular audio formats, supported by nearly all digital music players. If you've just got a new iPhone 17, you may want to transfer your MP3 songs to enjoy them anytime, anywhere. While iTunes is Apple's official tool for music transfer, many users prefer not to use it. Don't worry! There are several easy ways to put MP3 files on your iPhone without iTunes.
In this guide, we'll introduce 7 practical methods to help you move your songs to iPhone from a Windows or Mac computer, or even from another iPhone. Keep reading to find the best and most convenient way you want.
Transferring MP3 from computer to iPhone is easy as long as you have the right tool. iOS Transfer is highly recommended when it comes to file transfer between iPhone/iPad/iPod and computer. This program is designed to offer a smooth and quick file transfer experience for Apple users. All the frequently used data types are supported by this tool, including music, photos, contacts, messages, videos, notes, calendars, call logs, ringtones, eBooks, and so on.
Key features of iOS Data Transfer:
iOS Transfer makes the transfer process easy and quick, you can feel free to download it on your Windows or Mac computer and use it to transfer MP3 to iPhone.
Here is how to transfer MP3 files to iPhone without iTunes using iOS Transfer:
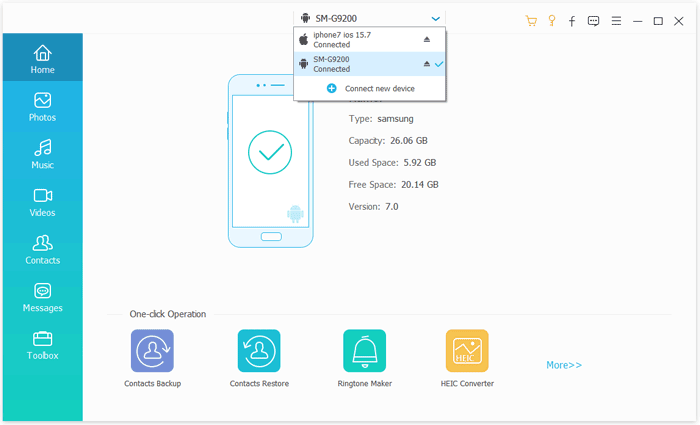
01Launch iOS Transfer on your computer after the quick and easy installation. Connect your iPhone to your computer with a USB cable. The software will detect your iPhone automatically.
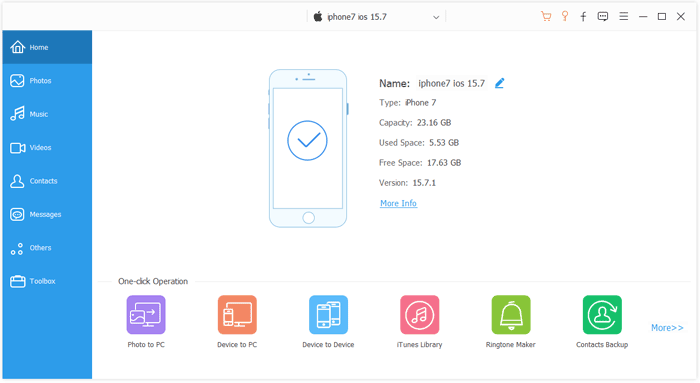
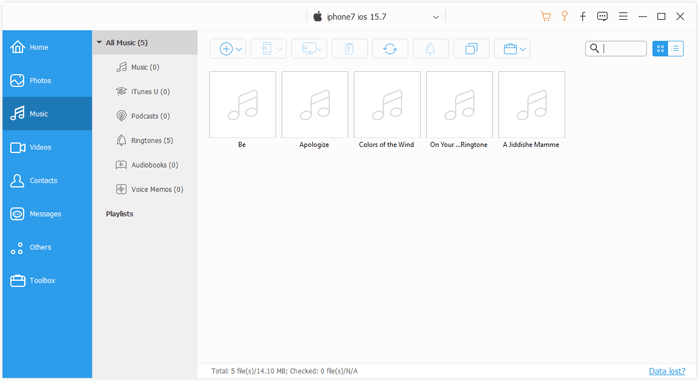
02Select the "Music" tab from the left menu, then select "Music" under the "All Music" section. Click the "+" icon on the top of the software and choose the MP3 files from your computer to move to your iPhone.
If you are wondering how to move music to iPhone from another iPhone, then Phone Transfer is your ideal tool. With it, you can transfer contacts, photos, and media files(including music, playlists, movies, TV shows, etc.) from iPhone to iPhone without hassle. It also supports Android OS, so you can use it to transfer files between iPhone and Android phone as well (click here to learn two solutions to transfer music from Android to iPhone).
Here is how to copy MP3 files to iPhone from another iPhone using Phone Transfer:
01After the installation, launch Phone Transfer on your computer, then connect both iPhones to the computer with suitable USB cables.
02After your devices are recognized by the software, make sure that the iPhone that you want to put MP3 on is the target device; if not, simply click the dropdown to choose the source phone.
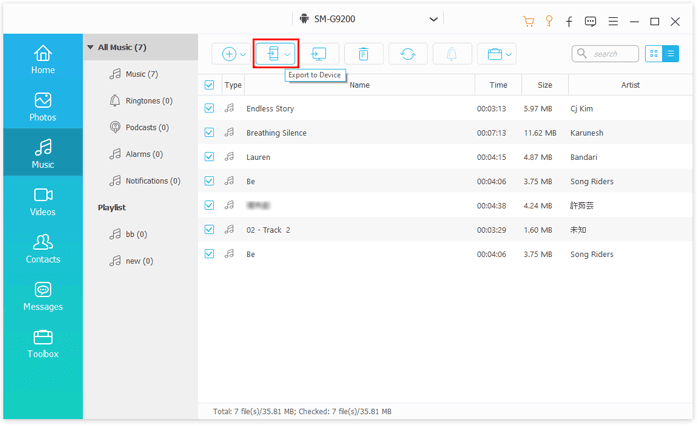
03To transfer the MP3 to the iPhone, simply select the "Music" option, which contains all the MP3 files, then click "Export to Device" to move the MP3 to the target iPhone.
For many users, iTunes or Finder remains the easiest and most reliable way to transfer music between a computer and an iPhone. These tools are completely free and don't require any extra software. However, keep in mind that when you sync music this way, the existing songs on your iPhone will be replaced with the new ones you add.
If you still prefer using iTunes (on Windows) or Finder (on Mac), follow the steps below based on your operating system.
If You're Using a Windows PC:
Step 1: Connect your iPhone to your computer using a USB cable, then open the latest version of iTunes.
Step 2: If prompted on your iPhone, tap "Trust This Computer."
Step 3: When your iPhone appears in iTunes, click the device icon at the top left corner.
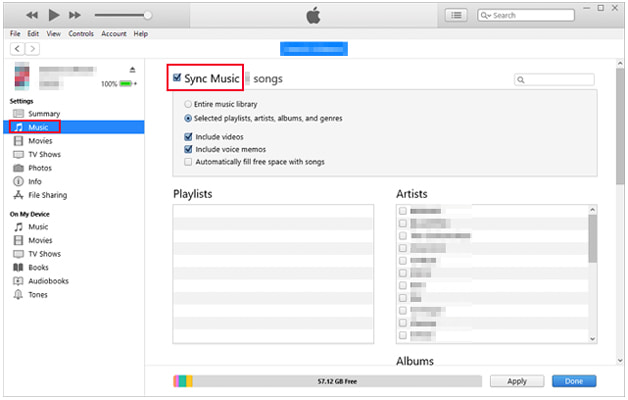
Step 4: Go to "Music" under the Settings menu. Check the box next to "Sync Music."
You can then choose to sync your entire library or only selected playlists, artists, or albums. There are also options to include music videos and voice memos. Once you've made your choices, click "Apply" to begin syncing.
If You're Using a Mac:
Step 1: Connect your iPhone to your Mac via a USB cable and open Finder.
Step 2: Select your iPhone from the sidebar, then click the "Music" tab.
Step 3: Check "Sync music onto [your iPhone name]." Choose whether you want to sync your entire music library or only specific items.
Step 4: Select the MP3 files you'd like to transfer, then click "Apply" to start syncing your songs to your iPhone.
AirDrop comes in handy when it comes to sharing files across Apple products. You can use it to transfer MP3 to iPhone from Mac or another iPhone without using a USB cable.
Send MP3 to iPhone from Another iPhone:
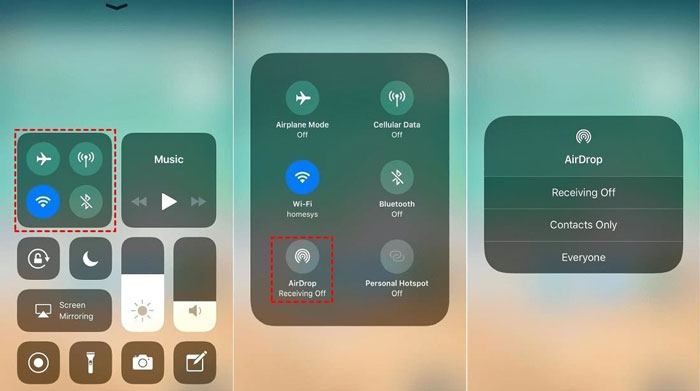
Step 1. On both sending and receiving iPhone, swipe up from the Home screen to open the Control Center > tap "AirDrop" > select "Contacts Only" or "Everyone".
Step 2. On your sending iPhone, open the Apple Music app > head to the song you want to add > tap the "three-dots" icon > "Share" > tap your receiving phone's name.
Step 3. On your target iPhone, tap "Accept" when a pop-up notice prompts you to receive the song.

Transfer MP3 Files to iPhone from Mac
Step 1. Enable AirDrop on both iPhone and Mac. For Mac, go to "Finder" > "Go" > "AirDrop" > allow the device to be discovered by "Contacts" Only" or "Everyone". (AirDrop No People Found?)

Step 2. On your Mac, locate the MP3 files you need to transfer, then right-click it and click "Share" > "AirDrop" > select your iPhone's name in the pop-up window.
Step 3. A window will be prompted on the iPhone; click "Accept" to receive the MP3 that was transferred from the Mac.
If you are a Mac user, there's an additional way to transfer music: you can use the Music app to copy songs from your Mac to your iPhone. If you're an Apple Music subscriber, there's no need to sync music manually, as it can be done automatically via iCloud.
Here's how to move MP3 to iPhone using Apple Music:
Step 1. Connect your iPhone to your Mac and open the Music app.
Step 2. Unlock your iPhone and trust the computer.
Step 3. Ensure your iPhone is recognized by your Mac. Then, go to the "Songs" tab in the Music app.
Step 4. Select the MP3 files you want to transfer, then drag and drop them onto your iOS device.
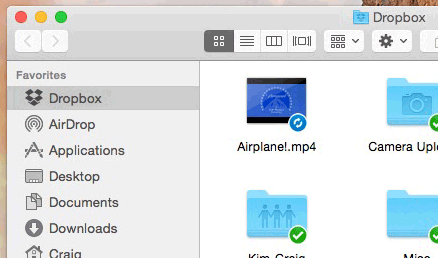
Cloud storage services have become increasingly popular, and for good reason. They let you stream your favorite songs without taking up space on your iPhone and make it easy to share files between different devices. Platforms like Dropbox, Amazon Music, and Google Play Music are great options for transferring MP3s or other files from your computer or phone to your iPhone.
Here's how to use Dropbox to add MP3 files to your iPhone:
Step 1. Install the Dropbox app on both your computer (or other device) and your iPhone, then sign in using the same account.
Step 2. Upload the MP3 files from your source device to Dropbox.
Step 3. Open the Dropbox app on your iPhone. You'll find the uploaded songs there. Just tap to play them online or download them for offline listening.
If you only need to move a few MP3 songs to your iPhone without using iTunes, sending them through email is a quick and easy option. Just remember that most email services limit attachments to 25MB, so make sure your MP3 files are small enough.
Here's how to add MP3 files to your iPhone Music Library through email:
Step 1: Open your email account in a web browser and click "Compose" to create a new message.
Step 2: Enter your own email address as the recipient and attach the MP3 files you want to transfer.
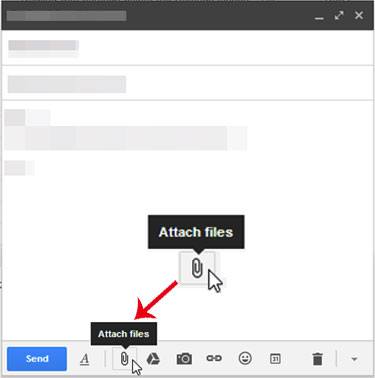
Step 3: Send the email, then open the same message on your iPhone.
Step 4: If you have several MP3 files, you can repeat the process and send them in separate emails.
How to transfer MP3 to iPhone is easy once you master the right solution. If there are MP3 files on your PC that you want to transfer, you can use iOS Transfer to finish the task. This software is quick, easy, and stable, letting you enjoy a hassle-free transfer experience without iTunes. If you want to transfer MP3 to iPhone from another iPhone, then Phone Transfer would be a good choice. Download the tool you need and start to add MP3 to your iPhone.
If there are any problems, feel free to leave a comment below.
Related Articles:
[Easy Guide] How to Transfer MP3 Files to iPod with or Without iTunes
How to Transfer Music from iPhone to Computer Effectively? (5 Tips)
6 Effective Ways | How to Transfer Music from iPhone to iPad?
Why Is My Apple Music Family Sharing Not Working? [Reasons & Solutions]


 Free Download for PC
  Free Download for Mac

