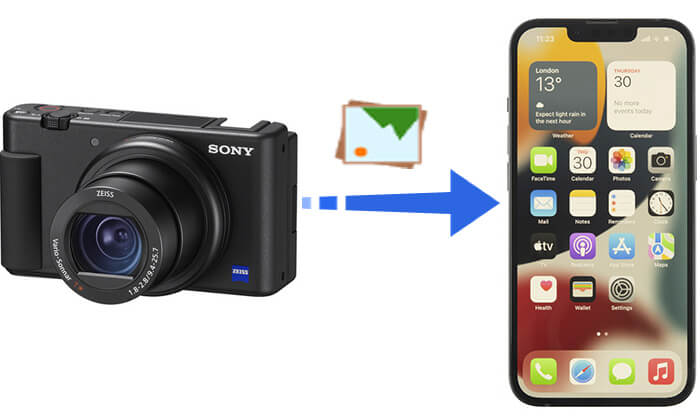
Transferring photos from your digital camera to your iPhone has become a must for photographers who want to easily edit, share, or save their images on the go. Whether you're working with high-quality photos or capturing precious memories, moving them to your iPhone opens up endless creative options.
In this guide, we'll walk you through different ways to get your camera photos onto your iPhone, from using adapters for wired transfers to wireless options with Wi-Fi-enabled cameras. We'll also cover advanced tools like iOS Transfer, so no matter what equipment you have, you can quickly and easily transfer your best shots.
If you have an adapter, you can easily transfer your photos from the digital camera to your iPhone. Here, we introduce two adapters for you.
The Apple Lightning to USB Camera Adapter is a direct way to transfer photos from a digital camera to an iPhone. By connecting the camera and the iPhone through the adapter, you can quickly transfer photos without needing an internet connection. This method is ideal for photography enthusiasts and users who want to transfer photos efficiently.
Here is how to transfer photos from camera to iPhone with adapter:
Step 1. Link your camera to the connector via the USB camera adapter cable. Then, connect the lightning end to your iOS device.
Step 2. Turn on your camera and unlock your iPhone or iPad.
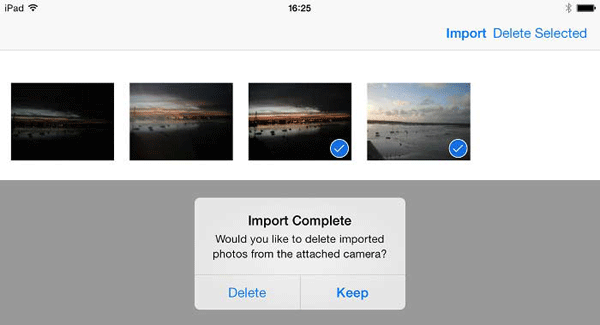
Step 3. Open the "Photos" app from your iPhone/iPad device. On the bottom column, you will see an "Import" option.

Step 4. Click the option and tick out the photos that you want to transfer from camera to iPad/iPhone.
Step 5. Finally, once the transfer process is done, you will go to an interface where you are asked whether to delete all photos from the camera or not. Choose the right option as needed.
You can use a Nikon WU-1a Wireless Mobile Adapter to transfer photos from your camera to your iPhone. Simply connect the adapter and install Nikon's Wireless Mobile Utility app on your iPhone.
After transferring the photos to the app, you can easily move them to your Photos app or other applications. Additionally, you can share the photos via email or social media.

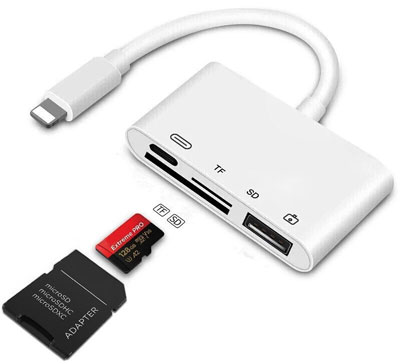
If you want to transfer photos from your digital camera to your iPhone using an SD card, a simple and lightweight option is to use an Apple SD card reader. You can choose between the Lightning to SD Card Camera Reader (for iPhone 5 to iPhone 14) or the Apple USB-C to SD Card Reader (for iPhone 15 and later).
Step 1: Take the SD card out of your camera and insert it into the card reader.
Step 2: Connect the card reader to your iPhone's Lightning or USB-C port.
Step 3: The Photos app will open and prompt you to import your photos.
Step 4: You can choose specific images or import everything at once.
Step 5: Your photos will automatically be saved to your iPhone's library.
Keep in mind, this method only transfers photos from your camera to your iPhone, not the other way around. (How to Transfer iPhone Photos to SD Card in 6 Easy Ways)
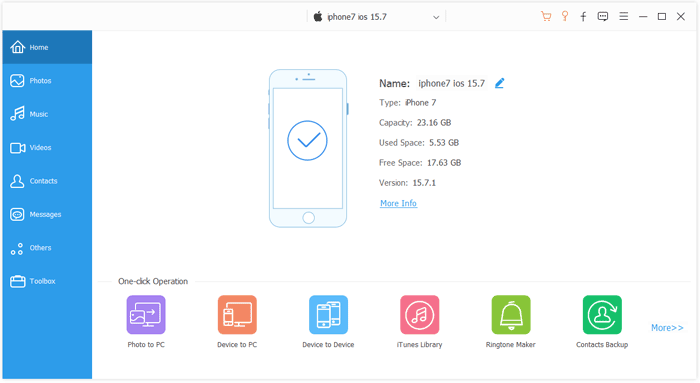
For photographers who need more than just a simple photo transfer, iOS Transfer is a comprehensive tool that lets you easily transfer, organize, and back up your photos. It offers greater flexibility in managing file formats and storage, making it perfect for handling large batches of photos between cameras, iPhones, and computers.
This software also allows you to import edited or copied photos from your digital camera directly to your iPhone, bypassing the usual restrictions of Apple adapters. The transfer process preserves the high quality of your photos and videos, ensuring they work seamlessly with your iPhone.
Highlights of iOS Transfer:
Here is how to transfer photos from digital camera to iPhone via USB using iOS Transfer:
01Connect your camera to the computer via the USB cord. Now, the computer will automatically detect your digital camera. Your camera should appear as a disk on your desktop.
02Download and run iOS Transfer and connect your iPhone to the computer using a USB cable.
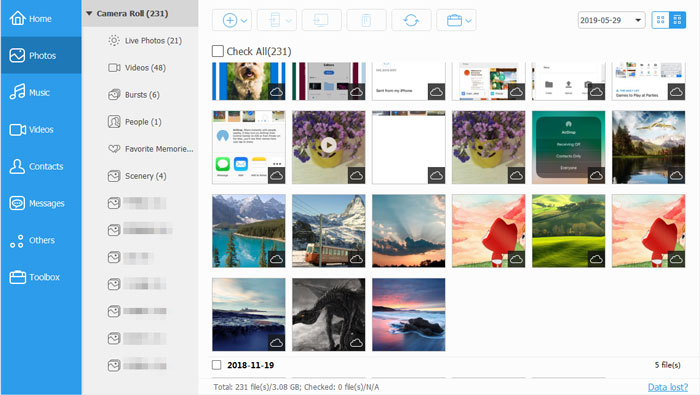
03Click on "Photos" in the left panel of the main interface. After a few moments, all your photos will be displayed in the program.
04Click the "Add" button, browse your camera folder and find the images you want to transfer, and then click "Open".
If you don't want to use an adapter, the second method is to use a cloud storage service, such as iCloud, OneDrive, or Dropbox. To do this, first transfer the pictures to your computer, then upload them to your cloud storage from there. After that, download the corresponding app on your iPhone to access and download all the uploaded photos.
Here is how to download digital camera pictures to iPhone using iCloud:
Step 1. Connect your camera to your computer using the camera's USB cable and turn on the camera.
Step 2. In the AutoPlay dialog box, select "Import pictures and videos using Windows".
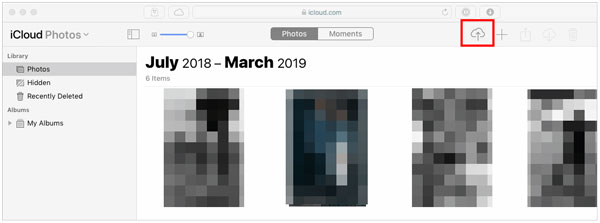
Step 3. Open a web browser and go to icloud.com, then sign in to your iCloud account.
Step 4. Choose "Photos" and then click the "upload" icon, which looks like a cloud with an arrow pointing up. (Photos not uploading to iCloud?)
Step 5. Choose the photos you imported and click "Open".
Step 6. Wait for the upload process to finish, and then you can check the transferred photos on your iPhone.
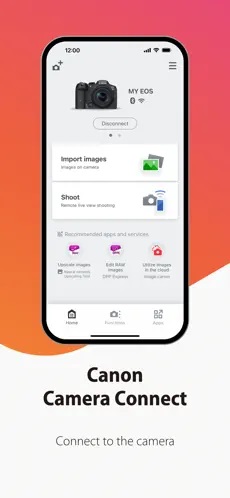
If you have a Canon camera, you can download the Canon Camera Connect app on your iPhone for photo transfers. This all-in-one app enables you to transfer photos and videos between your iPhone and any Wi-Fi or Bluetooth-enabled Canon camera. Additionally, it provides functionality to control your camera remotely.
Here is how to transfer photos from a Canon camera to iPhone:
Step 1. Turn on your Canon camera, go to the "Menu", navigate to the "Setup" section, and select "Wireless Communication Settings".
Step 2. Enable "Wi-Fi/NFC" and choose "Wi-Fi only".
Step 3. Select the "Wi-Fi function" on the screen and tap the "phone" icon.
Step 4. Choose "Easy Connection" and tap "OK" to proceed.
Step 5. Open the Canon Camera Connect app on your iPhone and follow the on-screen instructions to connect your camera.
That's all about how to transfer photos from digital camera to iPhone. Whether using an adapter, wired, or wireless transfer, each with its own advantages and disadvantages. If you frequently need to transfer large batches of camera photos to your iPhone, iOS Transfer is a great choice. It is user-friendly, safe, and reliable, and supports various file formats, making it ideal for large-scale photo transfer needs. It's a highly recommended transfer tool.
Related Articles:
[Full Guide] How to Transfer Photos from iPad to SD Card?
How to Transfer Photos from iPhone to Computer? Solved in 7 Ways
How to Transfer Photos from USB to iPhone with or without Computer?
[Ultimate Guide] How to Transfer Photos from SD Card to iPhone?


 Free Download for PC
  Free Download for Mac

