If you are a Sony Xperia user and looking for a way to back up the important data on your phone, then you're in the right place. This post focuses on Sony backup and restore, introducing the best 3 methods to help you do it efficiently. Regularly backing up your data is crucial to prevent unexpected data loss.
Please note that Xperia Companion no longer supports backup, restore, transfer, browsing, music, and photo features. It now only provides a simplified option for performing software repairs. As a result, finding reliable alternatives for Sony backup and restore has become more important than ever. Now, follow this guide, and let's get started.
First, let's take a look at the best Sony backup and restore software, Coolmuster Android Backup Manager. When it comes to backing up data on your phone, you may think it's a tedious job as there is a huge amount of data stored on your phone. Coolmuster Android Backup Manager will surprise you with its efficiency.
With just 1 click, all your data will be backed up to a computer. As a well-built and reliable software, Android Backup Manager ensures that the entire Sony backup and restore process will remain stable and smooth. And the speed of transferring depends on the size of the chosen files.
Key features of Android Backup Manager:
Download it on your computer and give it a try:
Here is the simple guide on Sony backup and restore via Android Backup Manager:
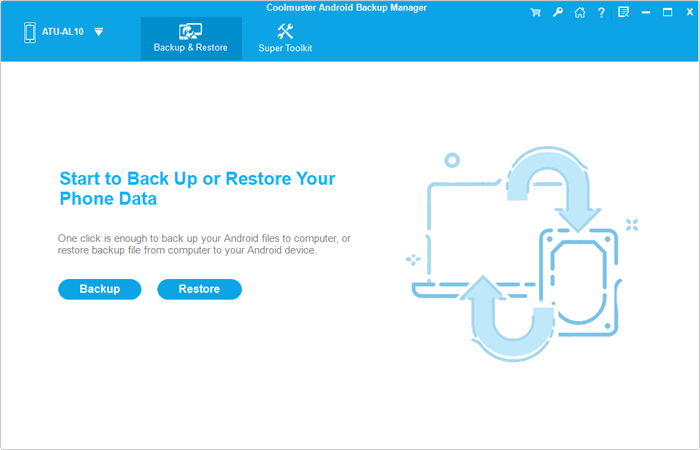
01Connect your Sony to your PC with a USB cable or using Wi-Fi. Enable USB debugging and grant permissions on your Sony according to the prompt on the screen. Once the program detects your phone, you will see the interface below.
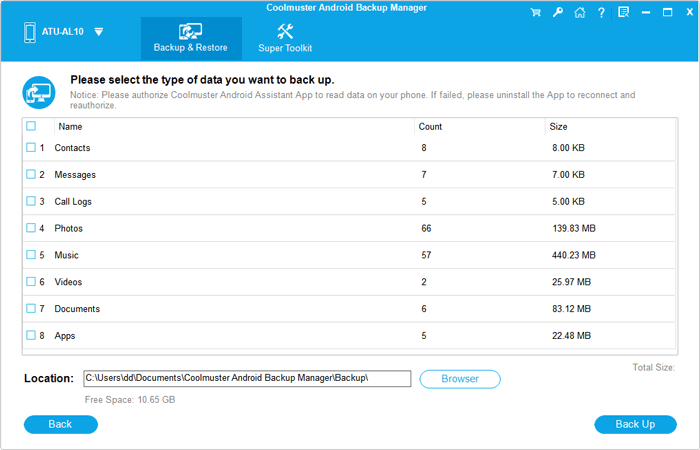
02To back up Sony to PC, click the "Backup" option > select the items you want to back up > choose the location on PC to store the backups > click the "Back Up" button to back up Sony Xperia data to PC.
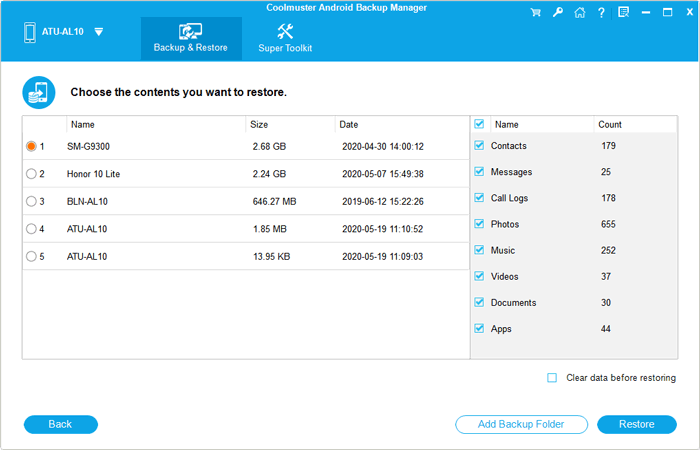
01After your phone is detected, select "Restore" this time.
02Select the backup record you want > choose the contents you wish to restore > and click the "Restore" button.
Here is a video guide for you.
Another great Sony backup and restore software is Coolmuster Android Assistant. Specialized in managing Android data, Coolmuster Android Assistant offers a 1-click backup and restore feature for Android phones. Besides creating a full Sony Xperia backup, it also lets you preview the data on your Sony Xperia, enabling you to select the specific files to back up as well as manage your files freely on the computer.
What else can Android Assistant do? Please check its features below:
Now download the free trial version of Coolmuster Android Assistant and have a try:
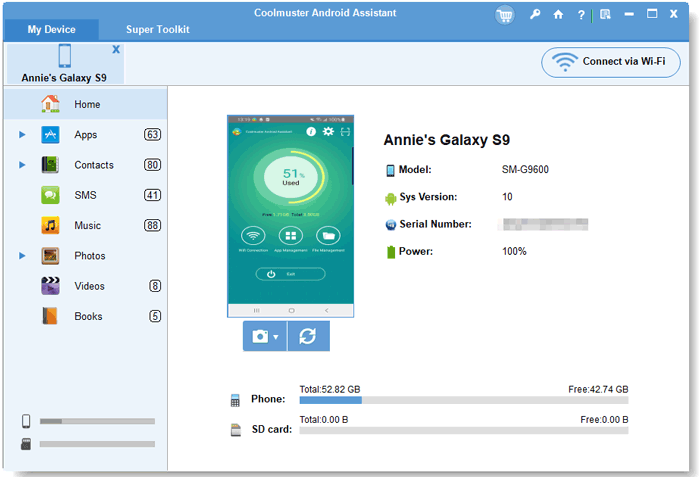
01After launching the program, connect your phone to your computer via a USB cable or Wi-Fi. Follow the on-screen prompt to realize the connection. You can see the main interface below once your phone is detected by the program.
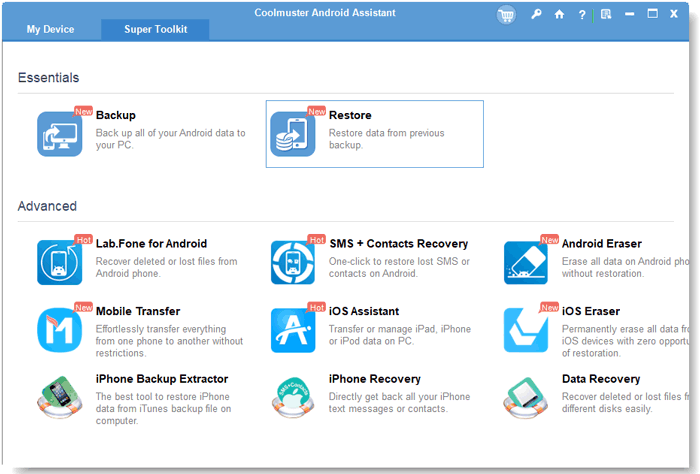
02Go to the "Super Toolkit" section and click "Backup".
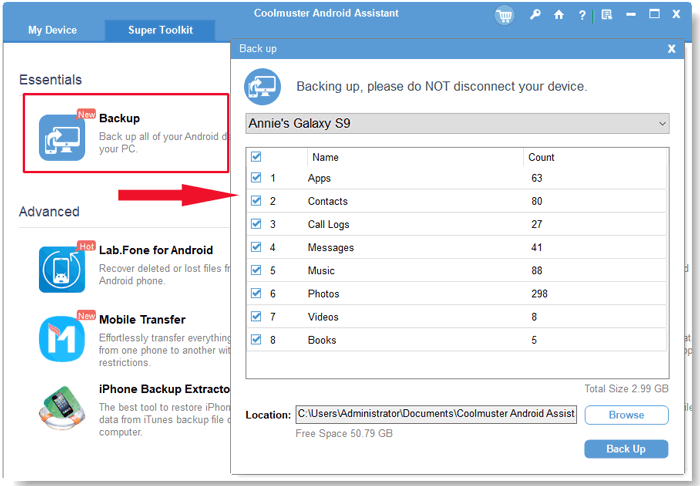
03Here, you can select the type of file to back up. Click "Browse" to choose the location to store your files, then click "Back Up".
01Run the software on your computer and then connect your Sony Xperia to your computer via a USB cable or Wi-Fi.
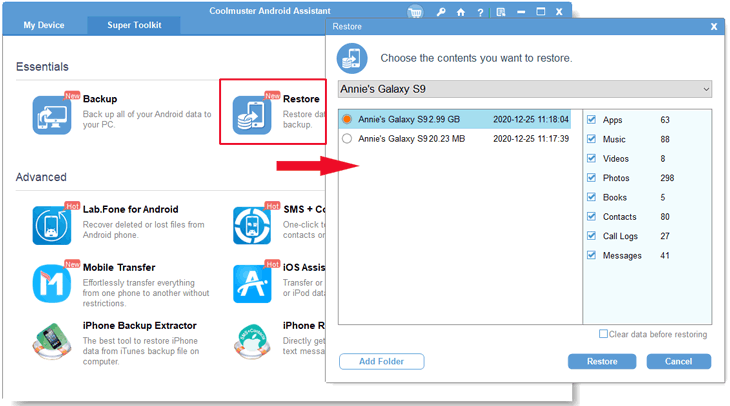
02Go to the "Super Toolkit" section and click "Restore".
03Select the previous Sony Xperia backup and then click "Restore".
You may think backing up the whole Xperia would be a waste of time or space if you only want to back up specific data like contacts, photos, videos, etc. Here, we will show you how to back up Sony Xperia data individually.
01Run the software on your computer and connect your Sony Xperia to your computer.
02Click the folders you want and preview the data. Select the required data and click "Export" at the top of the menu.
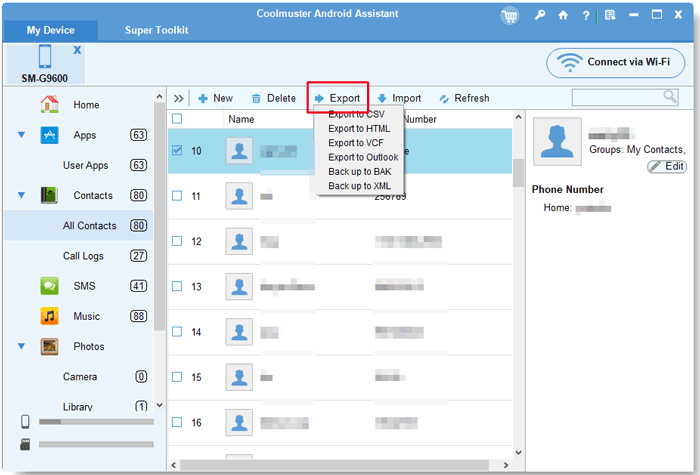
In this way, you can select the Sony Xperia data individually and back up to the computer. What's more, you can use the "Import" button to restore them to your phone again.
Below is a systematic video tutorial:
Apart from using third-party tools, backing up and restoring your Sony Xperia via a Google account is also a convenient and efficient method. With Google's auto-backup feature enabled, you can securely sync and save important data like contacts, messages, apps, settings, photos, and more to the cloud. When switching to a new phone or after a factory reset, simply signing into your Google account allows you to restore the data effortlessly.
Types of Data You Can Back Up with Google:
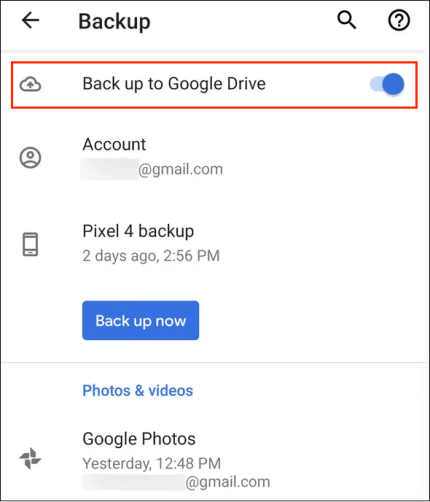
Step 1. On your Sony Xperia phone, go to "Settings" > "System" > "Backup".
Step 2. Enable the "Back up to Google Drive" option and make sure you're signed into your Google account.
Step 3. Tap "Back up now" to perform a manual backup instantly.
Step 1. On your new or factory-reset device, follow the on-screen setup instructions.
Step 2. When prompted, sign in with the same Google account used for the backup.
Step 3. Choose the desired backup record, and the device will automatically restore the data from Google's servers.
Make sure your Google Drive has sufficient cloud storage to accommodate the backup, as certain data, such as app data or text messages, may not be fully restored depending on your Android version and Google's current support policies.
It is wise to create a backup of your Xperia device just in case something goes wrong happens to your phone and causes data loss. Speaking of Sony backup and restore software, Coolmuster Android Backup Manager is your solid choice. Compared to cloud storage, it is safer and free from the concern of limited storage space. And it makes the backup and restore process easy and quick.
If you are looking for a tool that can back up and manage your data, you can give Coolmuster Android Assistant a try. It supports more types of files and provides more comprehensive functions for managing data.
Related Articles:
How to Recover Deleted Photos on Sony Xperia [4 Solutions]
How to Transfer Contacts from Sony Xperia to PC in 5 Clever Ways?
How to Transfer Data from Sony Xperia to Sony Xperia in 3 New Approaches?
Full Guide on How to Transfer Photos from Sony Xperia to a Computer


 Free Download for PC
  Free Download for Mac

