Our smartphones have become our primary cameras, capturing countless memories in the form of photos. However, with limited storage space on our devices, it's essential to know how to transfer these precious memories to external storage. One convenient method is transferring photos from your Android device to a flash drive. In this guide, we'll explore various methods of how to transfer photos from Android to flash drives.
Transferring photos from your phone to a USB stick using the drag-and-drop method is a straightforward and user-friendly process. This method is particularly handy when you want a quick and direct way to move your pictures without the need for additional software.
Here's how you can do it:
Step 1. Connect your Android to the computer with a USB cable.
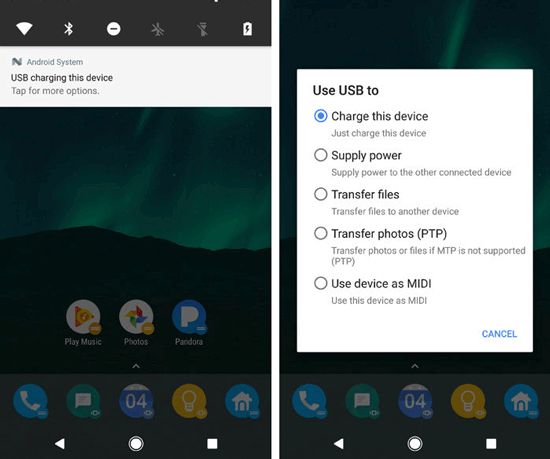
Step 2. On your Android phone, tap the USB Charging notification and select "Transfer files" or "Transfer photos".
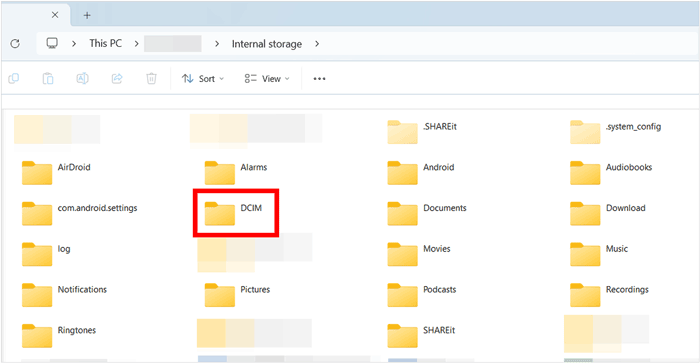
Step 3. On your computer, click "This PC" and open your Android phone under the Devices and Drivers section.
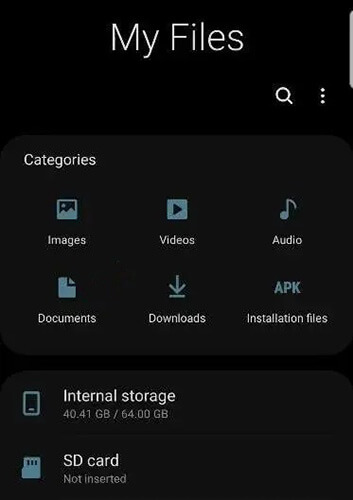
Step 4. Navigate to the internal storage of your phone, find the DCIM folder, and open it.
Step 5. Plug the USB flash drive into the computer and then open it, drag the photos from your Android's DCIM folder, and drop them to your USB drive. Eject your USB and your Android phone when it's done.
Read More: Click here to check this guide to learn how to transfer files from Android to USB flash drive.
An OTG (On The Go) cable has a larger USB port at one end and a micro USB connector at the other end. It enables you to directly connect a USB flash device or an SD card reader to your phone. Using an OTG adapter is a convenient way to transfer photos directly from your phone's photo gallery to a flash drive. However, not all Android devices support OTG. You can check if OTG can work on your device by downloading this app from Google Play.
Check the following steps to see how to transfer pictures from a phone to a flash drive with an OTG cable:
Step 1. Insert your USB flash drive into the larger USB port of the OTG cable, and then connect the opposite end of the OTG cable to your Android device.
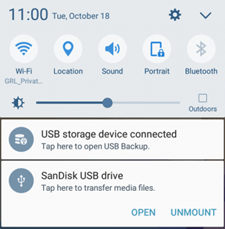
Step 2. A notification will appear that says USB storage device connected. If it's not connected, you can tap the USB drive for more options and select "Transfer files".
Step 3. Open the File Manager on your Android phone and then tap "Internal storage". Find the DCIM folder.
Step 4. Locate the photo you want to transfer and long-press it to select. Tap the three dots icon on the top-right and select "Copy".
Step 5. Copy the photos to your USB drive and then tap "Done".
Note: Here is another tip you may like: how to transfer photos from Android phone to external hard drive directly.
Coolmuster Android Assistant is a comprehensive software solution designed to simplify the management of Android devices, providing users with a range of features to enhance control and organization. It serves as a bridge between your Android device and your computer, offering a seamless way to manage, transfer, back up and restore data.
Whether you want to organize your contacts, messages, or multimedia files, this software provides a user-friendly interface for efficient device management.
How can Coolmuster Android Assistant assist you?
Follow these steps to transfer photos from Android to a flash drive:
01Download, install, and launch Coolmuster Android Assistant on your PC.
02Connect the USB flash drive to your computer and link your Android with a USB cable. Enable USB debugging and grant permissions as prompted. Once detected, the program will display your Android's information on the main interface.
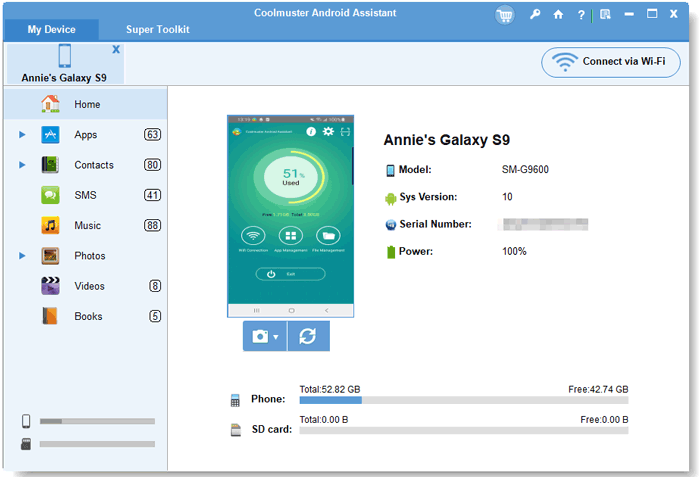
03Click the "Photos" tab from the left sidebar. You can preview all the photos on your Android. Select the photos you want and click "Export" > browse and select the USB flash drive in the prompted window > click "OK" to save the files to USB.

Cloud storage services like Google Drive, Dropbox, or OneDrive provide an efficient way to transfer and backup photos. (Is Google Drive secure? Click the link to get the answer.)
Here's a step-by-step guide on how to transfer photos from Android to a flash drive using Google Drive:
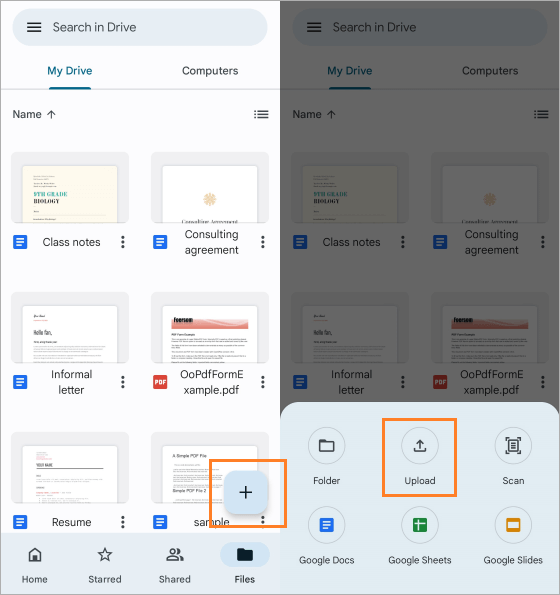
Step 1. Install the Google Drive app from the Google Play Store on your Android device. Open the app and log in with your Google account.
Step 2. Tap the "+" button within the Google Drive app and select "Upload". Choose the photos you want to transfer from your phone's gallery and upload them to your Google Drive.
Step 3. On your computer, open a web browser and go to the Google Drive website. Sign in with the same Google account you used on your phone.
Step 4. Locate the uploaded photos in Google Drive. Select the photos you want to transfer to your flash drive, then click on the "More" option and choose "Download". This will save the photos to your computer.
Step 5. Insert your flash drive into a free USB port on your computer. Open the folder where your downloaded photos are located. Select the photos and drag them to the folder associated with your flash drive. Alternatively, you can copy and paste the photos into the flash drive folder. Wait for it to complete.
AirDroid is a convenient mobile device management app that facilitates quick wireless file transfer and remote management between Android devices and computers. Users can effortlessly transfer photos, music, and videos, view notifications in real-time. Here's how to download pictures to a flash drive using AirDroid:
Step 1. Download and install the AirDroid app from the Google Play Store on your Android device.
Step 2. Open the AirDroid app on your Android, create an AirDroid account, and follow the on-screen instructions to finish the registration process.
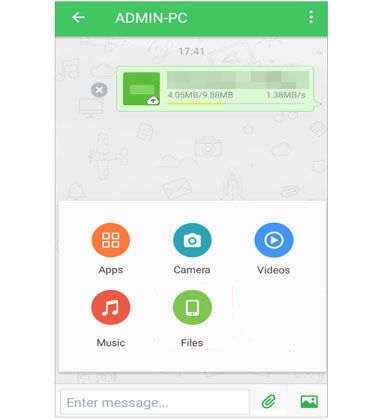
Step 3. Make sure both your Android device and computer are linked to the same Wi-Fi network. Open the AirDroid app on your Android and log in. Then, open the AirDroid desktop client on your computer and sign in with the same account.
Step 4. Within the AirDroid app on your Android device, navigate to the "Transfer" section. Choose your computer device, and click the "Photos" icon to select your photos. Then click "Send". You will receive the photos on your PC.
Step 5. On your computer, insert the flash drive into an available USB port. Within the AirDroid desktop client, select the flash drive as the destination for the transfer. The selected pictures will be wirelessly transferred from your Android device to the flash drive.
Transferring photos from your Android device to a flash drive is a straightforward process, and you can select a method that best fits your preferences and available resources. Whether you opt for a direct USB connection, file manager apps like Coolmuster Android Assistant, or cloud storage, the key is to ensure your cherished memories are safely stored and easily accessible.
By following the steps outlined in the article, you can free up valuable space on your Android device and continue capturing new moments without worrying about storage limitations.
Related Articles:
How to Transfer Photos from Android to PC Windows 10/11 [5 Ways]
Top 8 Ways on How to Transfer Photos from Android to Computer
5 Effective Solutions to Transfer Photos from Android to Mac Wirelessly
Learn How to Transfer Photos from Phone to Computer Like Pro


 Free Download for PC
  Free Download for Mac

