When you want to transfer photos from your Sony Xperia phone to a computer, Xperia Companion might be the first thing that comes to mind. However, it's worth noting that the updated Xperia Companion no longer supports backup, restore, or transfer functions; it merely offers a convenient method for software repair. So, how to transfer photos from a Sony Xperia to a computer?
To assist you better with Xperia transfer to PC, this article will introduce six other effective methods. Let's take a look.

Coolmuster Android Assistant is your solid option when talking about how to transfer photos from Sony Xperia to computer. It is a professional data management software that packed with all the features you need. If you are looking for a Sony photo assistant, Coolmuster Android Assistant is here for you. It can manage your photos including transferring photos from Sony Xperia to computer breezily.
What can Coolmuster Android Assistant do for you?
Download the required version of Coolmuster Android Assistant on your computer and let's see how to transfer photos from Sony Xperia to PC.
Note: If you're looking for a Sony Xperia Mac file transfer, please download the Coolmuster Android Assistant for the Mac version.
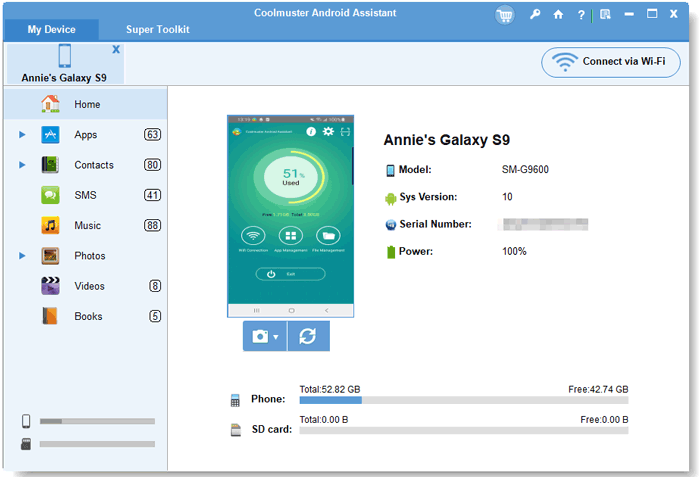
01Run Coolmuster Android Assistant on your PC, and connect Sony Xperia to your PC via a USB cable or Wi-Fi. Make your phone detected by the program by following the on-screen prompts. The main interface is as below once the program is recognized on your phone.
02Go to the "Photos" panel and click "Camera" or "Library" to view the photos on your Sony Xperia. Select the desired photos and click the "Export" button to transfer them to the PC.

You can watch the video guide to transfer your photos easily (about 2 minutes):
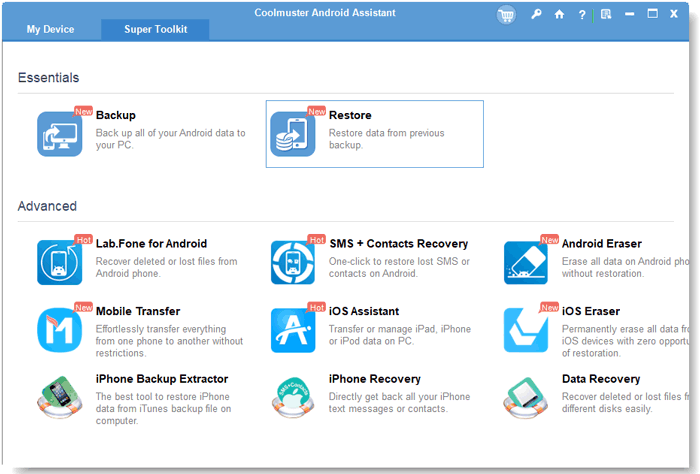
01Launch the software on your PC and connect your Sony Xperia to your PC. After the connection is done, go to the "Super Toolkit" section.
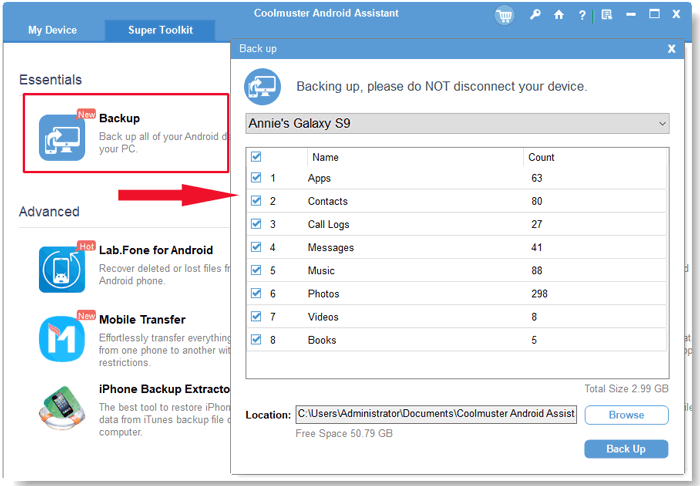
02Click "Backup" and select "Photos" on the pop-up window. Choose the location on your PC to store the photos and then click "Back Up". All the pictures in the Xperia device are transferred to the computer.
Follow the video guide to back up all photos at once (about two and a half minutes long):
One of the most straightforward and commonly used methods is to connect your phone to the computer via a USB cable and then utilize file managers or photo management software to transfer photos. Here's how:
Step 1. Connect your Sony Xperia to your computer via a USB cable.
Step 2. Slide down from the top of the screen and, tap the USB connection, select "Media transfer mode (MTP)".
Step 3. On your computer, go to File Explorer and click your Sony Xperia device. Find and open the "DCIM" folder that stores your photos.
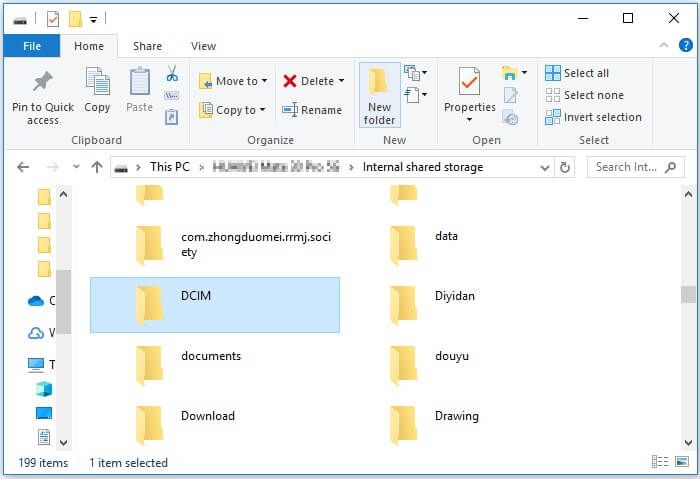
Step 4. Drag and drop the photos you want to transfer from Sony Xperia to the computer.
Read more: Wonder how to recover deleted photos on Sony Xperia? You can use these 4 powerful methods.
You can use Bluetooth to transfer from a Sony Xperia to a computer if there are just a few photos. The steps are as follows:
Step 1. Enable Bluetooth on both your Sony Xperia and computer.
- On your Sony Xperia: Tap "Menu" icon > "Settings" > Switch "Bluetooth to on.
- On your computer (take Win 10 as an example): Go to "Start" > "Settings" > "Device" > Turn on "Bluetooth".
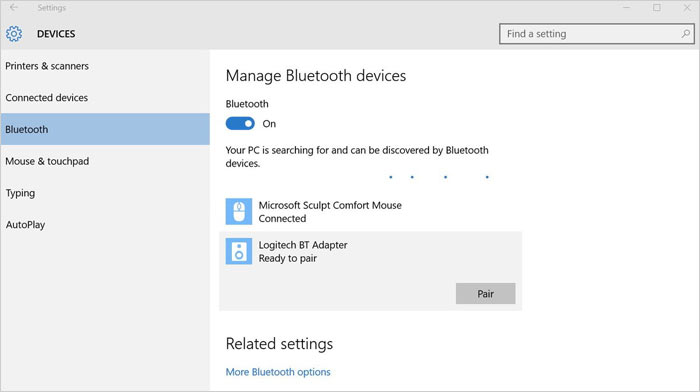
Step 2. Pair your phone and computer and confirm the password shown on your Sony Xperia and PC.
Step 3. On your phone, select the photos you want and share them via Bluetooth.
Step 4. On your computer, click "Receive a file" and save the photos to your computer.
May like: How can you transfer data bewteen Sony Xperia? Refer to this article to select a professional method: How to Transfer Data from Sony Xperia to Sony Xperia in 3 New Approaches.
If you hope to achieve cross-device synchronization and instant access to photos, then using cloud services like Dropbox would be a great choice. All you need to do is upload your photos to the cloud and download them from the device you want to access, such as your computer.
How to get pictures from Sony Xperia to a laptop with Dropbox?
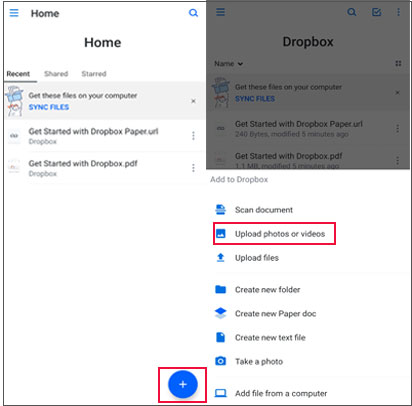
Step 1. On your Sony Xperia, download Dropbox from the Google Play store and create a Dropbox account.
Step 2. Tap the "+" icon on the right corner of the screen and select "Upload photos or videos". Select the photos that you want to transfer and upload them to Dropbox.
Step 3. On your computer, log in to Dropbox.com, go to "My files" to select the photos from your Xperia, and click "Download" on the right side.
If you only need to transfer a small number of photos, email is a simple and effective option. Below is a guide on how to transfer photos from a Sony Xperia XA to a computer with email:
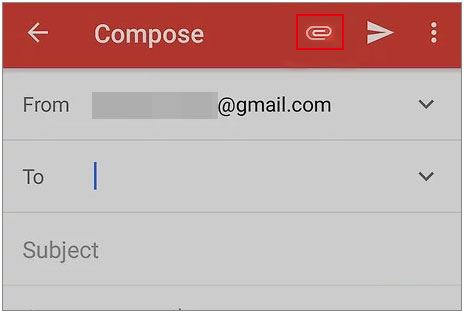
Step 1. Open the email app on your Sony Xperia and compose a new email.
Step 2. Attach the photos and send the email to your own mailbox.
Step 3. Log in to your email account on your computer and download the photos in the attachment to your computer.
Some may ask that, "How do I transfer text messages from a Sony Xperia to a computer?" Please find your answer below.
How Do I Transfer Text Messages from My Sony Xperia to My Computer? (4 Simple Ways)SD card transfer not only boasts fast speed but also eliminates the need for a network or specific software, making it ideal for users who require massive photo transfers. If your Sony Xperia phone supports SD cards, this will be a highly straightforward and flexible approach.
Here are the specific steps:
Step 1. Save photos to the SD card on your Sony Xperia.
Step 2. Remove the SD card and insert it into the SD card slot of your computer, or connect it to your computer via an SD card reader.
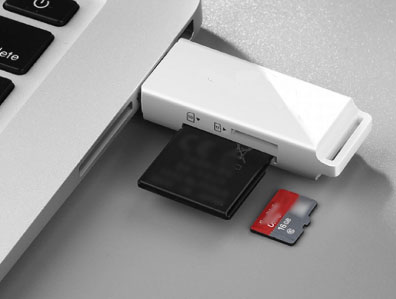
Step 3. Open the SD card on your computer, locate and copy the photos to the desired folder on your computer.
That's all for how to transfer photos from a Sony Xperia to the computer. You can follow the way you prefer. For transferring a small number of photos, Bluetooth and email are excellent options. Transferring via SD card and USB cable is the most direct and easy-to-operate method, albeit with a slightly more complex process.
Cloud storage, on the other hand, enables access to data anytime, anywhere, regardless of the device, but free space is limited, and this method demands a high-quality network connection.
If you are looking for the most secure and quickest way, Coolmuster Android Assistant is recommended for you. With it, you can transfer your photos individually or in batches to the computer easily within 3 simple steps (connect > select > transfer). Give it a try now.
Related Articles:
How to Transfer Contacts from Sony Xperia to PC in 5 Clever Ways?
How to Perform Sony Xperia Data Recovery with/Without Backup
How to Retrieve Deleted Messages/Contacts from Sony Xperia with/Without Backup


 Free Download for PC
  Free Download for Mac

