TL;DR: File shredder not deleting corrupted files on Windows 10/11? This guide explains why corrupted files cannot be removed and provides 4 effective solutions, including CHKDSK, CMD, Safe Mode, and Coolmuster Data Erasure, to permanently delete stubborn files and prevent recovery.
When you try to use a file shredder to permanently delete files but find that corrupted files cannot be removed, it can be extremely frustrating. If you are looking for solutions to fix file shredder not deleting corrupted files on Windows 10/11, the methods below can help you force-delete these stubborn files and ensure that the data cannot be recovered.

On Windows computers, several factors can prevent you from deleting corrupted files or folders successfully. Common causes include:
If the Windows file shredder cannot delete corrupted files or folders, there is no need to worry. In this section, we will introduce 4 practical solutions to help you resolve the issue and permanently remove stubborn files with ease.
If a file shredder not deleting corrupted files is caused by disk errors, the first recommended solution is to use the built-in Windows CHKDSK tool to repair the issue. CHKDSK can scan the hard drive for file system problems and fix directory errors, file index issues, and certain types of disk corruption. When files become inaccessible or behave abnormally, repairing the file system can often restore normal deletion functionality.
Here is how to do it:
Step 1. Press "Windows" + "S" and search for Command Prompt.
Step 2. Right-click "Command Prompt" and select "Run as administrator".
Step 3. Type "chkdsk C: /f /r" and press "Enter". Replace "C:" with the drive letter where the corrupted file is located.
Step 4. Wait for CHKDSK to complete the scanning and repair process. The tool will automatically detect file system errors, repair damaged sectors, and fix logical disk problems.
Step 5. Restart your computer if Windows asks you to schedule the disk check during the next startup.
Step 6. After the repair is complete, try using File Shredder again to permanently delete the corrupted file or folder.
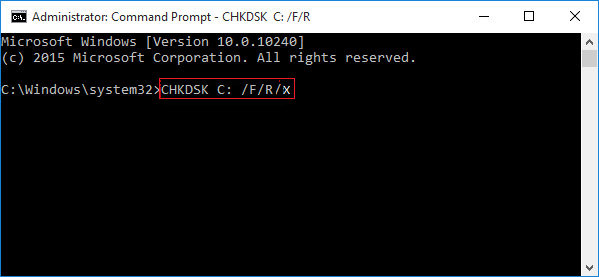
If repairing the file system does not solve the problem, you can try using Command Prompt to force Windows to delete the corrupted files. Here is how to delete corrupted files in Windows 11/10 via CMD:
Step 1. Press "Windows" + "S" simultaneously, type "cmd" in the search box, and select "Run as administrator" to launch Command Prompt with elevated privileges.
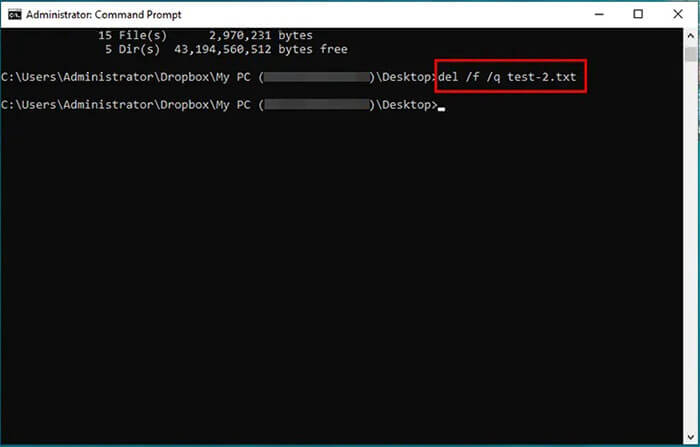
Step 2. In the Command Prompt window, type "del /f /q /a "file directory"" and press "Enter". Replace "file directory" with the actual path of the corrupted file or folder you want to remove. For example: del /f /q /a "C:\Users\Lovejeet\Desktop\infected.txt".
Step 3. Restart your computer and check whether the corrupted files have been successfully removed.
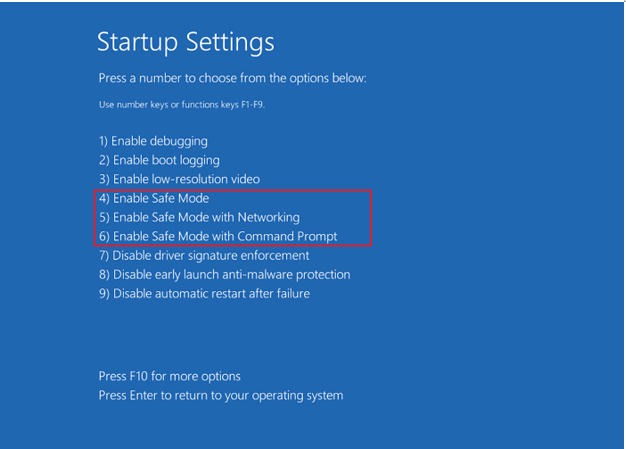
Safe Mode starts Windows with only essential files and drivers, which can help prevent background programs from locking files. By entering Safe Mode, you may be able to unlock corrupted files or folders and delete them successfully. Follow the steps below:
Step 1. Click "Start" > "Settings" > "Update & Security" > "Recovery". Under "Advanced Startup", click "Restart now" to access the Windows Recovery Environment.
Step 2. Select "Troubleshoot" > "Advanced options" > "Startup Settings", and then click "Restart".
Step 3. When the Startup Settings screen appears, press "F4" to start Windows in Safe Mode or press "F5" to enter Safe Mode with Networking.
Step 4. After Windows starts in Safe Mode, locate the corrupted file or folder and delete it using Delete or Shift + Delete.
Step 5. Restart your computer normally. Windows will automatically exit Safe Mode. After rebooting, check File Explorer or your desktop to confirm that the corrupted file or folder has been removed.
Coolmuster Data Erasure is a user-friendly and secure file shredder that is compatible with Windows 11/10/8/7. It can safely and effectively delete corrupted files or folders from your computer by overwriting the data, making them impossible to recover with data recovery software. With just a few simple steps, you can use this professional tool to permanently remove corrupted files or folders.
Key features of Coolmuster Data Erasure:
Here is how to delete corrupted files on Windows via Coolmuster Data Erasure:
01Launch Coolmuster Data Erasure and select the "File Shredder" mode to permanently remove corrupted files from your Windows computer.
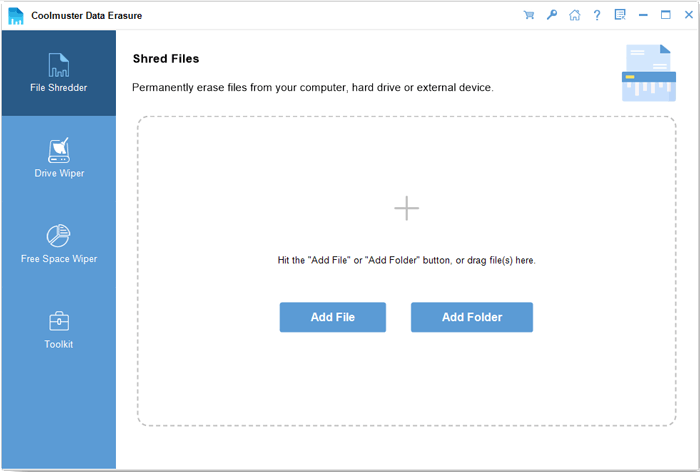
02Add the corrupted files or folders that cannot be deleted normally, then browse your computer and select the specific items you want to erase.
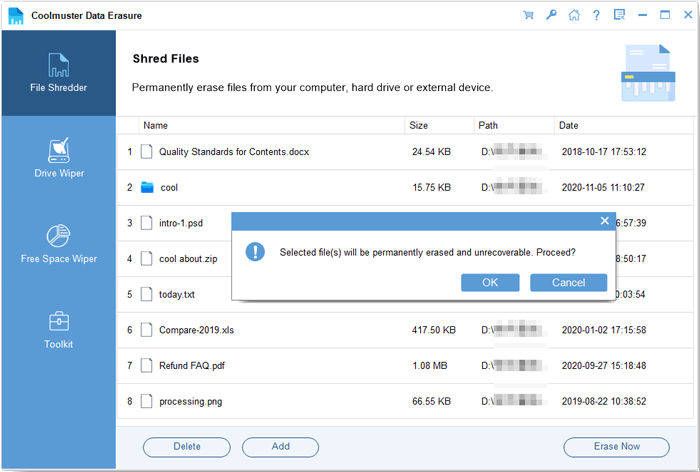
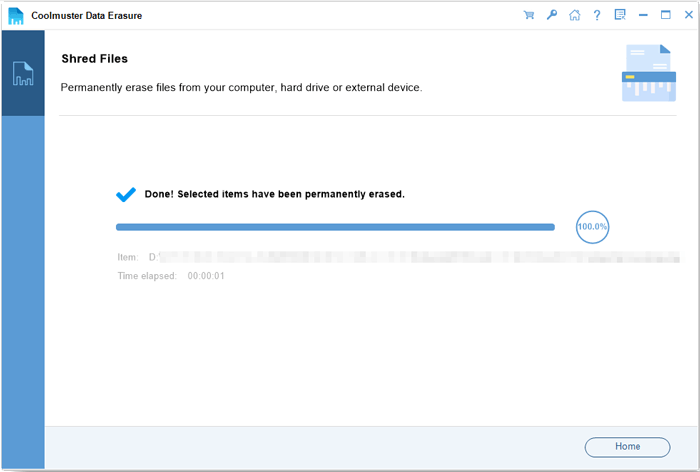
03Click "Erase Now" and confirm the operation. The selected corrupted files will be permanently deleted and cannot be recovered, so check the file list carefully before erasing.
Video Tutorial:
This guide provides several practical solutions to fix the file shredder not deleting corrupted files issue on Windows computers. You can first try using CHKDSK to repair disk errors, then use CMD to force delete the files, or enter Safe Mode to remove stubborn corrupted files.
If these methods still cannot solve the problem and you need to completely delete inaccessible corrupted files, Coolmuster Data Erasure is a more reliable option. It can securely erase file data and prevent any recoverable traces. For users who need to permanently remove sensitive or corrupted files, it offers a simple, safe, and professional solution.
Related Articles:
Disk Cleanup Not Deleting Files on Windows 10/11: 5 Quick Fixes
How to Force Delete a File on Windows and Mac: Complete Guide
How to Format a Corrupted SD Card on Windows and Mac? 5 Ways
How to Prevent Deleted File Recovery on Windows/Mac: Full Guide






 Free Download for PC


