
How to Transfer Photos, Movies and Music from iPad Air/Pro to Computer

I have some interesting videos in my iPad for which there is no backup. I originally copied these videos to the iPad from a PC. However, I accidentally formatted the drive where the videos were stored on the PC. I've tried to recover them but failed. So Im looking for a program that can copy and transfer my amine video from iPad to my computer. Who can give me an advice about how to transfer video from iPad?
People choose to copy large-sized files like movies, music and photos from iPad to computer for various reasons. Want to free up the memory space of the device to prevent too much data slow down the running speed. Or export the files to computer so as to better share or enjoy these fancy media files with your family and friends. Or just for backup purpose. We know that it is not safe to save valuable data on iPad because they can be lost easily for known or unknown reasons. Transferring data from iPad to computer is a wise decision to protect your important information. In this article, we will set the newly released iPad Air as an example and tell you how to transfer media files like videos, songs and pictures from iPad Air to computer.
Learn A Little about the iPad Air
Apple has launched the fifth generation iPad tablet two days ago and it broke the rumors that the new iPad was going to be called the iPad Air rather than the iPad 5. The appearance of iPad Air is more like the iPad mini, rather than iPad 4. With the dimensions of 9.45x6.67x0.30 inches, it is a lot smaller and thinner than its predecessor. The screen of the iPad Air is considerably sharp and detailed. And the slim exterior hides the powerful Apple A7 processor, which is the fastest mobile processor we have tested. Apple also imporves the cameras of iPad Air, including a 5 megapixels camera and 1.2 megapixels front-facing camera, allowing users to capture more wonderful videos and photos.
We know that iTunes is helpless to export movies, music, video or other data from iPad to Mac or PC. That means we have to ask help from a third-party program to achieve the transferring goal. Here Coolmuster iOS Assistant is highly recommended. As a professional transferring tool for iOS devices, it can help you efforlessly transfer media files from iPad Air to Windows or Mac computer without iTunes. The following tutorial will guide you through the process of coping movie, music and photos from iPad Air to computer/Mac respectively.
First of all, please download the free trial version on your PC or Mac according to your computer system.
Can't Miss:
How to Backup iPad Data with iPad Backup Apps
Step 1. Install and Run iPad Air/Pro Transfer on Your Computer
Connect your iPad Air to computer via USB cable, and then quickly install the iPad Air transfer on your computer. Launch it and then you'll see your iPad Air info showing in the main interface. If the program can't detect your device, you can try to re-detect it by clicking the button of "Refresh" on the interface.
Tips: The iPad Air Transfer supports all other models of iPad, including iPad Pro/Air/4/mini/2, etc.
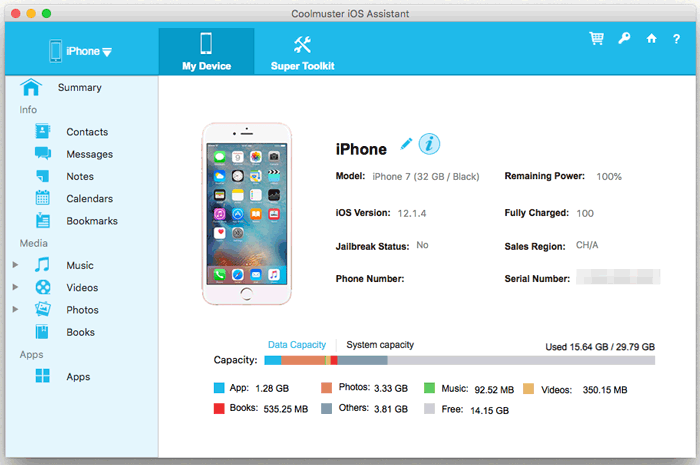
Step 2. Preview and Export Files from iPad Air to Computer Selectively
After detecting by the program, you can see all your iPad Air data have been scanned out and categorized into different folders, such as music, movie, TV shows, etc. Just go to open the folders of "Movie", "Music", "Photos" and "Camera Roll", and choose all files you want to export. Then hit the big "Export" button on the top of the panel to save them to your Mac.
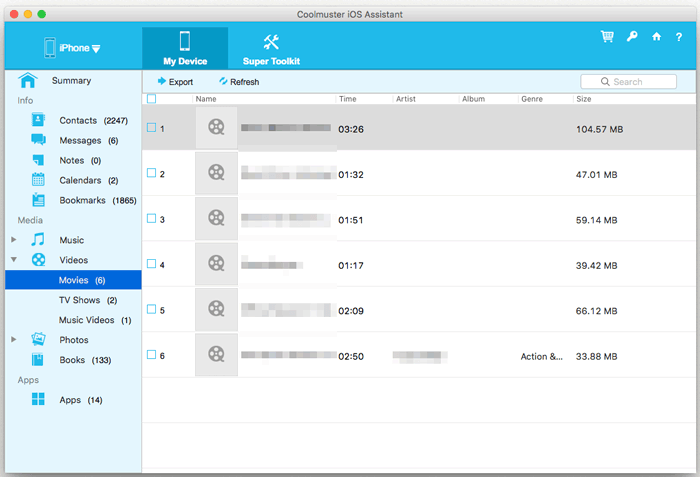
Actually, the operating of the iPad to PC Transfer just as same as the Mac version. Just connect your iPad Air to Mac, and then launch this program and go to all the folders contain the media files you want. Choose you wanted files and hit "Export" button. Wait for a few seconds and you will find all the selected files are all successfully exported to your computer.
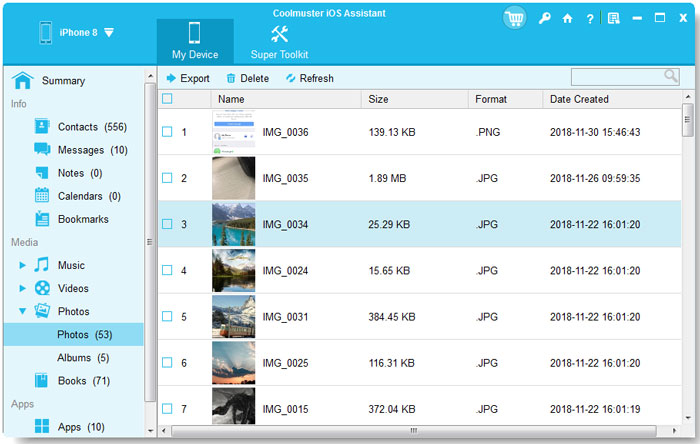
Quite easy, isn't it? The read-only program will do nothing harm on your data and your computer. Now, you can view, play and share these exported files freely on your computer. This iPad Air Transfer extremely does a good job in transferring files from iPad, iPhone and iPod to Windows or Mac computer. Try for yourself!
Optional Choice 1: Transfer Media from iPad to Windows Computer
- Connect your iPad to the computer via USB cord. Be sure to use the same USB cable that you use to charge your iPad.
- Unlock your iPad by selecting the option of "Trust this PC" on the promo dialogue. So this computer is able to detect your iPad device and scan all the saved files.
- Go to the "Computer"/"This PC"/"My Computer" window. You can open this from the Start menu.
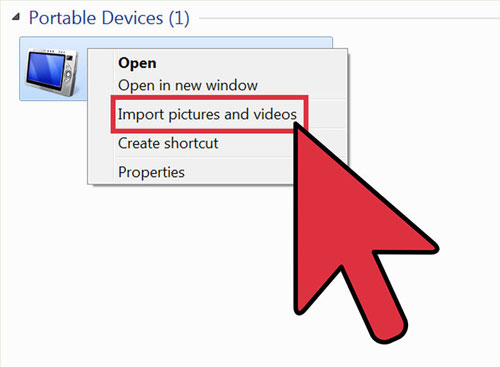
- Right-click on the iPad and select "Import pictures and videos". Then the computer will scan through your iPad device for all media files. Note: if there are a lot of pictures saved on your iPad device, it will be a little time-consuming.
- Select "Review, organize, and group items for import" and click Next. So you can select the files you want to import from the iPad device. By default, all the files within one folder will be chosen for import, just uncheck those unwanted files.
- Now, specify file folders to save your exported media files from the iPad as instructed. Then click on Import option to begin the file transfer from iPad to the computer.
Optional Choice 2: Transfer Media from iPad to Mac Computer
- Connect your iPad to your Mac computer via USB which you use to charge your device.
- Open Image Capture from your Applications folder. Note: This program comes pre-installed on all Mac computers.
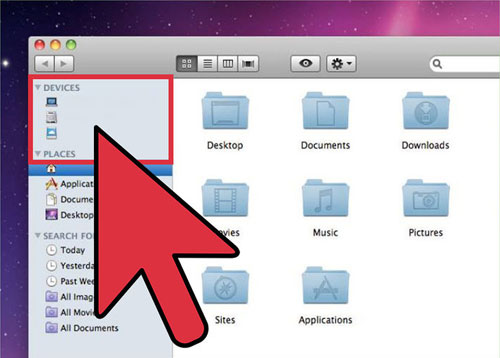
- Select your iPad from the Devices menu on the left. Then a list of your images stored on the iPad will be displayed on the right window.
- Click on the "Import To" option at the bottom to select a location. This is where the images from your iPad will be copied to. The default location is your Pictures folder.
- After that, you can decide if you want to delete the images from the iPad after importing. Open the menu in the bottom-left by clicking the Up arrow, and then check "Delete after import" to delete the pictures from your iPad after finishing the importing process.
- Now, you can select individual images and click on Import option to begin the file transfer from iPad to Mac computer. Also, if you want to transfer all the files like photos, you can click on Import All option. Finally, just wait for the process to get completed within a little while.
But as you can see, the two optional choices mentioned in the above are both time-consuming and energy-costing! So unless you have much free time to fritter away, or otherwise you are suggested to get Coolmuster iOS Assistant software to help at your hand!
Related Articles:
iPad Air: Specs, Tips & Tricks, Reviews, Prices, Video Format, Tutorials
How to Transfer Purchased Items from iPhone/iPad to iTunes Library
How to Transfer iBooks from iPad to Computer with or without iTunes?
Ultimate Guide on Transferring Files from iPhone to PC without iTunes
How to Transfer Photo from iPhone to Computer/PC without iTunes


