Transferring files from your iPhone to your Mac is an effective way to ensure data security and convenient access. It can help you back up important files, free up storage space on your iPhone, organize your files, and work with them more comfortably on a larger screen.
In this guide, we've covered different ways to transfer iPhone files to your Mac or MacBook, including wireless options like AirDrop, wired connections via Finder, and cloud services like iCloud Drive. Whatever your preference, there's a solution to meet your needs.
Connecting an iPhone and a MacBook with a data cable is the most traditional and stable transfer method. Here is how to transfer files from iPhone to Mac using USB in four ways. You can choose the one that best suits your needs.
Coolmuster iOS Assistant is the fastest way to transfer files from iPhone to Mac. It allows you to transfer a wide range of file types from iPhone to Mac, including contacts, text messages, notes, calendars, bookmarks, music, videos, photos, books, and apps. The transferring speed is quick and stable, and the selected data can be transferred to your Mac smoothly without quality loss.
What can iOS Assistant do?
Follow the step-by-step guide below to use iOS Assistant to transfer files from iPhone to Mac:
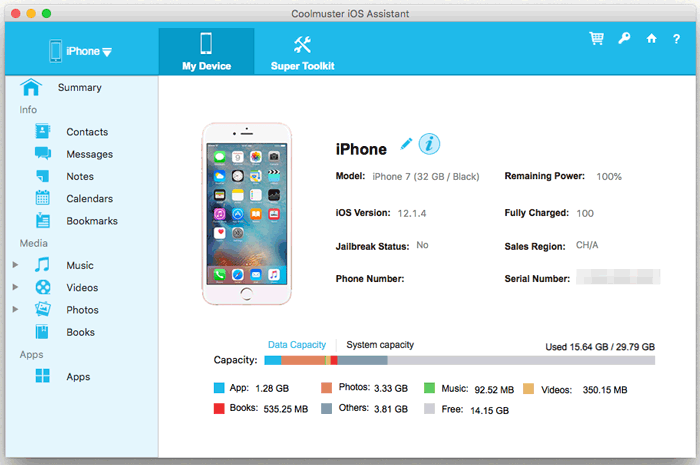
01Download, install, and run iOS Assistant on your Mac, then connect your iPhone to your Mac with a suitable USB cable.
02Hit "Trust" on your iPhone as prompted, and then the software will automatically detect your iPhone. Once detected, you will see the main interface of this tool.
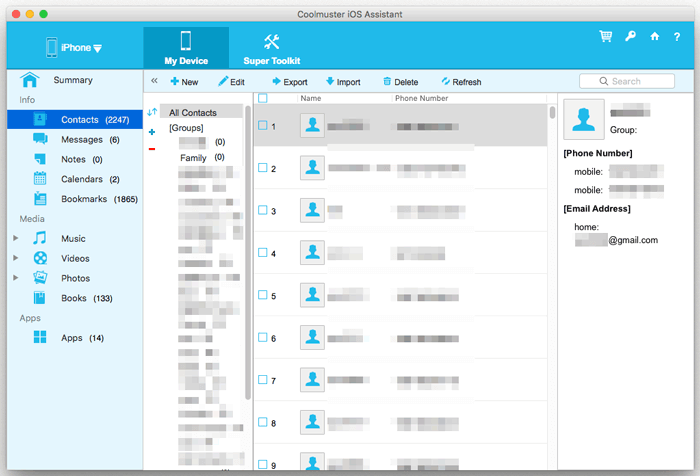
03Select the data type on the left sidebar, and then the files from the iPhone will be displayed on the right windows for management. Choose the files you need to transfer and then click the "Export" button to move them to Mac.
Video Tutorial:
After knowing how to transfer files from iPhone to Mac, how about transferring files from Mac to iPhone? You can read the following articles to learn how to do it.
How to Transfer Files from Mac to iPhone? Solved in 5 Proven WaysIf your Mac is running macOS Catalina, you can easily copy iPhone data to Mac using Finder. How do I transfer files from iPhone to Mac? Follow the steps below:
Step 1. Plug your iPhone into your Mac using a USB cable.
Step 2. Launch Finder on your Mac and select your iPhone's name from the "Locations" section in the left sidebar.
Step 3. Navigate to the "Files" tab at the top-right to view a list of apps on your iPhone containing files.
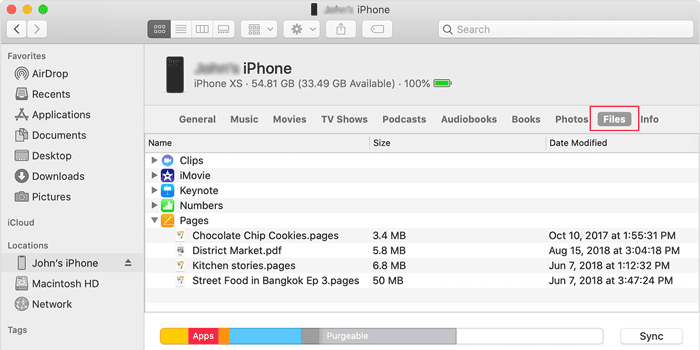
Step 4. Click the arrow next to the desired app to display its files.
Step 5. Simply drag and drop the file you wish to share onto your computer, whether it's into a folder or directly onto your desktop.
If you just want to transfer images and PDF files from iPhone to Mac, the Preview function is also a good choice. Here is how to copy files from iPhone to Mac with Preview:
Step 1. Connect your iPhone to your Mac using a USB cable.
Step 2. Open the "Preview" application.
Step 3. Select "File" > "Import from iPhone".
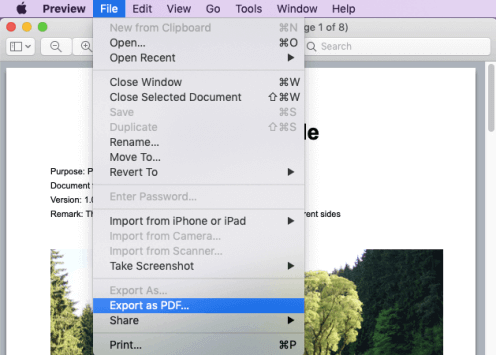
Step 4. Choose the files you want to transfer and click "Import".
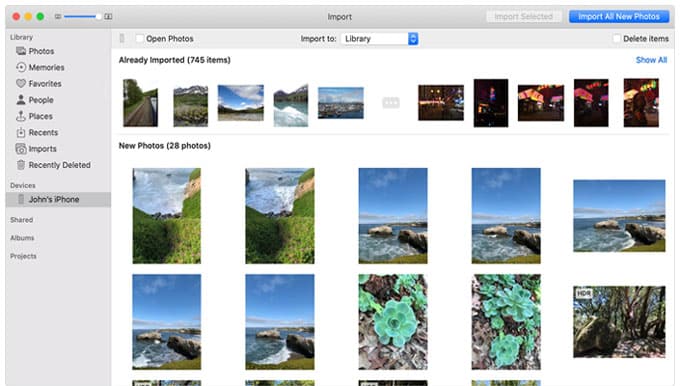
If you only want to transfer photos from iPhone to Mac, the Photos app is a great option. It can help you move photos from your iPhone to your Mac in a very quick and easy way. Here's how to do it:
Step 1. Connect your iPhone to your Mac with a USB cable.
Step 2. Open the Photos app on your Mac, click the device name in the left sidebar and you will see the photos and videos on your iPhone. Then, click the "Import" option.
Step 3. Select the photos you want to transfer, then click "Import Selected" or "Import All" to move them to your Mac. (Can't import photos from iPhone to Mac?)
If you don't have a data cable or prefer wireless transmission, there are also multiple methods to choose from. Here is how to transfer files from iPhone to Mac wirelessly in three ways. Let's look at them one by one.
iCloud Drive allows you to synchronize files between all Apple devices (How to sync iPhone to Mac?). This method is not only simple and easy to use but also ensures the security of files. However, this method relies on iCloud storage, and the free version only offers 5GB.
Here is how to sync files from iPhone to Mac using iCloud Drive:
Step 1. On your iPhone, go to "Settings" > [your name] > tap "iCloud" > enable "iCloud Drive".
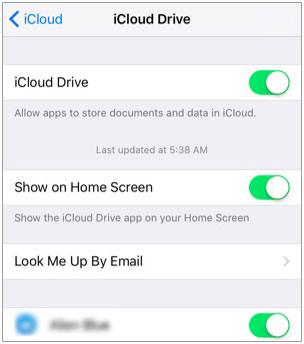
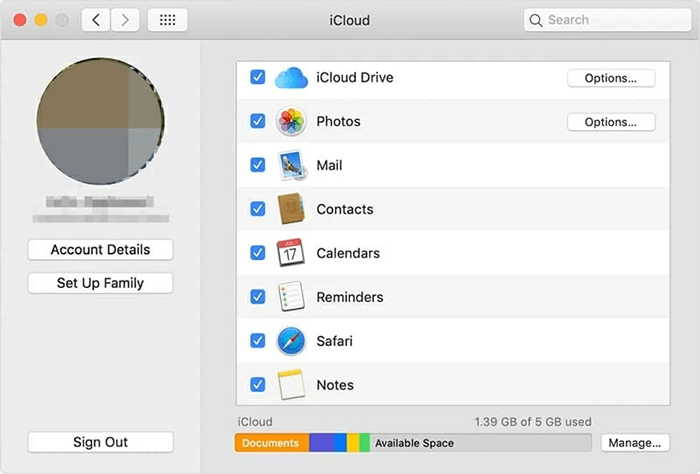
Step 2. On your Mac, go to the Apple menu > "System Preferences" > click "Apple ID" > check the box next to "iCloud Drive".
Step 3. After setting up iCloud Drive on both your iPhone and Mac, you can save your files to the File app on your iPhone, then they will be synced to Mac automatically. (iCloud Drive not syncing?)
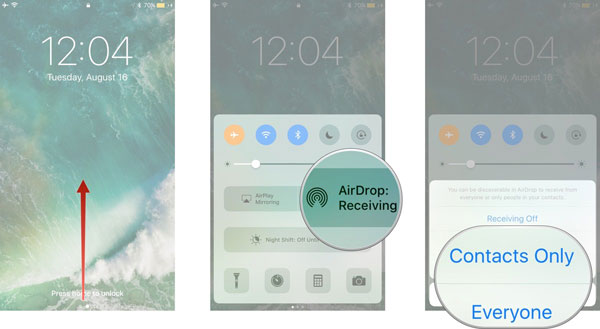
AirDrop comes in very handy when it comes to transferring files between iDevices wirelessly. You only need to turn on the Wi-Fi, Bluetooth, and AirDrop on both your devices and place your devices close enough to do the transfer.
Here is how to AirDrop your iPhone to your Mac:
Step 1. On your iPhone, swipe up from the bottom of the screen and tap "AirDrop", then select "Contacts Only" or "Everyone" according to your needs.
Step 2. On your Mac, open the Finder window and select "AirDrop". Set up "Allow me to be discovered" by "Contacts Only" or "Everyone".

Step 3. Select the files you want to transfer on your iPhone, then tap "Share" > "AirDrop".

Step 4. Choose your Mac device and tap "Accept". The files will be automatically saved to the Downloads folder on your Mac.
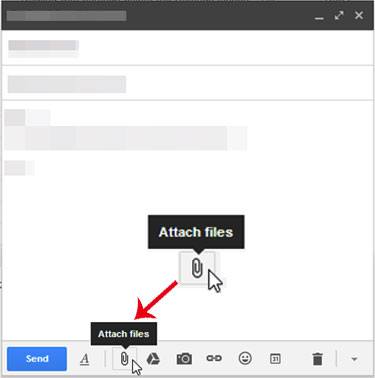
If you want to transfer a few files with small sizes, Email can help you do the data transfer easily. Here is how to transfer files from iPhone to Mac using Email:
Step 1. On your iPhone, compose an email and attach the file you want to transfer, then send this email to yourself.
Step 2. On your Mac, log in to the same email account, and then open the email and download the file from iPhone to Mac.
Although there are many ways to transfer files from iPhone to Mac, Coolmuster iOS Assistant is the most recommended option due to its simplicity and powerful functions. If you hope to manage and transfer files more efficiently, give Coolmuster iOS Assistant a try. No matter which method you choose, you can easily transfer files from iPhone to Mac/MacBook.
Related Articles:
Complete Guide: How to Transfer Files from iPhone to PC
How to Transfer Videos from iPhone to Mac? [7 Effective Ways]
How to Transfer Music from iPhone to Mac? Solved in 5 Effective Ways
How to Transfer Calendar from iPhone to Mac? Solved in 3 Easy Ways


 Free Download for Mac
 Free Download for PC

