Isn't it annoying to fiddle with a USB cable every time you want to transfer photos from your iPhone to your computer? There's an easier way. In this guide, we'll show you how to easily transfer photos from your iPhone to your computer without using USB.
From using Bluetooth to taking advantage of iCloud, we'll show you the most convenient ways to send photos directly to your computer or laptop wirelessly. Say goodbye to cables and enjoy hassle-free photo sharing.
|
Solutions
|
Overview
|
|
iCloud
|
Apple's cloud storage service, seamlessly transfers data between different devices, and provides 5GB free storage options and convenient backup functions. Learn more >>
|
|
Google Photos
|
Google's photo storage service provides 15GB of free storage space for high-quality photos and videos, and provides image management functions. Learn more >>
|
|
Dropbox
|
A popular cloud storage platform that lets you sync and share files, offering limited 2GB of free storage and expandable paid options. Learn more >>
|
|
Email
|
Allows to share documents and media using mail attachments, but generally has strict limits on the size of attachments, so it is suitable for transferring small-capacity photos. Learn more >>
|
|
AirDrop
|
Apple's proprietary file sharing feature that enables fast, secure transfers between Apple devices in close proximity. Learn more >>
|
Here are five ways you can try to transfer photos from iPhone to computer wirelessly. Let's learn them together.
Apple offers a cloud service called iCloud that lets you back up and sync your data, including photos, between various devices. Photos from your iPhone can be uploaded to iCloud and then downloaded using an application or a web browser to your PC. This method's simplicity and convenience lie in the fact that it doesn't require the installation of any third-party software, and it also guarantees the integrity and quality of your photos. The drawback is that it needs a strong internet connection and enough iCloud storage space. (Not enough iCloud storage?)
1. How to Transfer Photos from iPhone to Computer Wirelessly via iCloud.com
If you want to access and download your iCloud photos through a web browser, you can follow these steps:
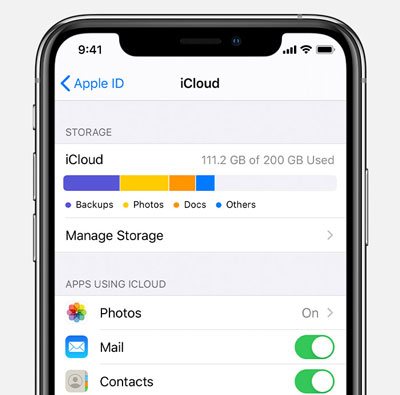
Step 1. Go to "Settings" on your iPhone.
Step 2. Tap on "Apple ID" > "iCloud" > "Photos".
Step 3. Turn on the switch for "iCloud Photos" to instantly sync iPhone photos to iCloud.
Step 4. Access iCloud.com on your computer and sign in.
Step 5. After logging in, select "Photos".
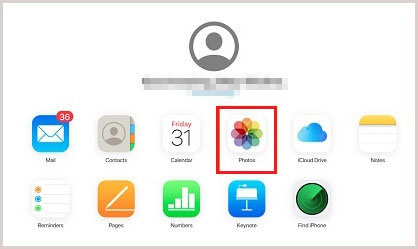
Step 6. Then choose the photos you want to download to your computer and click "Download".
2. How to Transfer Photos from iPhone to Mac Wirelessly via iCloud
If you're using a Mac computer, you can sync and download your iCloud photos directly through the iCloud application on your Mac. Here is how to transfer photos from iPhone to Mac without USB via iCloud:
Step 1. On your Mac, open "System Preferences", click on "iCloud", and then check "Photos".
Step 2. Click on "Options", ensure "iCloud Photo Library" is checked, and then click "Done".
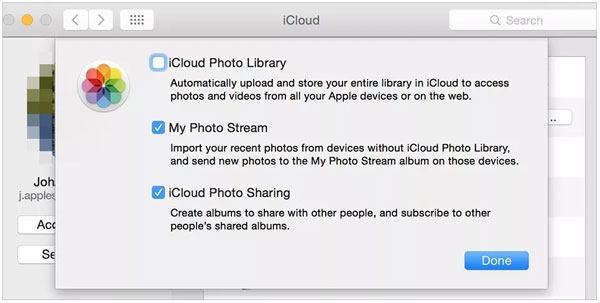
Step 3. Open the Photos app, and you'll see that the photos from your iPhone have been synced to your Mac.
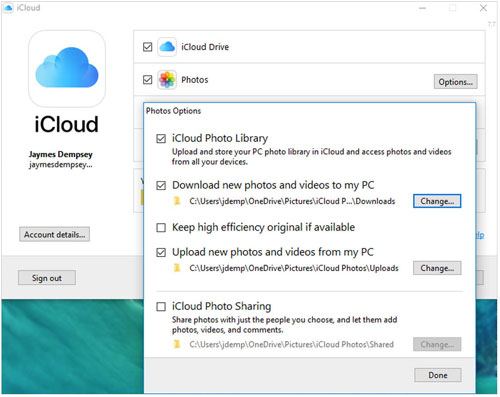
3. How to Transfer Photos from iPhone to Windows 10/11 Wirelessly via iCloud for Windows
For Windows users, transferring photos from an iPhone to a PC is also possible using iCloud for Windows app. Here are the steps to transfer photos from iPhone to Windows 10/11 wirelessly via iCloud for Windows:
Step 1. On your Windows 10/11 computer, download and install iCloud for Windows, then sign in with your Apple ID.
Step 2. Open iCloud for Windows, check "Photos", and then click on "Options".
Step 3. Ensure "iCloud Photo Library" is checked, then click "Done".
Google Photos is a cloud service that lets you back up and sync your photos and videos across multiple devices. If you are willing to accept a specific level of compression quality, it gives infinite free storage space. Photos from your iPhone can be uploaded to Google Photos, where you may download them via an application or a web browser to your computer. Here is how to transfer pictures from iPhone to computer without USB via Google Photos: (Google Photos not backing up?)
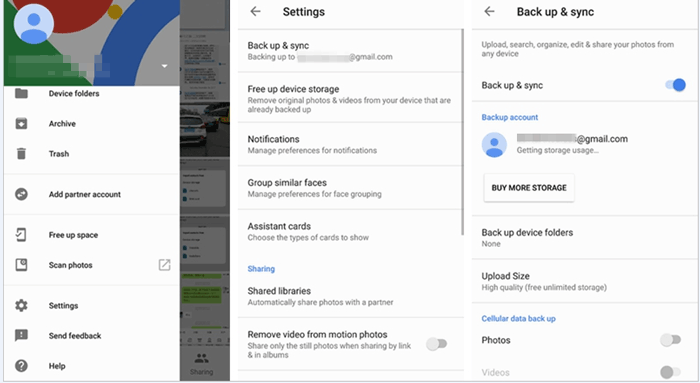
Step 1. On your iPhone, download and install the Google Photos application from the App Store. Open the Google Photos app and sign in with your Google account.
Step 2. Tap on the three horizontal lines (menu) in the top left corner, then select "Settings" > "Back up & sync". Toggle the switch to enable "Back up & Sync".
Step 3. Wait for your iPhone to upload photos to Google Photos. This may take some time, depending on your network speed and the number of photos.
Step 4. On your computer, open a browser and visit photos.google.com, then sign in with your Google account.
Step 5. Once logged in, you'll see all your photos and albums. You can select individual photos or entire albums by clicking on them. To download, click on the three vertical dots (more options) in the top right corner and choose "Download" to save the selected photos to your PC.
Dropbox provides another wireless solution for transferring photos from your iPhone to a laptop. Here is how to transfer photos from iPhone to PC wirelessly with Dropbox:
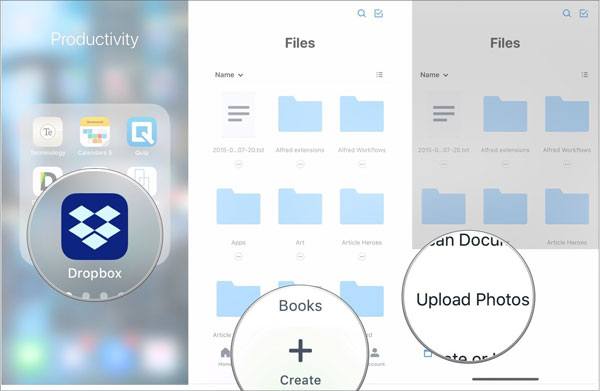
Step 1. Install the Dropbox app on your iPhone by downloading it from the App Store.
Step 2. After installation, open the app and tap the "+" icon located at the bottom of the screen. Then, choose "Upload Photos" from the options provided.
Step 3. Choose the photos you want to upload, then select "Set location" and choose where you want to upload them to sync photos to Dropbox.
Step 4. Open a web browser on your laptop or download the Dropbox desktop application.
Step 5. Sign in to your Dropbox account using the same credentials you used on your iPhone.
Step 6. Once logged in, navigate to the folder where you uploaded the photos from your iPhone. You should see the photos listed there. You can select individual photos or entire folders, then click the "Download" button to save them to your laptop.
If you only want to transfer a small number of photos, you can also do so via email. However, you can only send a limited number of photos each time, and it requires manual operation. Here is how to transfer photos from iPhone to laptop wirelessly via email:
Step 1. On your iPhone, open the "Photos" app, then select the photos you want to send.
Step 2. Tap on the "Share" icon at the bottom left corner, then select "Mail".
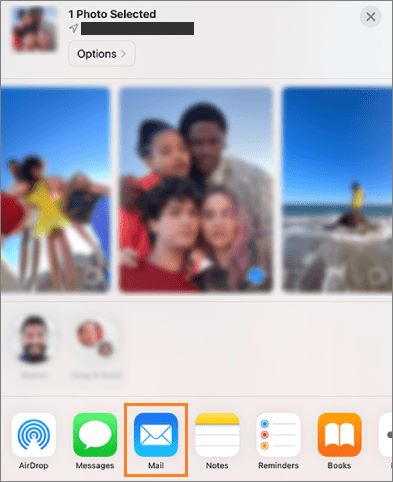
Step 3. In the pop-up window, enter your email address, then click "Send".
Step 4. On your computer, open your email and find the email you just sent.
Step 5. Open the email, then click on the attachment to save the photos to your computer.
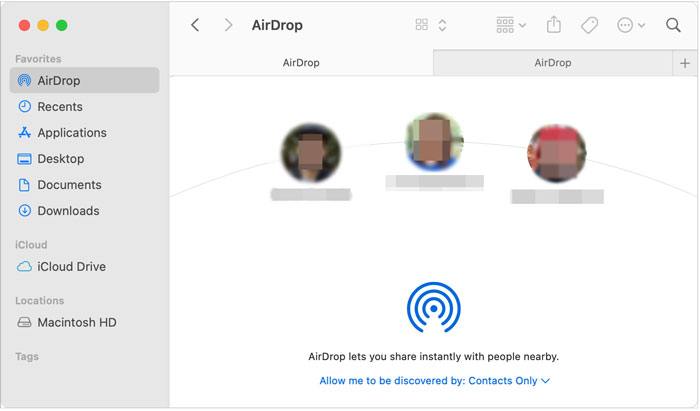
Moreover, you may use AirDrop to swiftly move photos from your iPhone to your Mac if you're using a Mac computer. Apple has a wireless transfer method called AirDrop that makes it simple to send data between Apple devices that are close to each other without requiring a network connection. This method has the advantages of quickness and maintaining photo quality. The drawback is that it can only be used with Apple products, and both devices must have AirDrop turned on. The steps are as follows:
Step 1. On your iPhone, open "Settings", select "General", locate "AirDrop", and then choose either "Everyone" or "Contacts Only".
Step 2. On your Mac, open "Finder" and click on the "AirDrop" icon on the left side. In the "AirDrop" window, ensure the option "Allow me to be discovered by" is enabled, then choose either "Everyone" or "Contacts Only".
Step 3. On your iPhone, open the "Photos" app and select the photos you want to transfer.
Step 4. Tap on the "Share" icon at the bottom left corner, then in the pop-up window, find your Mac's icon and tap on it.
Step 5. On your Mac, accept the photos sent from your iPhone and choose the location where you want to save them.
Learn More:
AirDrop is not working? Read this article to find the best alternative to AirDrop.
The above is all about how to transfer photos from iPhone to computer without USB. If you prefer the USB method, you can use this software - Coolmuster iOS Assistant. It is a strong tool that can help you back up, restore, transfer, and manage your iPhone data with ease. It has a user-friendly interface, and it is considered a fast and secure transfer method between your iPhone and computer.
Highlights of Coolmuster iOS Assistant:
Here is how to use iOS Assistant to transfer photos from iPhone to computer:
01Download the appropriate software version according to your computer's operating system, then connect your iPhone to the computer using a data cable. Once a pop-up window appears, click on the "Trust" option on your device.
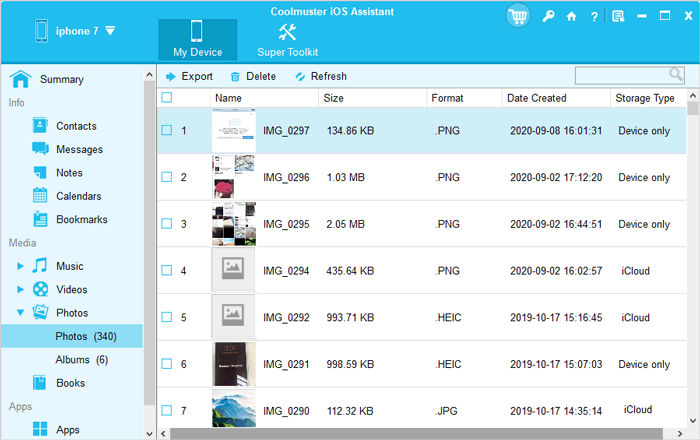
02Once successfully connected, you will see the following main interface. Navigate to the "Photos" folder and preview more detailed file information.

03When previewing, select the photos you want to export to the computer, then click on the "Export" option to start the process.
These are the five ways we described above on how to transfer photos from iPhone to computer without USB. You can select the approach that best fits your requirements and tastes. Try Coolmuster iOS Assistant if you would rather transfer data via a USB. We think you won't be let down by it.
Related Articles:
How to Transfer iPad Photos to Mac via USB and Wirelessly?
How to Transfer Files from iPhone to Mac without iTunes [Full Guide]
Can We Transfer Photos from iPhone to PC via Bluetooth? A Step-by-Step Guide
[Solved] How to Transfer iPhone Photos to SD Card with Original Quality?


 Free Download for PC
  Free Download for Mac

