"My camera doesn't seem to work anymore after updating to IOS 26.1. It turns dark immediately I open the camera App. It's impossible to take pictures with both front and back camera."
- from Apple Community
When you want to take a photo or record a video, but find that the iPhone camera is not working, it can be very frustrating. Possible issues include: a black screen on the camera, crashes, inability to focus, flash not working, or even the camera app failing to open.
The good news is that the iPhone camera not working issues can be resolved with a few simple steps. In this article, we will analyze common causes and provide 12 effective solutions to help you quickly restore your iPhone camera functionality.
If your iPhone camera is not working, there could be several potential reasons for this issue, both hardware and software-related. Here are some common causes of iPhone camera problems:
After you know the reasons for iPhone camera is not working, you can try the following methods one by one. Most users are able to resolve the issue using these solutions.
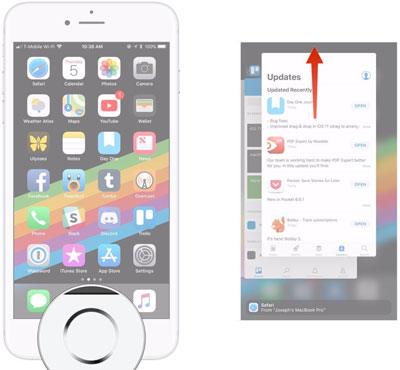
Sometimes the camera app simply crashes or becomes unresponsive. This can cause issues such as the iPhone camera not working black screen, or the camera interface freezing. Restarting the app forces the system to reload the camera service.
This quick fix often resolves temporary glitches without requiring further troubleshooting.
Here are the steps:
Step 1. Swipe up from the bottom of the screen (or double-press the "Home" button).
Step 2. Open the App Switcher.
Step 3. Locate the Camera app.
Step 4. Swipe the camera app upward to close it.
Step 5. Reopen the Camera app from the home screen.
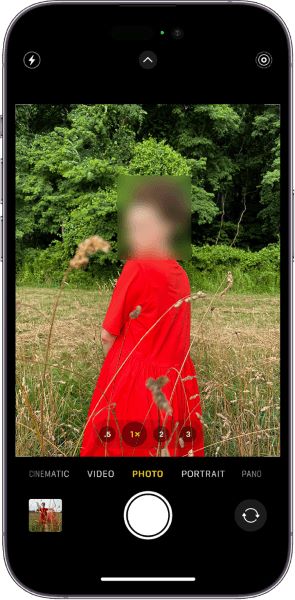
Sometimes, the iPhone camera does not working black screen if the camera module has not loaded correctly. By switching between the front and rear cameras, you can reinitialize the camera components, which may resolve the issue. This method is especially useful for cases where the rear camera shows a black screen or the front camera is not working.
Open the Camera app and tap the switch camera button in the bottom-right corner to toggle between the front and rear cameras a few times.
If the lens is covered with dust, fingerprints, or oil smudges, it may cause the camera to fail to focus or affect image quality. Use a soft microfiber cloth to gently wipe the camera lens, ensuring it is free from dust or smudges, then reopen the camera to test.
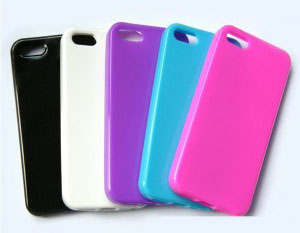
Some phone cases have poorly designed features that can block the camera or interfere with the camera sensors, leading to issues such as black edges, blurriness, or the inability to take photos. If you've recently changed your phone case, it's recommended to remove it and test the camera.
Restarting your iPhone is a simple and effective way to address many software-related issues, including problems with the camera. Here's how to fix the iPhone camera not working after update to iOS 26 issue by restarting your device:
How to restart your iPhone X, 11, 12, 13, or later:
How to restart your iPhone 6, 7, 8, or SE (2nd/3rd generation):
How to restart your iPhone SE (1st gen), 5, or earlier:

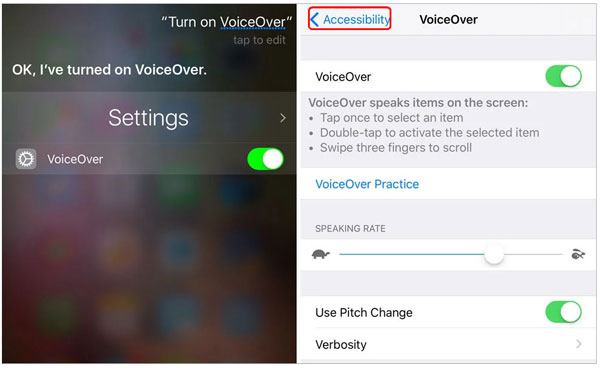
VoiceOver is an accessibility feature designed for visually impaired users. However, it can sometimes interfere with camera controls or gestures. If the iPhone camera is not working in apps, disabling VoiceOver might resolve the issue.
Just go to "Settings" > "Accessibility" > "VoiceOver", then toggle it off.
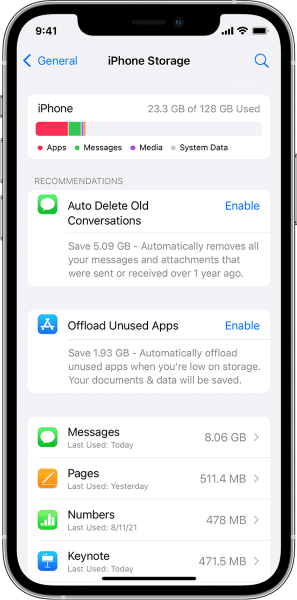
If your iPhone storage is nearly full, the camera might fail to save photos or videos. This may make it seem like the iPhone camera is not working properly. Freeing up storage space ensures the camera can function normally.
Here is how to do it:
Step 1. Open "Settings", then go to "General" > "iPhone Storage".
Step 2. Check available space and remove any unnecessary files, apps, or photos.
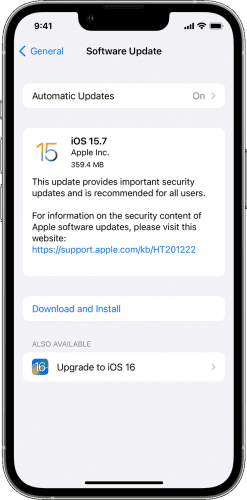
iOS updates usually fix known system issues, including camera bugs. If your iPhone is running an older system version, updating it may resolve the "iPhone camera not working" problem.
To update your iPhone, follow the steps below:
Step 1. Open the "Settings" app on your iPhone. Scroll down and tap "General" > "Software Update".
Step 2. If any update is available, tap "Download and Install" to get the update downloaded.
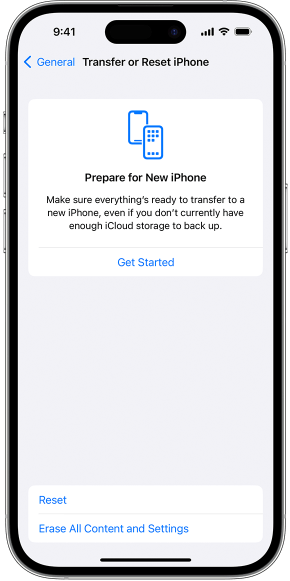
Incorrect system settings can sometimes cause the iPhone camera to not work in apps or malfunction in certain features. Resetting all settings restores default configurations without deleting your data.
Here is how to reset all settings on your iPhone:
Step 1. Open "Settings" > "General" > "Transfer or Reset iPhone".
Step 2. Tap "Reset", then select "Reset All Settings".

If none of the methods work, you can try restoring to factory settings. This will completely clear system issues, but will erase all data on the device. Therefore, be sure to back up your iPhone data before proceeding.
Here is how to do it:
Step 1. Open the "Settings" app on your iPhone. Scroll down and tap "General" > "Transfer or Reset iPhone" > "Erase All Content and Settings".
Step 2. You'll be prompted to enter your passcode and your Apple ID password. Follow the on-screen instructions.
Step 3. Confirm your decision to erase all content and settings. Your iPhone will begin the reset process, which may take some time.
Once the factory reset is completed, your iPhone will be in its initial setup state. You can recover your data from the backup you created earlier during the setup process. After restoring your data, open the Camera app and check if the cameras are working as expected.
If none of the solutions above work, the issue may be hardware-related. For example, an iPhone camera not working after a drop or an iPhone camera not working after a screen replacement often indicates internal damage. In such cases, professional repair is recommended.
Go to the Apple Support website to schedule a repair appointment, then take your iPhone to an Apple Store or an authorized service provider.

If the "iPhone camera not working" issue is caused by an iOS system malfunction, and you don't want to erase data by restoring to factory settings, using iOS System Recovery is an ideal solution.
This tool is a professional iOS system repair software that can fix various system issues, such as iPhone camera not working, iPhone black screen, iPhone stuck on the Apple logo, iPhone stuck in recovery mode, iOS update failure, and more. Importantly, the software supports Standard Repair mode, which can fix system issues without deleting your data.
Key features of iOS System Recovery:
Here is how to fix the iPhone camera not working with iOS System Recovery:
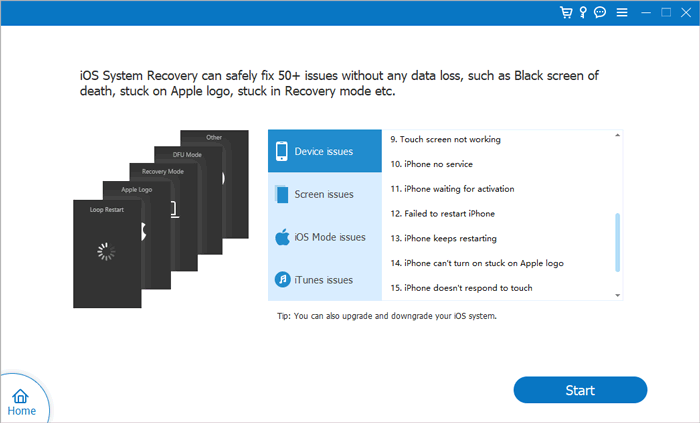
01Download & install the tool on your Mac or Windows computer. Open the application, and select "iOS System Recovery".
02It will automatically detect your iPhone issue. Once detected, click "Start" to proceed.
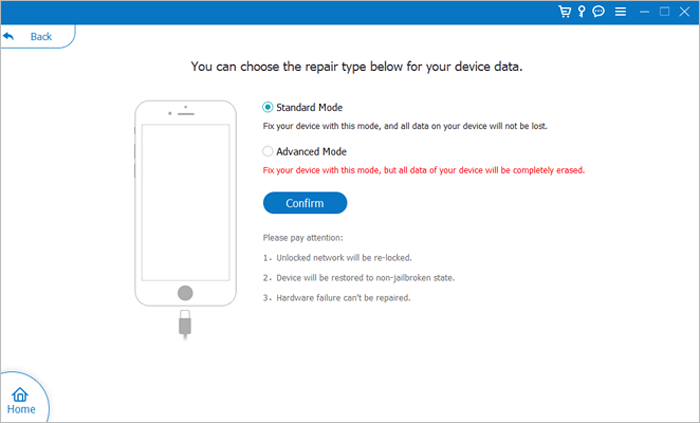
03Verify your device details and select "Standard Mode" to ensure your data remains intact. Once selected, tap "Confirm".
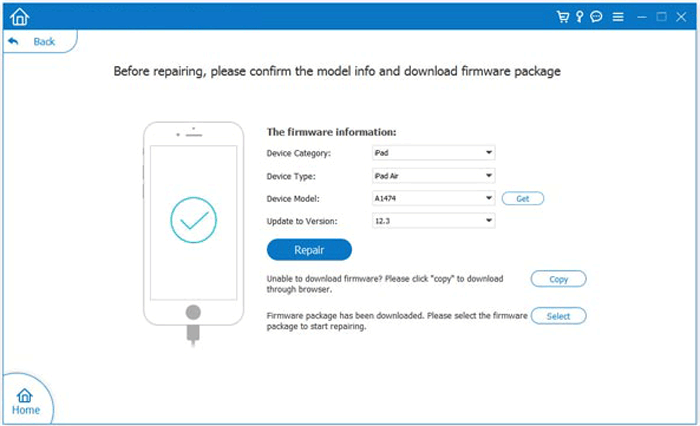
04Click the "Repair" button to download the firmware package and begin fixing your iPhone.
That's all you can do if your iPhone camera is not working. With these simple and effective methods, you don't need to worry anymore. If you want to avoid data loss during the fix process, you can back up your iPhone first or use iOS System Recovery to fix your iPhone issue without data loss. However, in cases where the problem is more complex and hardware-related, don't hesitate to seek professional assistance from Apple Support.
Related Articles:
How to Fix iPhone Camera Keeps Refocusing? 9 Quick Fixes Inside!
iPhone Not Saving Photos in iOS 26/18? 9 Solutions to Fix It!
10 Ways to Fix iOS 26 Video Black Screen Issue: Complete Guide
iPhone Screen Recording Not Working: Reasons and 9 Best Fixes


 Free Download for PC
  Free Download for Mac

