The iOS 11 HEIC for photos is a great improvement in image processing technical field, solving the problem that photos take up too much storage space on iDevice and saving more storage space on your devices and iCloud Photo Library while offering the same visual quality, together with the HEVC (High Efficiency Video Coding) for videos.
However, what if you accidentally delete the HEIC images from your iPhone or iPad, being the new image format, is it possible to recover the lost HEIC photos from your iPhone or iPad? Of course. This article will introduce how to recover HEIC photos on iPhone/iPad, helping you retrieve those lost memories.
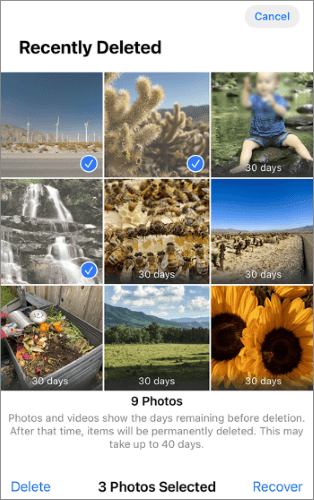
The "Recently Deleted" album on iPhone/iPad is the first line of defense after accidental photo deletion. Deleted photos are kept for 30 days and will only be permanently removed after that period. If the photo was recently deleted, this is the simplest and quickest recovery method, with no need for any additional tools.
Here is how to recover HEIC files on iPhone or iPad from the Recently Deleted folder:
Step 1. Open the Photos app on your iPhone or iPad.
Step 2. Go to the "Albums" tab.
Step 3. Scroll down and tap on "Recently Deleted".
Step 4. Select the HEIC photos you want to recover.
Step 5. Tap "Recover" to restore them to your library.
If you have already emptied the "Recently Deleted" folder but have backed up your iPhone/iPad using iCloud or iTunes, you can easily recover HEIC photos from the backup. Compared to the official methods, using professional tools like Coolmuster iPhone Data Recovery is a better option. It allows you to selectively recover HEIC photos from iTunes and iCloud backups without overwriting your current data.
Main features of iPhone Data Recovery:
Download the top-rated iPhone data recovery tool to your PC and follow the steps below to retrieve HEIC photos from your iPhone/iPad.
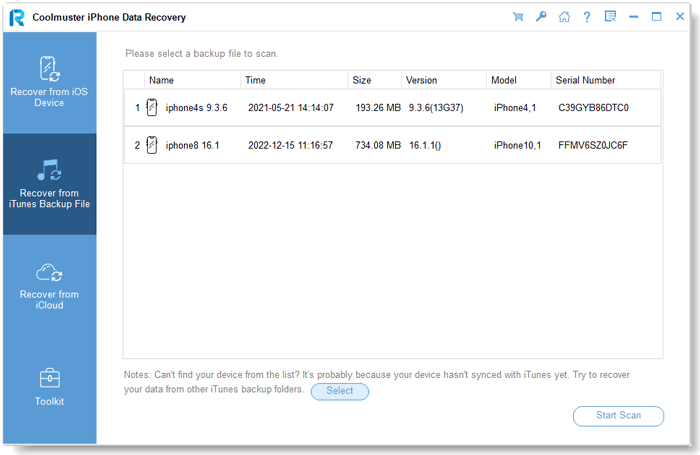
01After installing the software on your computer, launch it and select the "Recover from iTunes Backup File" option from the left panel. The program will automatically detect the default iTunes backup directory on your computer. Once it finishes, choose the backup file for your old iPhone from the list and click the "Start Scan" button. (Note: If you can't find the backup you're looking for, click the "Select" button at the bottom to manually locate the iTunes backup from another folder.)
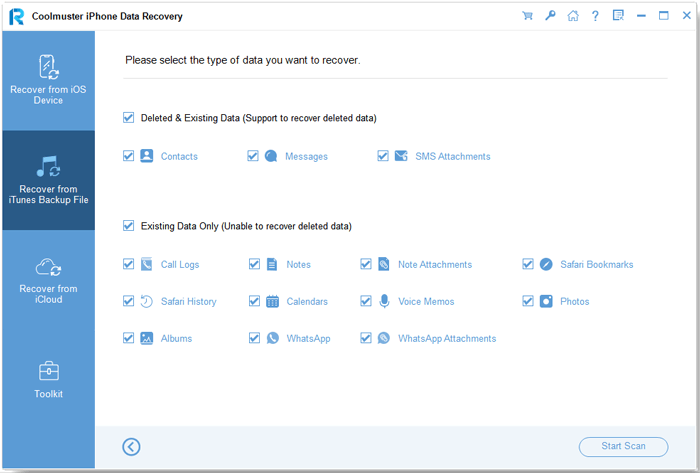
02Next, choose "Photos" and "Albums", then click "Start Scan" to search for items in those categories.
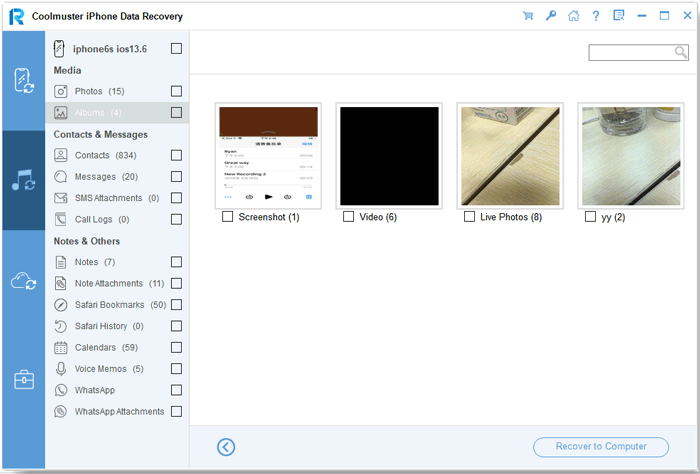
03After scanning, go to the "Photos" and "Albums" tabs under "Media" to view the details of your photos. Find and select the HEIC you want, then click the "Recover to Computer" button to save the HEICs to your computer.
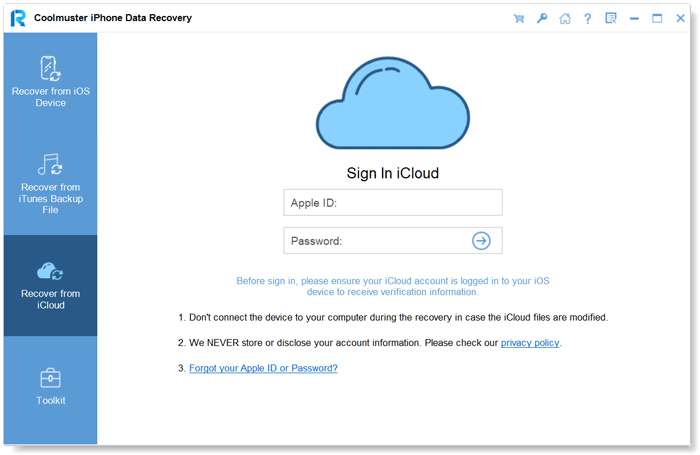
01Open the software and switch to "Recover from iCloud" mode. Then, sign in to your iCloud account when prompted. If Two-Factor Authentication is required, enter the verification code sent to your iOS device and click "Verify" to proceed.
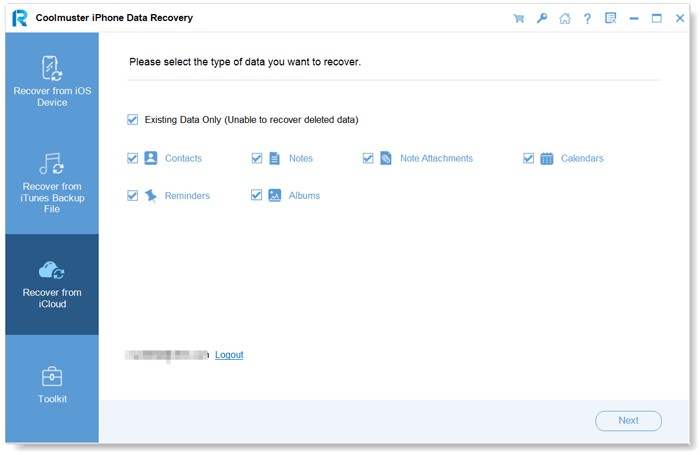
02Select the file types you wish to recover. Choose "Albums" and click the "Next" button to begin the quick scan.
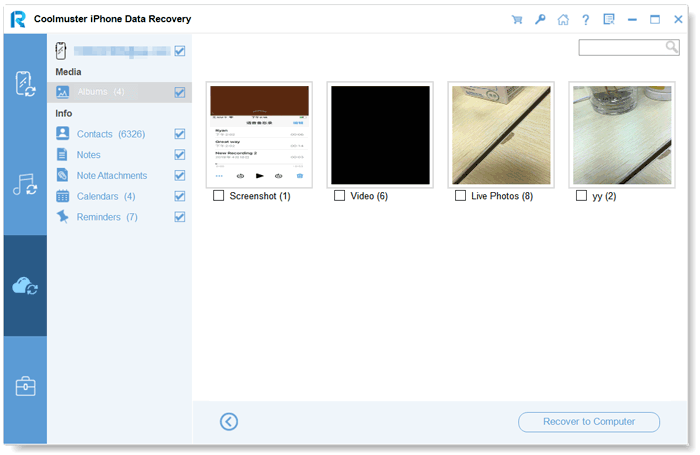
03Once the scan is finished, go to the "Albums" category, select the HEIC photos you want to restore, and click the "Recover to Computer" button to save them to your computer.
Video Tutorial:
For users who have already performed a complete backup via iTunes, they can also restore the entire device directly through iTunes, in addition to using third-party tools. However, it's important to note that this method will overwrite all the data currently on the device.
Here is how to restore HEIC photos on iPhone or iPad using iTunes:
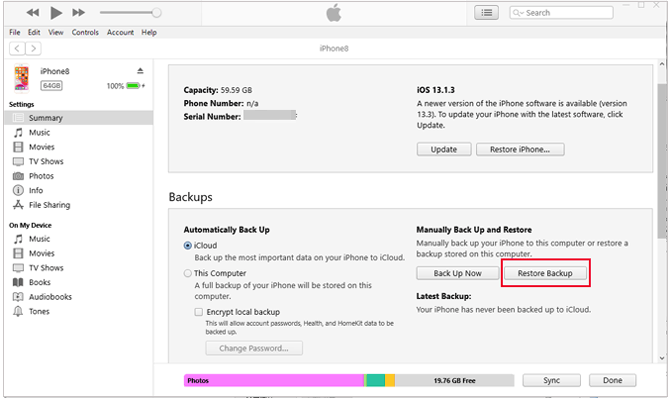
Step 1. Connect your iPhone or iPad to the computer and launch iTunes.
Step 2. Click the device icon in the top left corner to go to the device "Summary" page.
Step 3. Click the "Restore Backup" button.
Step 4. Select a backup that contains the HEIC photos.
Step 5. Click "Restore" and wait for the device to restart and complete the restoration.
In addition to iTunes, iCloud is another commonly used data backup method for Apple users. If you have enabled iCloud backup on your device, you can restore HEIC photos by restoring an iCloud backup. This process will erase all data on the device, so make sure to back up your current data beforehand to avoid any further data loss.
Here is how to retrieve photos on iPhone/iPad with iCloud:
Step 1. Open "Settings" on your iPhone/iPad > "General" > "Transfer or Reset iPhone".
Step 2. Select "Erase All Content and Settings" to clear the current data on the device.
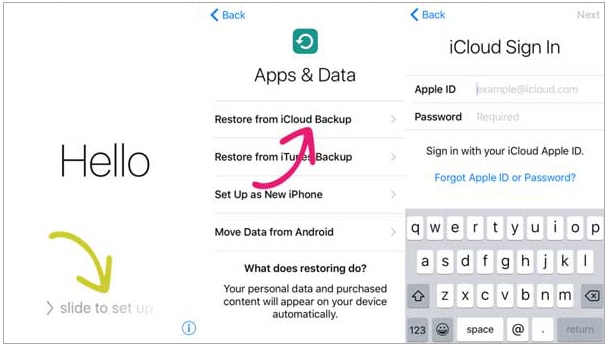
Step 3. After the device restarts and enters the setup process, choose "Restore from iCloud Backup".
Step 4. Log in with your Apple ID and select the backup file that contains the HEIC photos.
Step 5. Wait for the backup to restore, and the device will automatically load the data and photos.
Here are several effective methods to recover HEIC photos on your iPhone/iPad. If you've accidentally deleted photos, you can first check the "Recently Deleted" folder. If you have a backup, you can restore from iTunes or iCloud. For users who wish to selectively recover HEIC photos, we highly recommend using Coolmuster iPhone Data Recovery. It's easy to use, supports extracting specific photos from iTunes and iCloud backups, and avoids overwriting all device data. It's one of the most flexible and efficient HEIC photo recovery tools available today.
Related Articles:
Why Can't I Open HEIC Photos on iPhone? - 7 Quick Fixes Inside!
How to Share HEIC Photos from iPhone in 3 Easy and Quick Ways
How to Transfer HEIC Photos from iPhone to PC: 4 Proven Ways
[Comprehensive Review] Top 10 iPhone Photo Recovery Apps in 2025


 Free Download for PC

 Download for Mac
