TL;DR:
Reinstalling iTunes can help fix various issues, but it's important to protect your music library during the process.
If iTunes keeps crashing, fails to update, or encounters other issues, reinstalling it may be the best solution. However, many users worry that removing and reinstalling iTunes will erase their music library and playlists. Fortunately, your music files can remain intact if you follow the correct steps. In this guide, we'll show you how to safely uninstall and reinstall iTunes without losing music, as well as share an easier way to back up and manage your iPhone music collection.
Before reinstalling iTunes, taking a few precautionary steps can ensure that your music library, playlists, and settings remain safe. Skipping this step could result in lost songs or playlists, which is frustrating for any music lover. Follow these essential preparations:
1. Back Up Your iTunes Media Folder
Locate your iTunes Media folder (usually in C:\Users\[Your Name]\Music\iTunes\iTunes Media on Windows or ~/Music/iTunes/iTunes Media on Mac) and copy it to an external hard drive or cloud storage. This preserves all your songs, albums, and downloaded content.
2. Export Important Playlists
Even if your music files are safe, playlists can sometimes disappear during reinstallation. Export your playlists by selecting "File" > "Library" > "Export Playlist" in iTunes, saving them as XML files.
3. Check Your Apple ID Authorizations
Make sure your computer is authorized with your Apple ID (Account > Authorizations > Authorize This Computer) to avoid issues syncing music or purchased content after reinstalling iTunes. (How to Authorize or Deauthorize a Computer in iTunes?)
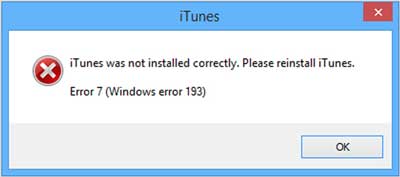
Just like other software programs, iTunes can become corrupted or stop working properly due to missing or modified installation files, which may cause errors. In many cases, reinstalling iTunes is an effective solution. However, if the issue is minor, updating iTunes to the latest version may fix the problem without needing a full reinstall.
To reinstall iTunes without losing music, you should follow three key steps: back up your iTunes library, uninstall iTunes completely, and reinstall iTunes while restoring your music library.
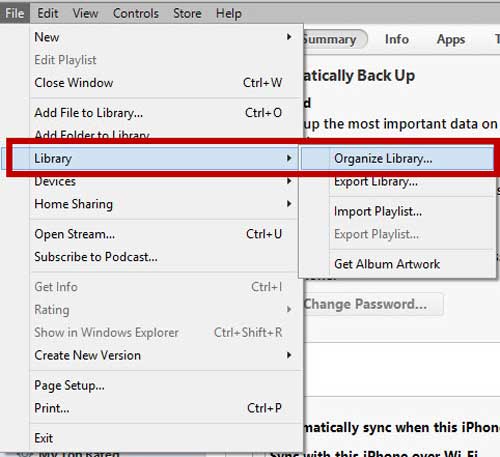
1. Launch iTunes and go to "File" > "Library" > "Organize Library" in the iTunes window.
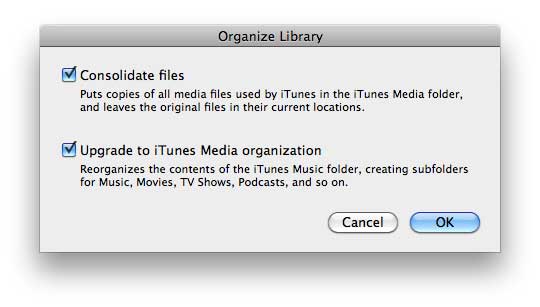
2. Check the box next to "Consolidate files", then click OK to confirm. This will copy all media files into the iTunes Media folder. This process may take a few minutes depending on the size of your media library.
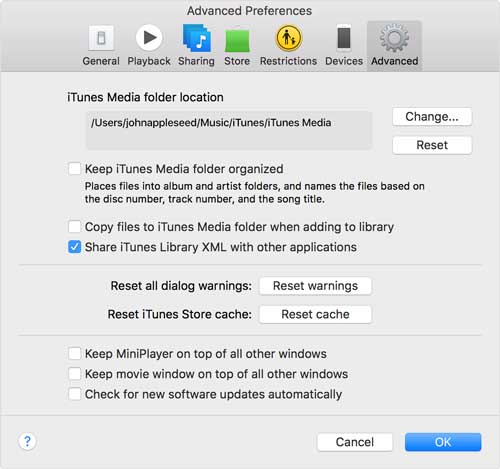
3. Go to "File" > "Preferences" > "Advanced" to view the advanced settings. Then locate the iTunes Media folder location and press Ctrl + C to copy the path. You can use this path to find your media files.
4. Press Windows + X on your keyboard to open the Power User menu, then select File Explorer. Click the address bar, press Ctrl + V to paste the iTunes Media folder path, and press Enter to open it.
5. Select the Music folder and press Ctrl + C to copy it. If you want to back up all media files in iTunes (such as movies, TV shows, and podcasts), press Ctrl + A first to select all items, then copy them using Ctrl + C.
6. Create a new folder to store your iTunes library backup, then press Ctrl + V to paste the copied files. This process may take some time depending on the size and number of files. (How to Find and Change the iTunes Backup Location?)
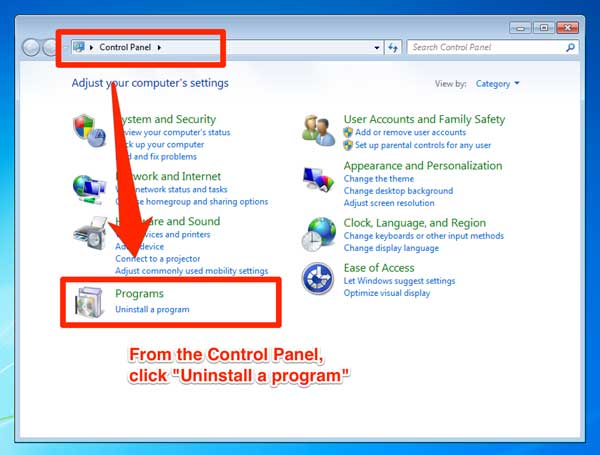
1. Exit iTunes and the Apple Software Update program. If they are running, press Windows + X to open the Power User menu, then click Control Panel.
2. In Control Panel, click Uninstall a program under the Programs section and wait until the list of installed programs appears.
3. Select iTunes, then click "Uninstall". Click "Yes" to confirm and remove iTunes from your Windows computer. Do not restart your computer immediately, even if prompted to do so.
4. Next, uninstall the following Apple-related components using the same method:
5. Open File Explorer and go to C:\Program Files. If you are using a 64-bit version of Windows, also check C:\Program Files (x86).
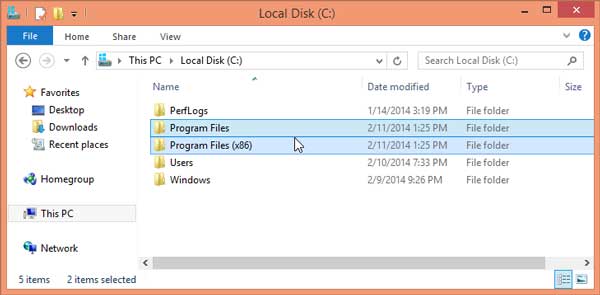
6. Locate and delete the following folders by pressing Shift + Delete:
Confirm to permanently remove them.
7. Then go to C:\Program Files\Common Files\Apple and delete the following folders:
8. Once completed, iTunes and all related components will be fully removed from your computer.
1. Go to the official Apple iTunes download page and download the latest version of iTunes for your system.
2. Run the installer and follow the on-screen instructions to complete the installation.
3. After installation, open iTunes to ensure it launches correctly.
4. Sign in with your Apple ID if prompted, so your purchases and settings can sync properly.
Tip: Using the official installer ensures compatibility with your system and reduces the risk of errors.
1. In iTunes, go to File > Preferences > Advanced and make sure the iTunes Media folder location points to the folder where you backed up your media files.
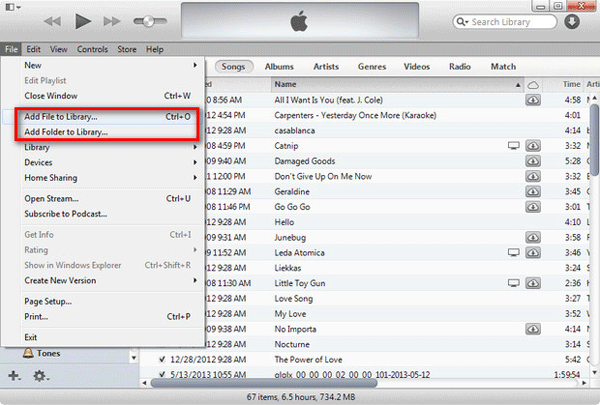
2. If your music does not appear automatically, go to "File" > "Add Folder to Library" and select your backup folder. This will import all your music, playlists, movies, and podcasts back into iTunes.
3. Check that your playlists, ratings, and song metadata are intact.
4. If any files are missing, you can repeat the Add Folder to Library step to ensure everything is included.
5. Once confirmed, your iTunes library is fully restored without losing any media files. (iTunes Stuck on Preparing iPhone for Restore?)
If you want an easier way to back up, transfer, and manage your iPhone music without relying on iTunes, Coolmuster iOS Assistant is an excellent solution. This tool allows you to export music and other media files directly from your iPhone to your computer, organize playlists, and restore your music library safely. It saves time and avoids potential iTunes errors, making music management simple and efficient.
Key Features of Coolmuster iOS Assistant
How to Back Up iPhone Music Using Coolmuster iOS Assistant:
01Download and install Coolmuster iOS Assistant on your computer. Connect your iPhone to the computer via USB cable and trust the device if prompted. Launch the software; your iPhone will be automatically detected.

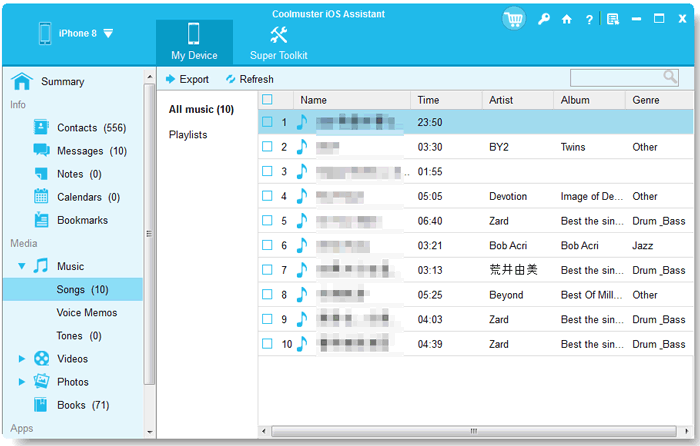
02Click the Music tab in the left panel to view all songs stored on your iPhone. Select the songs or playlists you want to back up and click Export to save them to your computer.
Video Guide:
Reinstalling iTunes doesn't have to mean losing your music. By backing up your iTunes library, uninstalling the software correctly, and restoring your media files after reinstallation, you can keep your music collection safe throughout the process. For users who want a simpler way to back up and manage iPhone music, Coolmuster iOS Assistant provides a convenient alternative to iTunes. With the right preparation, you can fix iTunes issues and continue enjoying your music without worrying about data loss.
Related Articles:
How to Restore Backup to New iPhone [Ultimate Tutorial]
How to Fix iTunes Backup & Restore Problems on iPhone/iPad


 Free Download for PC
  Free Download for Mac

