When you want to transfer photos from your Redmi phone to an iPad, you may find that they belong to different systems: one is Android, and the other is iOS. So you can't simply copy them directly with a data cable. But don't worry, whether you're transferring a batch of travel photos or sharing a few important work images, there are multiple ways to achieve efficient and stable transfers. Below, we will introduce 5 methods to transfer photos from Redmi to iPad and explain each step in detail.
When it comes to fast, stable, and lossless photo transfer, Phone Transfer is one of the best solutions. This professional phone transfer software supports direct transfers between Android and iOS devices, including photos, videos, contacts, music, and more. It works through a computer as a bridge, so the transfer speed doesn't rely on your internet connection, making it ideal for bulk photo transfers or situations with poor network coverage.
Highlights of Phone Transfer:
How to transfer photos from Redmi to iPad in just one click? Simply follow these easy steps:
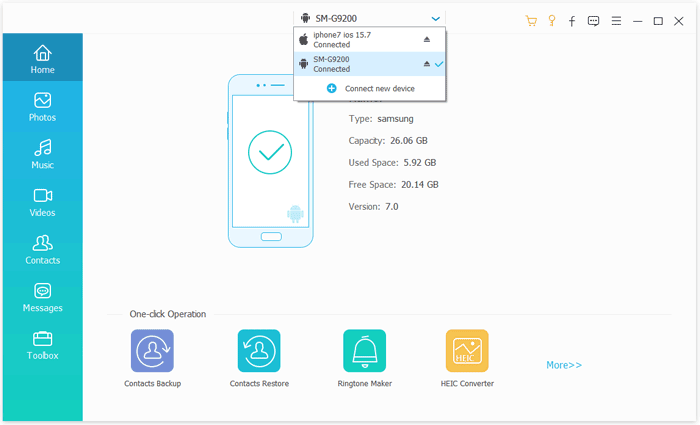
01Download, install, and launch Phone Transfer on your computer. Then, connect both your iPad and Redmi devices using USB cables.
02The software will automatically detect your devices and display their details on the screen. Make sure your source device is listed at the top center; if not, click the drop-down menu to select it.
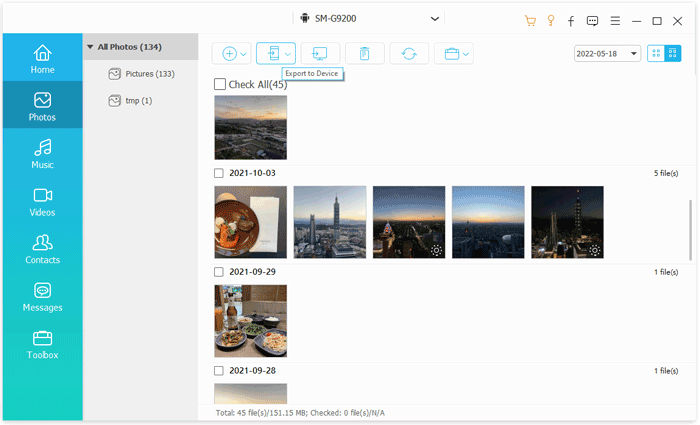
03Tick the "Photos" option to continue. Select the photos you wish to transfer, then click "Export to Device" to instantly transfer them from your Redmi to your iPad.
Move to iOS is Apple's official migration tool designed to transfer data from an Android device to an iOS device during the initial setup. It works by creating a secure private Wi-Fi network between the two devices. While this method is safe and straightforward, it only works on brand-new iPads or those that have been reset to factory settings. (How to factory reset iPad?)
Here is how to transfer photos from Redmi to iPad via Move to iOS:
Step 1. Follow the on-screen instructions to set up your new iPad. When you reach the "Apps & Data" screen, select "Move Data from Android".

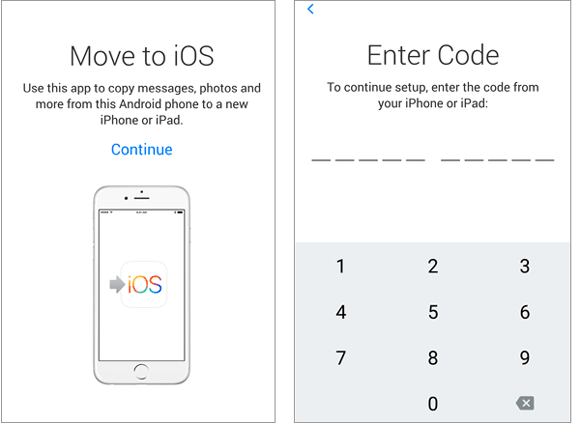
Step 2. Install the Move to iOS app on your Redmi phone and grant it the necessary permissions. Once done, open the app, tap "Continue", agree to the terms and conditions, then tap "Next" to proceed.
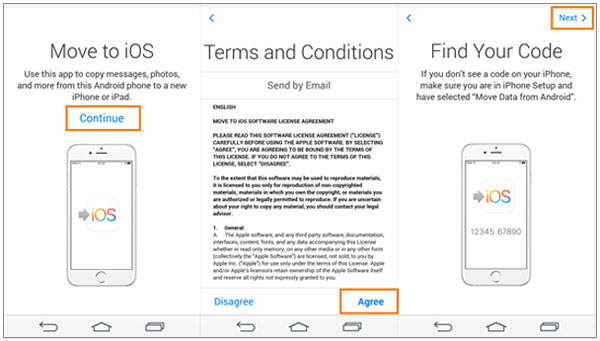
Step 3. On your iPad, tap "Continue", and a 12-digit code will appear. Enter this code on your Android phone to establish a connection between the two devices. Next, select the "Photos" option on your Redmi device and tap "Next" to begin syncing.
Step 4. Complete the iPad setup, and you'll find the synced photos ready to view on your device.
If you prefer a wireless and cloud-based option, Google Drive is a convenient choice. It allows you to upload photos from your Redmi to the cloud, then download them onto your iPad. This method is especially useful if you already use Google services, but it requires a stable internet connection and enough cloud storage space.
Here is how to sync photos from Redmi to iPad with Google Drive:
Step 1. On your Redmi, open Google Drive and log in to your Google account.
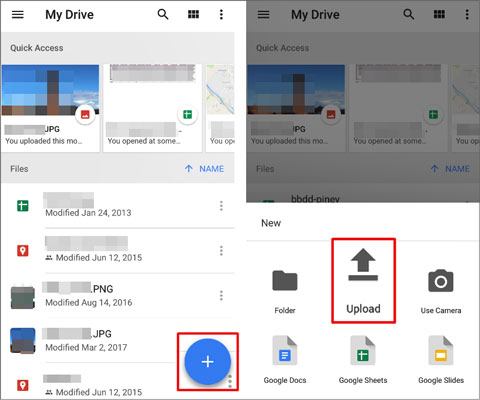
Step 2. Tap the "+" button > "Upload" > "Photos and Videos", then select the images you want to upload.
Step 3. Wait for the upload to complete.
Step 4. On your iPad, install and open Google Drive and log in to the same account.
Step 5. Locate the uploaded photos and download them to your iPad.
SHAREit is a cross-platform wireless transfer app that allows devices to transfer files via direct Wi-Fi connection, which is much faster than Bluetooth. Its advantage lies in not requiring a data cable or relying on cloud storage, making it ideal for quickly sharing photos on the go. However, its downside is that both devices need to have Shareit installed, and occasionally, the connection may be unstable.
Here is how to send photos from Redmi to iPad using SHAREit:
Step 1. Download the SHAREit app on both your Redmi device and iPad, then install and open it.
Step 2. Connect both devices to the same Wi-Fi network. On your Redmi device, tap "Send" and select the photos you want to transfer to your iPad. Afterward, tap "Next" to proceed.
Step 3. Tap "Send" again, and SHAREit will request permissions for both GPS and Bluetooth. Simply grant these permissions.
Step 4. On your iPad, tap the "Receive" section. Once you confirm the permissions for file transfer, your iPad will start searching for the nearby Redmi device and prepare to receive the photos.
Step 5. When your Redmi phone detects your iPad, tap on the iPad icon, and the transfer will begin automatically.

For small batches of images, email is the simplest solution. You just attach the photos to an email and send them to yourself. However, most email providers have file size limits (usually around 25MB), so this method isn't ideal for transferring large photo libraries.
Here is how to share photos from Redmi to iPad using email:
Step 1. On Redmi, open your preferred email app (e.g., Gmail, Outlook).
Step 2. Create a new email and enter your own email address in the recipient field.
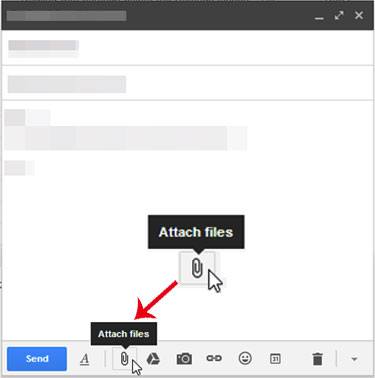
Step 3. Tap "Attach files" and select the photos you want to send.
Step 4. Send the email.
Step 5. On iPad, open your email inbox and download the attached photos.
There are many ways to transfer photos from Redmi to iPad, from official tools like Move to iOS to cloud services like Google Drive. If you only need to send a few images, email or SHAREit may be enough. But if you want a fast, stable, and lossless transfer solution that works for large batches of photos, Phone Transfer is highly recommended. It bridges Android and iOS seamlessly, supports multiple file types, and ensures your photos remain in their original quality.
Related Articles:
How to Transfer Photos from Android to iPad in 4 Simple Ways? (Updated)
How to Transfer Data from Redmi to iPhone? Solved in 4 Easy Ways
How to Transfer Data from Xiaomi to iPhone with 4 Easy Methods
[Solved] How to Transfer Text Messages from Redmi to iPhone Easily?

 Phone to Phone Transfer
How to Transfer Photos from Redmi to iPad Without Quality Loss? - 5 Easy Ways
Phone to Phone Transfer
How to Transfer Photos from Redmi to iPad Without Quality Loss? - 5 Easy Ways


 Free Download for PC
  Free Download for Mac