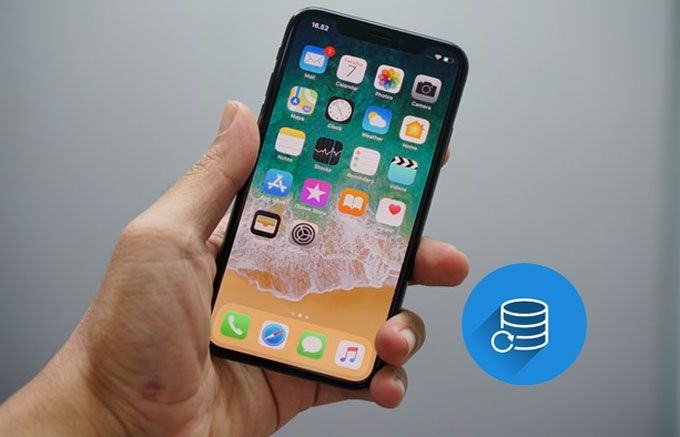
iOS 26 and iPadOS 26 are now available! If you're thinking about upgrading your device to explore the new features, it's crucial to back up your data first. The upgrade process can sometimes lead to data loss, so it's always best to be safe. In this post, we’ll walk you through four simple ways to back up your iPhone or iPad before you update to iOS 26. Just follow the easy steps, and you'll ensure your important data is safe during the upgrade.
Yes, absolutely! It’s important to back up your iPhone before updating to iOS 26. Why? Because data loss is always a possibility during an update. We often hear from users who’ve lost data after upgrading their devices. While new iOS versions bring exciting features, they can also introduce unexpected problems. That’s why backing up your iPhone before updating, whether you’re installing the beta or the official release, is a smart move.
Keep in mind that Apple’s security settings prevent you from restoring a backup made on a newer iOS version to a device running an older version. So, if you’re not happy with iOS 26 and decide to downgrade to an earlier version, you won’t be able to restore your iOS 26 backup.
In short, the answer to "Should I back up my iPhone before upgrading?" is a clear yes. It’s the safest way to ensure you don’t lose any important data, and it gives you an option to fall back on if something goes wrong.
We recommend using Coolmuster iOS Assistant, a reliable third-party tool, to back up your iPhone before switching devices without losing any data. This professional iPhone backup software makes it easy to quickly back up your iPhone to your computer. With its simple and intuitive interface, even beginners can back up their data in just a few clicks.
Plus, Coolmuster iOS Assistant offers flexible backup options, letting you choose between a full backup or backing up specific data to either a Windows PC or Mac.
Key features of Coolmuster iOS Assistant:
Below are the guides on how to back up iPhone before upgrading to iOS 26 via iOS Assistant:
01Install and launch iOS Assistant on your computer.
02Connect your iPhone to your computer via a USB cord, and tap "Trust" when a window pops up on the iPhone that asks you whether to trust this computer or not. Then, hit "Continue" on this program to go on. After the computer recognizes your iPhone, you will see the iPhone's main information on this program.

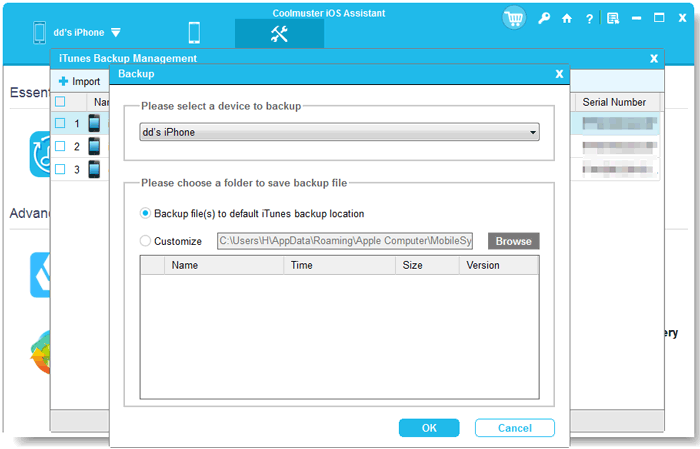
03To bake up all data on the iPhone, click "Super Toolkit" on the top menu > Choose "iTunes Backup & Restore" > "Backup". Select your iPhone from the drop-down list > Choose a location on your computer to save the backup files > Tap "OK" to start backing up iPhone data.
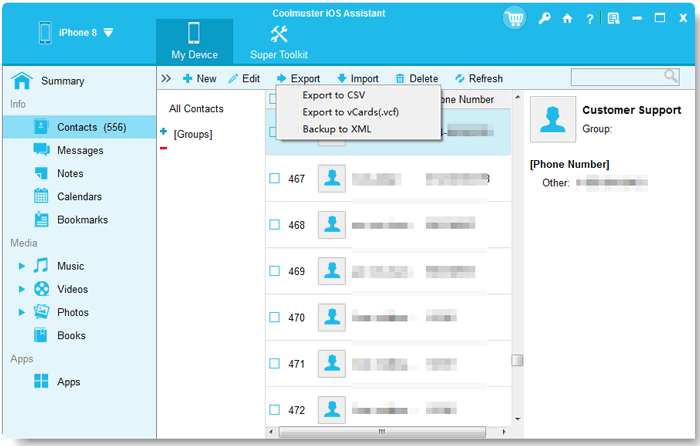
To back up certain data, click the required file type from the left sidebar, and all the corresponding files will be displayed on the right. You can choose the files you want to back up and then click the "Export" button on the top to save them to your PC for a backup.
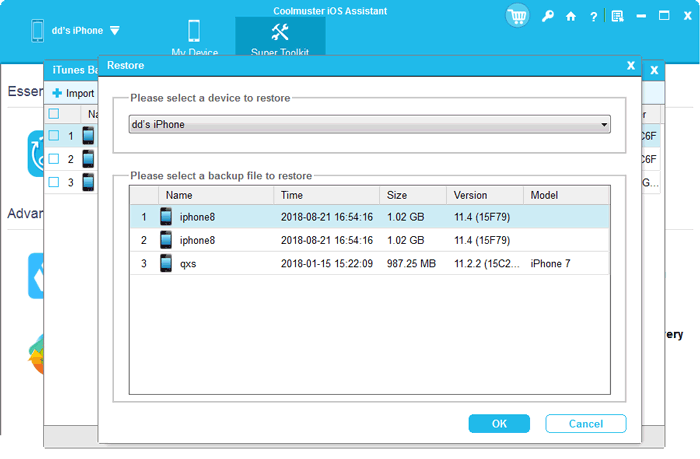
If you need to restore the backup after upgrading, just simply connect your new device to the computer, open the software, and navigate to "Super Toolkit" > "iTunes Backup & Restore" > "Restore". Select the backup record you need to restore and then click "OK".
Video Tutorial:
Another way to back up iPhone before upgrade for free is using iCloud, which offers 5GB of free storage for all iPhone/iPad users. With a stable Wi-Fi network connection, you can back up iPhone data to iCloud automatically. However, you cannot preview all backups and selectively back up or restore data to your iPhone.
Here is how to back up iPhone before upgrade to iOS 26 via iCloud:
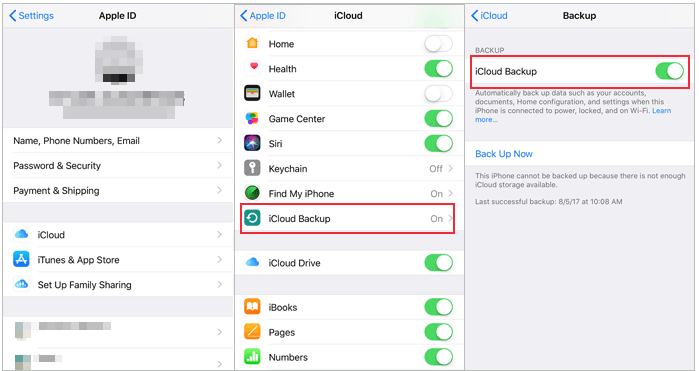
Step 1. Connect your iPhone to a stable Wi-Fi network.
Step 2. Navigate to iPhone "Settings" > Click your "Apple ID" > "iCloud" > Tap "iCloud backup".
Step 3. Turn on "iCloud Backup" and hit "Back Up Now".
If you want to restore iPhone from iCloud backup, follow the steps below:
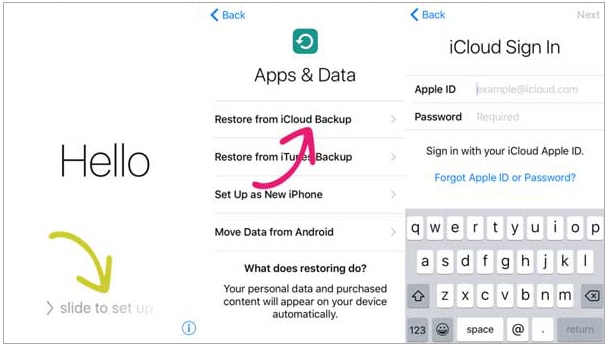
Step 1. Turn on your new iPhone, select your language and country/region, and then follow the on-screen instructions to connect to a Wi-Fi network.
Note: If you have set up your new iPhone, go to "Settings" > "General" > "Reset" > "Erase All Content and Settings" to erase your iPhone first. (iPhone won't erase?)
Step 2. When you reach the "Apps & Data" screen, select "Restore from iCloud Backup".
Step 3. Sign in to your iCloud account using your Apple ID and password. Once logged in, you'll see a list of previous backups.
Step 4. Choose the most recent backup you want to restore and tap to begin the restoration.
You can also back up iPhone before upgrade by using iTunes (for Windows and macOS Mojave and earlier) or Finder (for macOS Catalina and later) if you prefer to manage your data on a computer.
Here is how to back up iPhone before upgrading using iTunes/Finder:
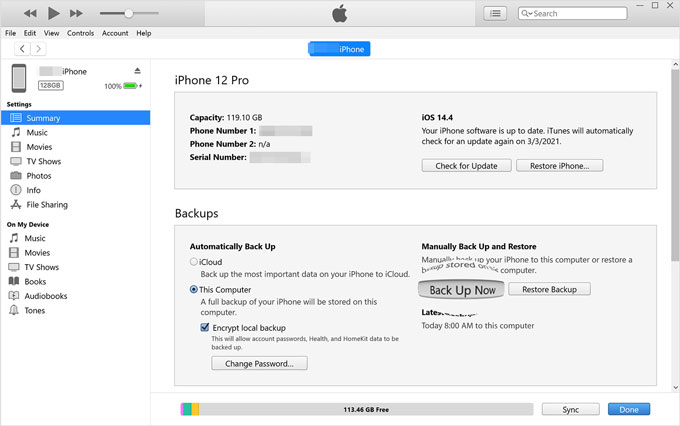
Step 1. Launch the latest iTunes on your computer and connect your iPhone to it via a USB cable.
Step 2. Select "Trust" when a pop-up window occurs on your iPhone that asks you to trust this computer.
Step 3. Click the iPhone icon on the top right corner, choose "Summary" in the left window, select "This Computer" under "Backups", and tap "Back Up Now" in the right window to begin iPhone backup. (Is the iTunes Back Up Now button greyed out?)
If you want to restore your new iPhone from iTunes backup, follow the steps below:
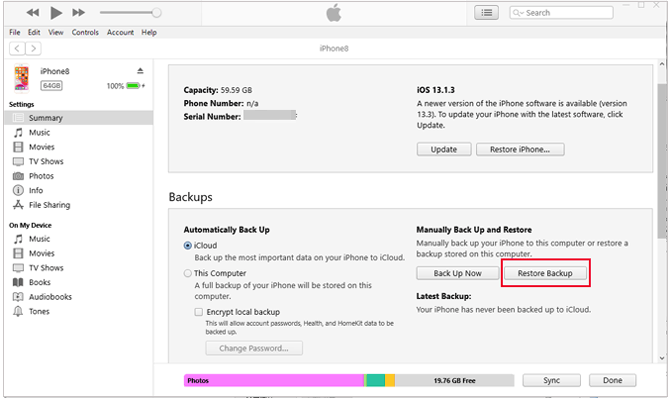
Step 1. Connect your new iPhone to the computer with iTunes using a USB cable. If prompted to "Trust This Computer", click "Trust" and enter your device password. Then, open iTunes (if it doesn't open automatically).
Step 2. In the upper left corner of the iTunes window, click the device icon to select your new iPhone.
Step 3. Under the "Summary" tab, click the "Restore Backup" button. In the pop-up backup list, select the backup you wish to restore (usually the most recent one).
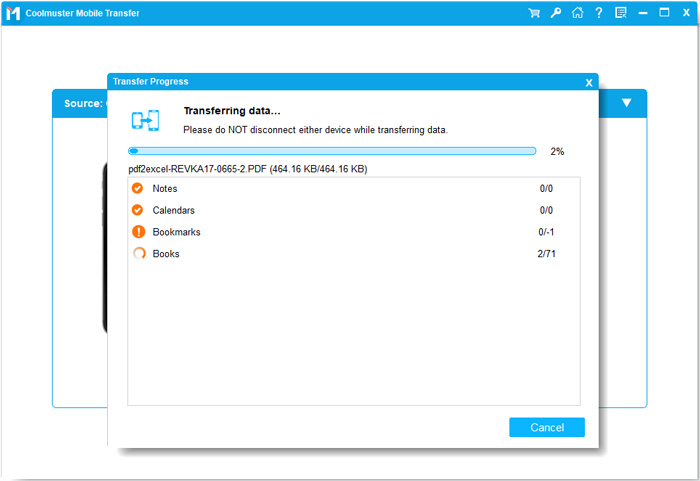
Step 4. Click "Restore", and iTunes will begin restoring the backup content to your new iPhone. The restoration process may take a few minutes to several minutes, depending on the backup size.
Many users stick to transferring iCloud or iTunes backups when upgrading to a new iPhone, but there's a simpler way to make the switch. You don’t have to back up your old phone before getting a new one. Using Coolmuster Mobile Transfer, you can easily transfer your data by connecting both phones to your computer. Just select the files you want from the scan results and transfer them directly. It can move contacts, messages, calendars, photos, music, and videos, though it doesn’t transfer apps or settings.
Key features of Coolmuster Mobile Transfer:
Here is how to back up iPhone before getting a new one using Mobile Transfer:
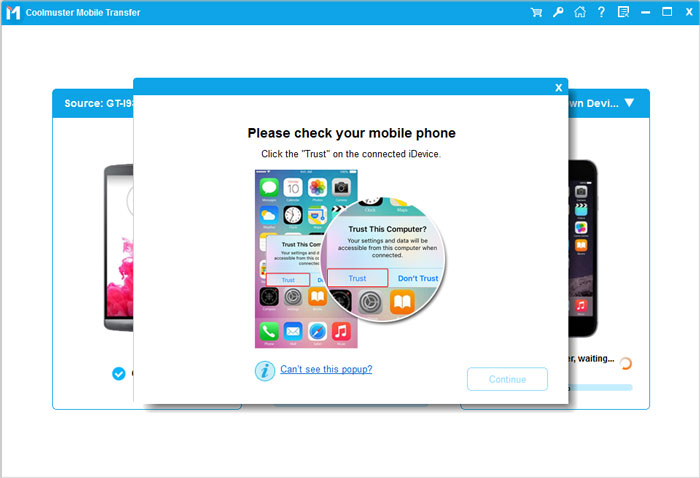
01Install and launch the tool on your computer. Connect your iPhone and another device to your computer via suitable USB cables. Then, tap "Trust" on iOS devices to make it recognizable by this program.
02After a successful connection, you will see Connected in each phone's position on this program. (Note: The old iPhone is in the source phone's position; if not, click "Flip" on this program to make a change.)
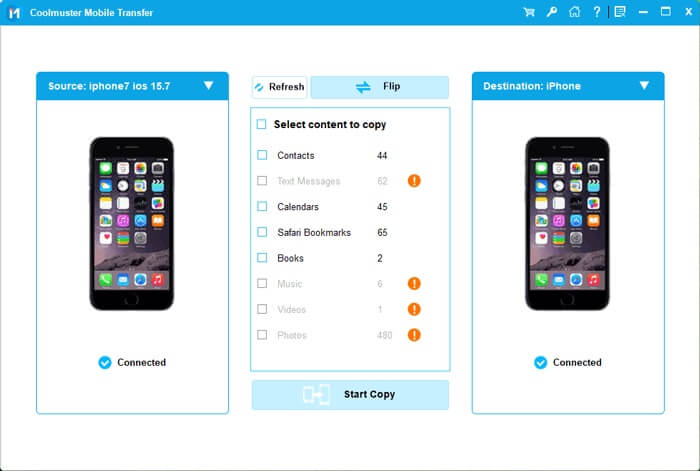
03Check the contents you want to transfer from the table and hit "Start Copy" below to back up your iPhone to another device.
Video Tutorial:
To avoid any data loss, you need to back up iPhone before upgrading to iOS 26. This article provides you with four easy ways from which you can select any way to back up your iPhone data. Here I still highly recommend you to try Coolmuster iOS Assistant, which allows you to back up iPhone data selectively or all in one click. You can use this tool to create multiple backups without overwriting the previous data.
If you encounter any problem during use, feel free to leave a comment below.
Related Articles:
How to Fix iPhone Backup Not Enough Space on Computer Issue (Proven Tips)
5 Methods to Back Up an iPhone without/with a Computer (Step-by-Step)
How to Back Up iPhone to OneDrive? Step-by-Step Guide
How to Restore iPhone from Backup Efficiently? [4 Techniques]


 Free Download for PC
  Free Download for Mac

