[Solved] How to Restore iCloud/iTunes Backup to a New iPhone 16/15/14?

Just bought a new iPhone and wondering how to get all your old data back? Whether you have a backup stored in iTunes or iCloud, there are multiple ways to restore backup to new iPhone. This guide will walk you through every reliable method step by step, so you can quickly transfer everything from your old device and pick up right where you left off.
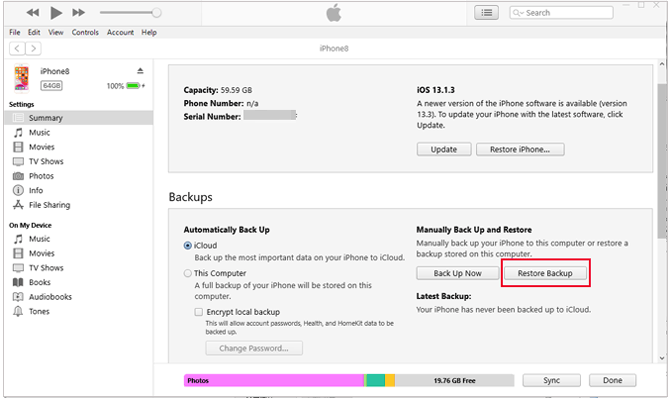
One of the most common ways to restore backup to new iPhone is through iTunes (on Windows or older macOS) or Finder (on macOS Catalina and above). These tools allow you to restore a full local backup stored on your computer directly to your new device.
Step 1. Launch iTunes on your PC (make sure it's the latest version).
Step 2. Connect your new iPhone to the computer using a USB cable.
Step 3. Trust the computer on your iPhone when prompted.
Step 4. Click the device icon in iTunes and navigate to the "Summary" tab. (iPhone not showing up in iTunes?)
Step 5. Select "Restore Backup".
Step 6. Choose the appropriate backup based on date and size.
Step 7. If the backup is encrypted, enter the password when prompted.
Step 8. Click "Restore" and wait for the process to finish. Your iPhone will restart afterward.
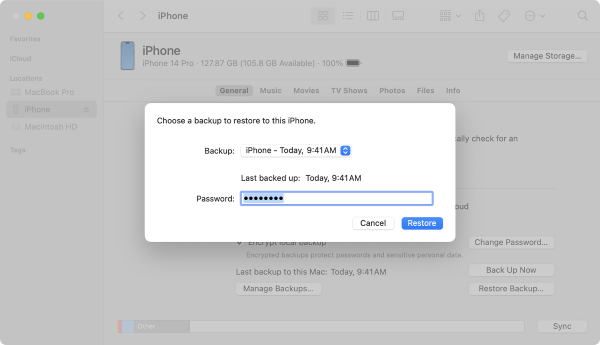
Step 1. Connect your new iPhone to your Mac with a USB cable.
Step 2. Open Finder and select your iPhone under "Locations".
Step 3. Click "Trust" on both Mac and iPhone if prompted.
Step 4. Under the "General" tab, click "Restore Backup".
Step 5. Choose the most recent backup from the list.
Step 6. Enter the password if the backup is encrypted.
Step 7. Click "Restore" and let the process complete.
If you've enabled iCloud backups on your old iPhone, restoring to a new device is effortless and wireless. This method doesn't require a computer and can be done during the setup process. However, make sure your device is connected to a stable Wi-Fi network and has enough storage. (iPhone storage full?)
Here is how to restore backup to new iPhone via iCloud:
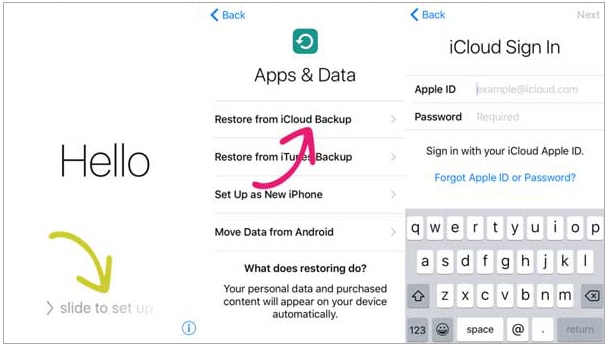
Step 1. Turn on your new iPhone and follow the on-screen instructions until you reach the "Apps & Data" screen.
Note: If your new iPhone is set up, go to "Settings" > "General" > "Reset" > "Erase All Content and Settings" to erase your iPhone first.
Step 2. Choose "Restore from iCloud Backup".
Step 3. Sign in with your Apple ID and password.
Step 4. Select the most relevant backup from the list (based on date and size).
Step 5. Connect to Wi-Fi and keep the iPhone plugged in during the process.
Step 6. Wait for the restore to complete. Your iPhone will restart automatically.
Although Apple's method is effective, some users may prefer not to restore the entire backup but instead selectively extract certain data from iTunes or iCloud backups, such as photos, messages, or contacts. In such cases, Coolmuster iPhone Data Recovery proves to be especially useful.
It is a professional data recovery tool that allows you to preview and selectively recover data from iTunes or iCloud backups without resetting your device or overwriting the original data. What's more, with this software, you will get the job done without connecting your new iPhone to the computer.
Highlights of iPhone Data Recovery:
Download the best iPhone data recovery software on your PC and follow the steps below to learn how to restore backup to new iPhone after setup.
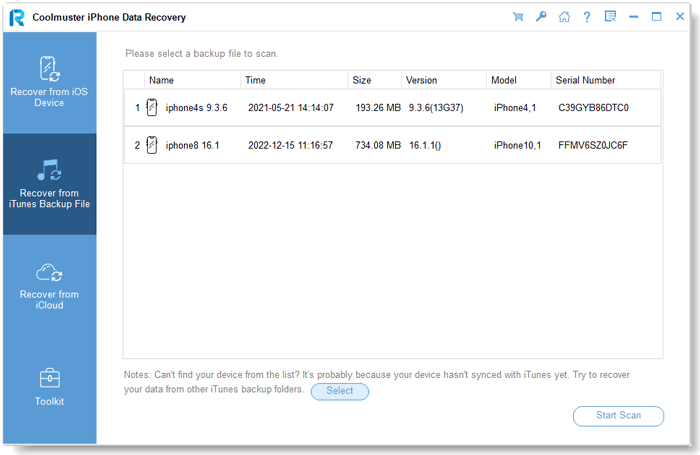
01Download and install the software on your PC, and select the "Recover from the iTunes Backup File" option on the left. It will automatically start to scan the iTunes backup location. Choose a backup file from the list available on the user interface and click on "Start Scan".
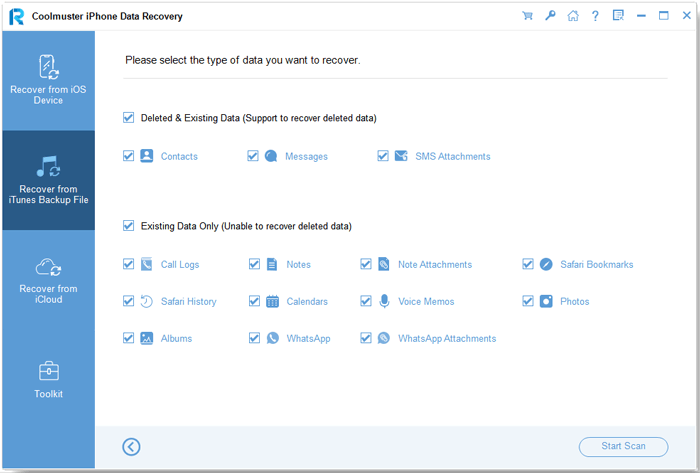
02Tick off the data types you want to restore and click on the "Start Scan" button on the bottom right side of the screen.
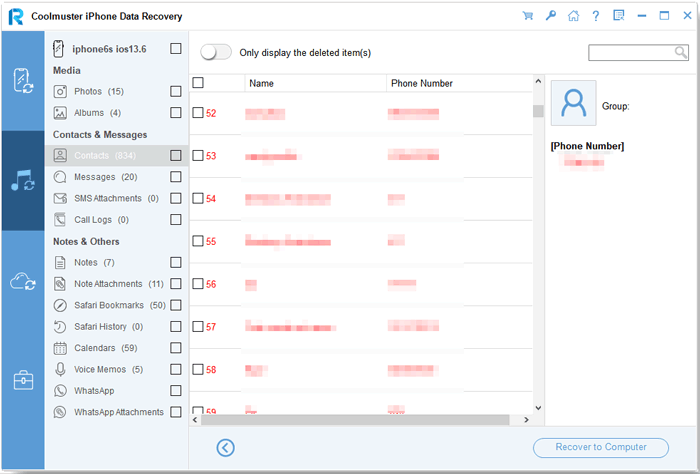
03Click on the categories and select the existing and detailed deleted files on the right side of your screen. To restore files from iTunes backups, click the "Recover to Computer" button.
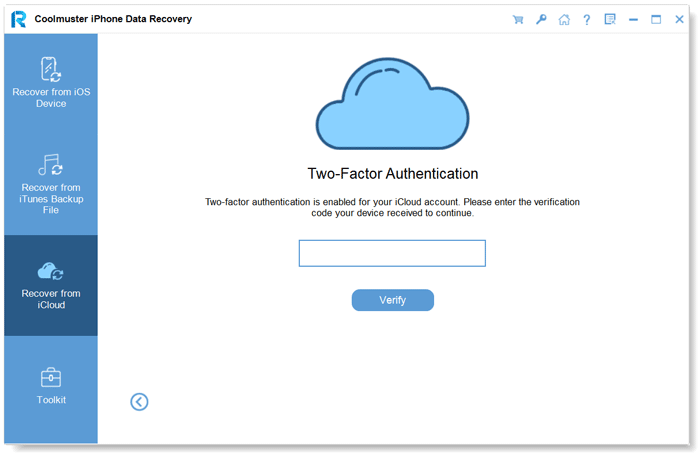
01Open the software and switch to "Recover from iCloud" mode. When prompted, sign in to your iCloud account. (Note: If two-factor authentication is enabled, enter the verification code sent to your iOS device and click "Verify" to proceed.)
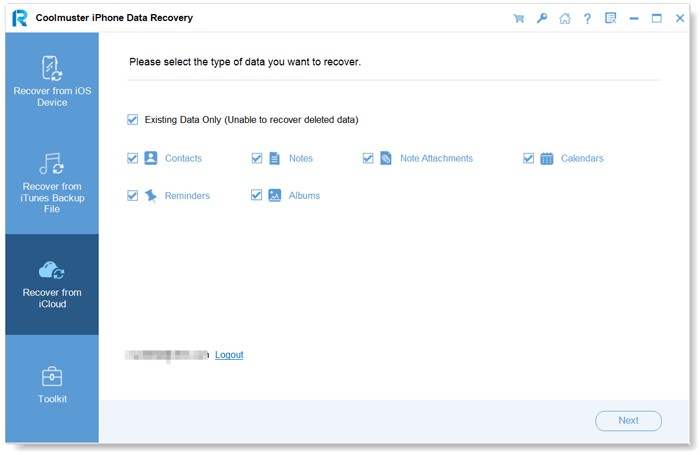
02Choose the file types you want to recover and click "Next" to initiate a quick scan. This will allow you to preview the details of your iCloud backup.
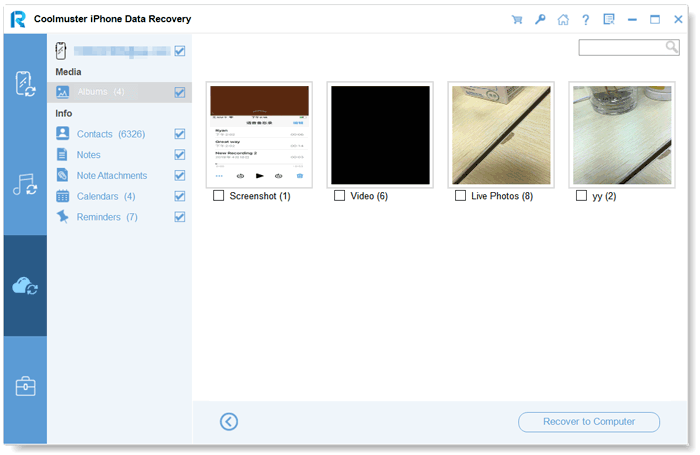
03Once you've selected the files to restore, click "Recover to Computer" to save them to your device.
Video Tutorial:
You may encounter problems while restoring a backup to a new phone. If you can't restore backup to new iPhone, there are a few troubleshooting steps you can take.
1. Restart both Your iPhone and Computer
Have you ever found yourself stuck in a jam? A simple restart may be the answer. Reboot your computer or iPhone, depending on the issue at hand, and give it another try. If that doesn't solve things, check out some of our other methods to get back up and running!
2. Update Your Devices
It's always a good idea to keep your devices up-to-date with the latest software updates. This can help improve the restore process, as it ensures that all your data is transferred correctly and that any bugs or errors in the restore process are fixed.
3. Ensure Your Internet Connection is Working Correctly
Your restore process relies on a working internet connection. If there is an issue with your Wi-Fi or other connection, it can cause the restore process to fail. Try connecting to a different network and see if that resolves the problem.
4. Ensure You Have Enough Storage Space
If your device does not have enough storage space, it cannot restore the Backup. Make sure you have enough free space on your device before restoring a backup.
These are the simple steps you need to follow to restore backup to a new iPhone. We highly recommend using Coolmuster iPhone Data Recovery as it is a reliable and easy-to-use program. It will help you restore the iTunes/iCloud backup without data loss. Why not download it and give it a try yourself?
Related Articles:
10 Tricks for the Issue Cannot Restore Backup to This iPhone Because the Software Is Too Old
How to Restore from iCloud Backup Without Reset? [2 Quick Solutions]
iPhone Won't Restore? 11 Effective Fixes for Your iPhone Woes
