Photos capture our most precious moments, but sometimes we need to transfer them to our computers, whether to free up iPhone storage, back them up, or simply manage them more conveniently.
While iTunes is a popular choice for transferring photos, its complex interface and limited transfer process often frustrate users. So, is there a way to transfer photos from your iPhone to your PC without using iTunes? Fortunately, the answer is yes. In this article, we'll introduce seven of the best ways to transfer photos from your iPhone to your computer without relying on iTunes. Read on to learn how.
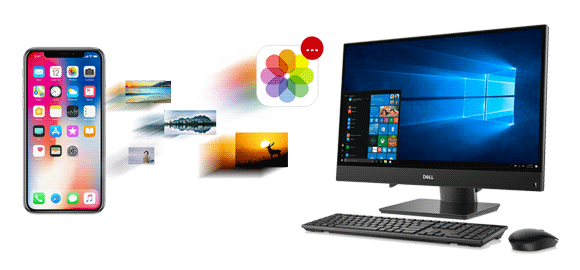
When it comes to transferring photos from iPhone to PC without iTunes, the first tool that comes to mind for me is Coolmuster iOS Assistant. It is the best way to move pictures from iPhone to PC. With this software, you can preview the photos before transferring them, and you can also select the photos you want to transfer to your PC, not all the photos. Besides photos, it also supports other file types, such as contacts, messages, videos, music, and so on.
Key features of iOS Assistant:
This software supports both Windows and Mac versions. Click the download button below to download the appropriate version to your computer.
Here is how to use iOS Assistant to transfer photos from iPhone to PC without iTunes:
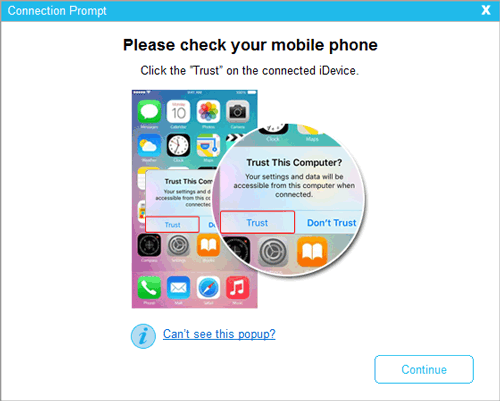
01Initiate the program. Typically, the software will autonomously identify your connected device, triggering a pop-up window on your computer. Select the "Trust" option on your device, and subsequently, click the "Continue" option to proceed.
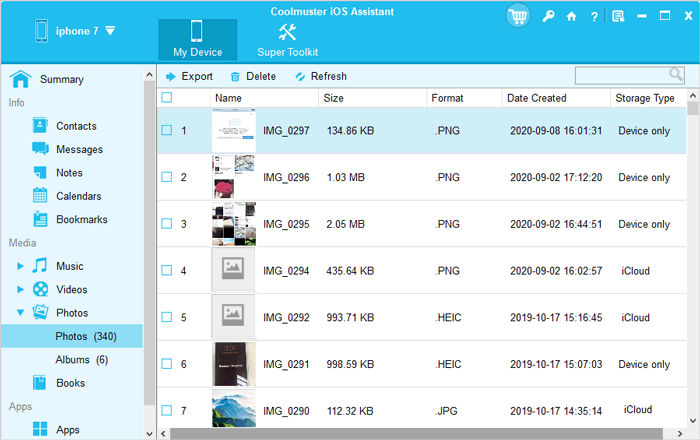
02You can see the interface like this when your iPhone successfully connects with your PC via the program.

03Select the "Photos" icon on the left panel; you can see more detailed information on the interface. Choose the pictures you'd like to transfer, tap on the "Export" button, and the program will start to export these photos to your computer automatically.
Video Tutorial:
If you are a Windows 10/11 user, Windows provides a built-in solution through the Photos app, which is designed primarily for managing photos and videos on your computer. This app allows you to import pictures from external devices, including your iPhone.
Here is how to transfer photos from iPhone to PC on Windows 10/11 without iTunes using the Photos app:
Step 1. Connect your iPhone to your PC with a USB Cable. Ensure your phone is powered on and unlocked, as the PC won't detect the device if it's locked.
Step 2. On your PC, click the "Start" button, and then open the "Photos" app.
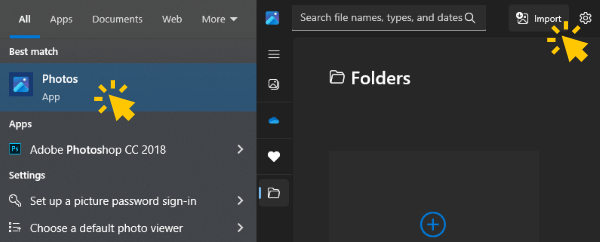
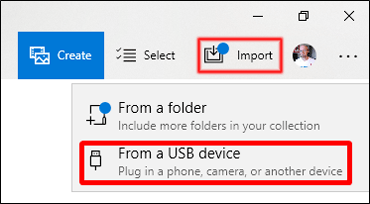
Step 3. Choose "Import" > "From a USB device" and follow the provided instructions. Select the specific items you wish to import and designate the destination for saving them. Allow a brief moment for detection and transfer to occur.
For users of Windows 7 PCs, the Photos app is not pre-installed on the computer for transferring images from iPhone to PC without iTunes. However, an excellent alternative is to use AutoPlay. Follow the steps below to use AutoPlay to download iPhone photos to PC without iTunes:
Step 1. Connect your iPhone to your PC with a USB Cable, and remember to hit the "Trust" option on your iPhone.
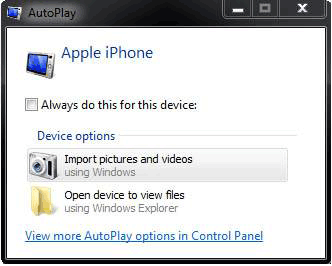
Step 2. After you connect your iPhone to your PC with a USB Cable, the AutoPlay window will pop up. Click "Import pictures and videos" with a camera icon.
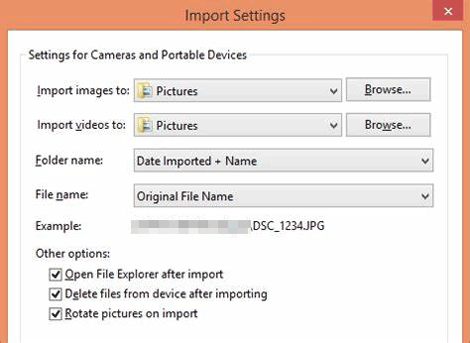
Step 3. Click the "Import Settings" link, and you can choose the "Browse" option to change the folder that your photos will be saved. After that, tick "OK" to finish your selection, and you can go to the folder that you selected to view your photos from your iPhone. (Photos Disappeared from iPhone?)
File Explorer provides an alternative method for transferring photos from iPhone to PC without the need for iTunes or any additional software. As long as your iOS device is recognizable by the PC, you can use it to transfer photos from iPhone to PC. Follow the steps below to transfer photos from iPhone to computer without iTunes using Filer Explorer:
Step 1. Connect your iPhone to your PC via USB.
Step 2. Unlock your iPhone and choose "Trust" on the prompt.
Step 3. Open File Explorer and locate your iPhone under "This PC".
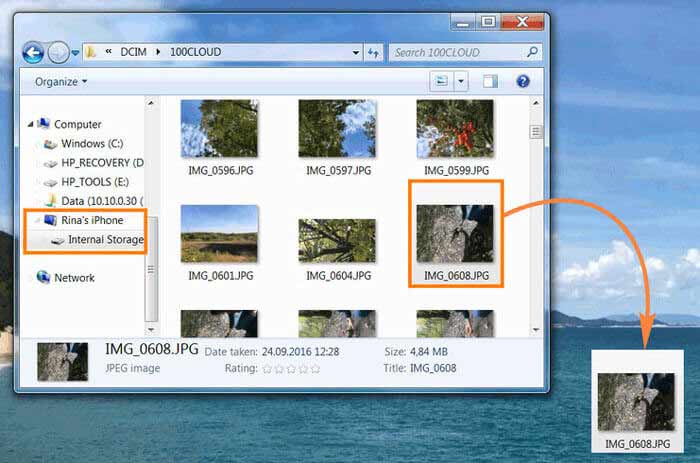
Step 4. Double-click on your iPhone, then navigate to "Internal Storage" > "DCIM".
Step 5. Select the photos you want to transfer and copy-paste them to your desired folder on your PC.
Typically, iPhone users back up their device data to iCloud. If you fall into this category, you have the option to transfer pictures from iPhone to PC without iTunes using iCloud. You can download iCloud photos to your computer by accessing iCloud.com through your PC browser.
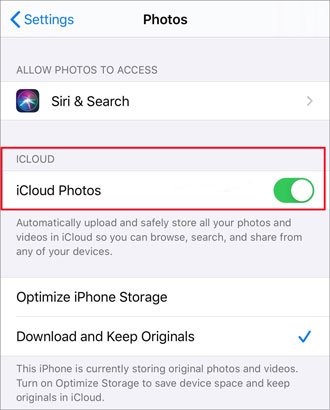
Step 1. Go to "Settings", tap on your "Apple ID" at the top of the screen, and select "iCloud". Then, toggle the switch next to "Photos" to enable "iCloud Photos".
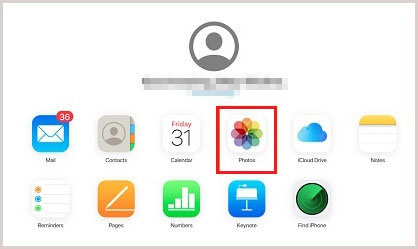
Step 2. Open your PC's web browser and go to iCloud.com. Sign in using the same account credentials as your iPhone.
Step 3. Once logged in, click on the "Photos" icon in the iCloud menu.
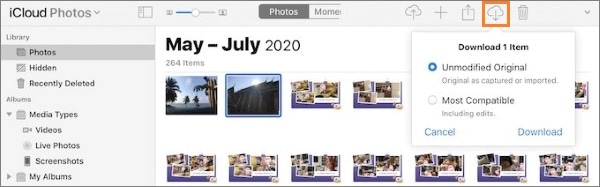
Step 4. Choose the photos you want, and then click the "Download" icon, represented by a downward arrow within the upper-right options menu.
Step 1. Visit the official Apple website to download iCloud for Windows to your Windows computer.
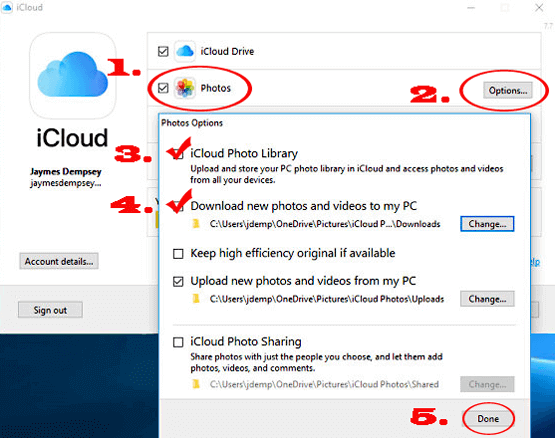
Step 2. Open the iCloud for Windows application. Sign in with your Apple ID.
Step 3. Select "Options" beside "Photos" and activate "iCloud Photo Library".
Step 4. Confirm that "Download new photos and videos to my PC" is enabled. To modify the storage location for uploaded photos, click "Change" beneath this option and designate an alternative path for your iPhone photos.
Step 5. After that, choose "Done" and "Apply". Then, your PC will show the photos from your iPhone.
Cloud services provide a convenient way to transfer photos wirelessly. Besides iCloud, Google Photos, Google Drive, OneDrive, and Dropbox are popular options. The methods are similar: just upload your photos from your iPhone to the cloud service of your choice, then access the cloud service on your PC through a browser using the same account, and finally download the photos to your computer. Here, we take Google Photos as an example. Here is how to use Google Photos to get pictures off of iPhone without iTunes:
Step 1. Open the Google Photos app and sign in with your Google account.
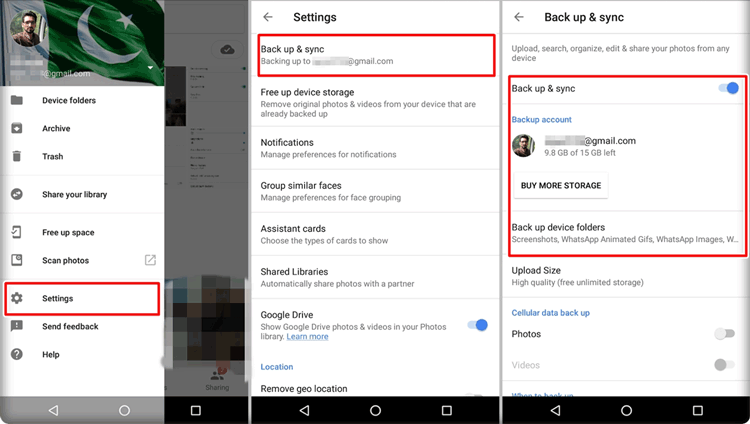
Step 2. Tap on the three horizontal lines in the top-left corner to open the menu. Then, select "Settings" and tap on "Back up & sync".
Step 3. Toggle the switch to enable "Back up & sync". This will upload your photos to your Google account.
Step 4. Open a web browser on your PC and go to the Google Photos website. Sign in with the same Google account used on your iPhone. Navigate to the "Photos" section to view and download your backed-up pictures.
Another convenient method for transferring photos from your iPhone to your PC without using iTunes is through email, especially when dealing with a small number of images. However, there are some drawbacks associated with using email for photo transfer.
Firstly, transferring a large number of photos can be problematic as most email services impose size limits on attachments. Exceeding this limit may require sending multiple emails, leading to a time-consuming process. Additionally, the quality of the photos may be compromised due to compression during the email-sending process. If you don't mind, follow the steps below to transfer iPhone photos to PC without iTunes:
Step 1. On your iPhone, go to the "Photos" app and select the pictures you want to transfer.
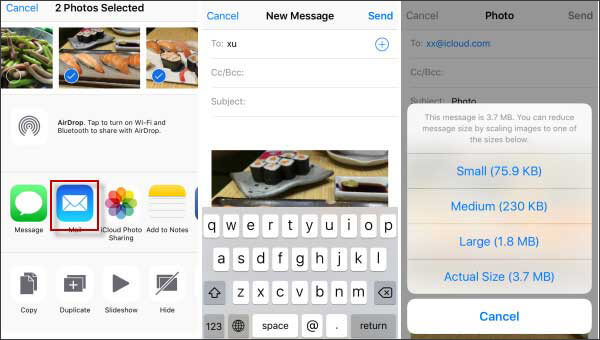
Step 2. Tap the "Share" icon, usually represented by a square with an arrow pointing upward.
Step 3. From the options presented, select the "Mail" icon. This will open a new email composition window.
Step 4. Enter your own email address in the "To" field. Look for an option to attach files or photos in the email composition window. Attach the selected photos to the email.
Step 5. Tap the "Send" button to send the email with the attached photos to yourself.
Step 6. Go to your PC and open the email you just sent to yourself. Download the attached photos from the email to a location on your PC.
That's all about how to transfer photos from iPhone to PC without iTunes. We have tried all the methods and highly recommend the first way to use the best iPhone transfer tool - Coolmuster iOS Assistant to transfer photos from iPhone to PC. Compared with other methods, Coolmuster iOS Assistant integrates many functions, such as export, import, backup, restore, and so on, into one. If you get this program, you won't worry about other problems between your iPhone and computer anymore. Although the choice is yours, I don't want you to miss it.
If the above 7 ways are helpful to you (I hope they are), I would appreciate it if you share this page with your friends who are in need from the bottom of my heart.
Related Articles:
How to Transfer Files from iPhone to PC Without iTunes? [6 Methods]
How to Transfer Photos from iPad to PC Without iTunes? - 5 Easy Ways
How to Transfer Photos from PC to iPhone without iTunes [6 Options]
How to Transfer Photos from iPhone to Mac Using Cable or Wirelessly?


 Free Download for PC
  Free Download for Mac

