When you're ready to erase iPhone data for selling, ensuring that your personal information is securely deleted is crucial. In fact, without proper data erasure, information such as messages, contacts, photos, passwords, and financial details can still be recovered by the next owner. This could put your privacy at risk, leading to potential identity theft or unauthorized use of your personal information.
To avoid these risks, it's essential to follow secure methods to completely erase iPhone data before selling it. This guide will walk you through the most effective ways to erase all personal information and ensure your device is free from recoverable data. Whether you're selling, recycling, or passing down your iPhone, securely erasing the data is a vital step to protect your privacy.
Before we dive into the methods, it's important to understand why erasing iPhone data before selling it is crucial. If not done correctly, you leave your personal and sensitive information vulnerable to unauthorized access. Here are the primary risks of not properly erasing your iPhone's data:
Now that we understand the importance of securely erasing data, let's explore the different methods you can use to remove your personal information from the device. Each method has its own steps, and we'll discuss the pros and cons so you can choose the best one for your needs.
Before proceeding, make sure to back up your iPhone data, as the following steps will erase all data on your device, and it may not be recoverable.
One of the easiest ways to erase your data is through your iPhone's built-in settings. This method deletes most of the data but might leave traces behind.
Here are the steps to erase iPhone data for selling from Settings:
Step 1. Open "Settings" on your iPhone, scroll down, and select "General".
Step 2. Tap "Reset" and then choose "Erase All Content and Settings".
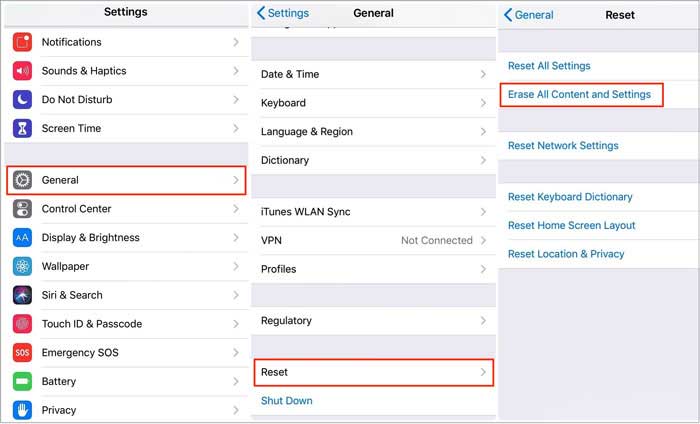
Step 3. You will be prompted to enter your Apple ID password to confirm the action.
Step 4. Wait for the process to complete. The phone will then return to factory settings.
Pros:
Cons:
If you want to remotely erase your iPhone, iCloud offers a convenient solution. This is especially useful if you no longer have physical access to the device. The following are the steps to erase an iPhone:
Step 1. Go to iCloud.com and log in using your Apple ID.
Step 2. Select "Find iPhone", then click on "All Devices" at the top.
Step 3. Choose your device from the list and click "Erase iPhone".
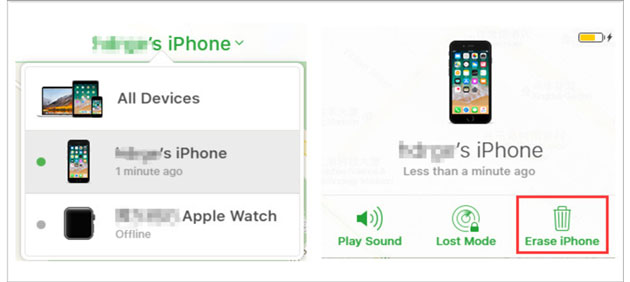
Step 4. Confirm the action and wait for the iPhone to be remotely wiped.
Pros:
Cons:
Using iTunes is another reliable way to erase your iPhone. This method ensures a complete factory reset and works without needing a network connection. Below is the guide on how to erase iPhone data for selling using iTunes:
Step 1. Connect your iPhone to your computer and open iTunes (or Finder on macOS Catalina and newer).
Step 2. Select your device in iTunes and click "Restore iPhone".
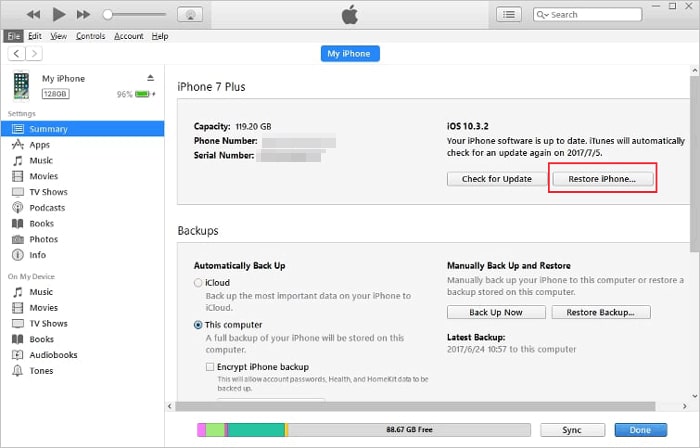
Step 3. Follow the on-screen instructions to restore the phone to factory settings.
Step 4. Once completed, your device will be wiped clean and reset.
Pros:
Cons:
The previous methods, to some extent, have their limitations. For example, they don't truly erase data from the iPhone, as other recovery tools can still retrieve it. That's why we recommend a professional iPhone eraser tool - Coolmuster iOS Eraser. It provides the correct method to permanently delete all data from your device, with a simple and secure process. Once you use this tool to erase your data, no recovery tool will be able to retrieve it.
Key features of iOS Eraser:
Step-by-step guide for deleting all iPhone data permanently:
01To securely erase all data from your iPhone, first, install and launch iOS Eraser on your computer.
02Connect your iPhone to the computer via a USB cable. Once the device is successfully connected, you'll see the main interface of the program.
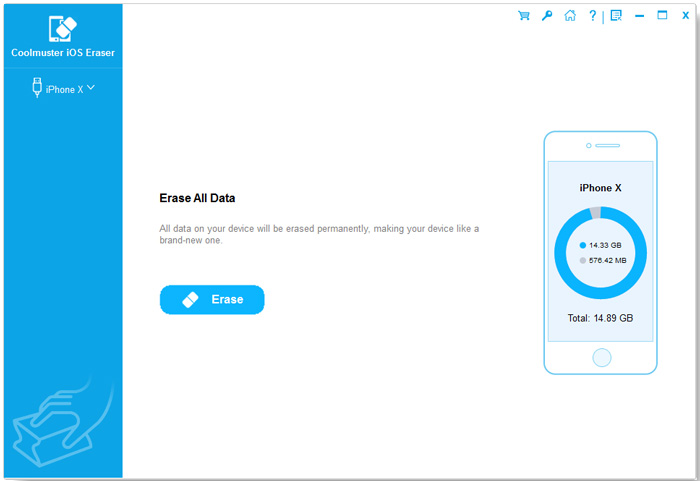
03Next, click the "Erase" button to begin the data erasure process.
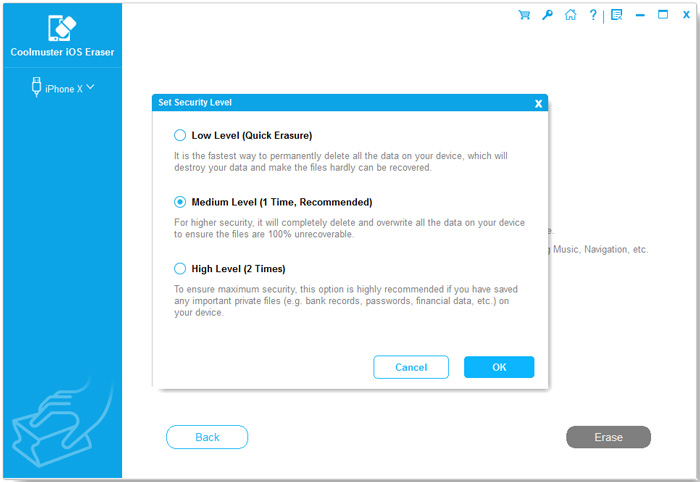
04To ensure the data is wiped securely, click on the "Security Level" menu and choose the appropriate level of erasure: Low, Medium, or High. After selecting your preferred security level, click "OK" to proceed.
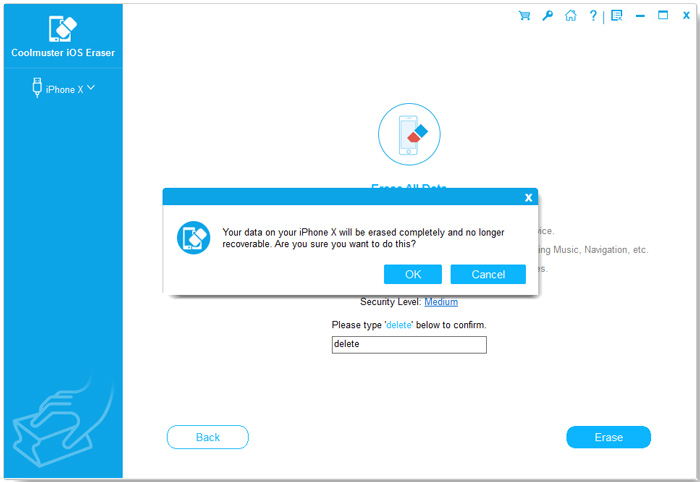
05For added security, enter "delete" in the confirmation box to verify the action, then click the "Erase" button. You'll be prompted to confirm the complete deletion of all data on your device. Once you confirm by clicking "OK", the program will quickly scan your device and begin the secure erasure process.
To make the process even easier, you can follow our detailed video tutorial below for a step-by-step guide on how to securely erase iPhone data.
To wrap it up, erasing your iPhone data before selling it is crucial for keeping your personal information safe. While options like factory resets and iCloud erasure help, they don't always guarantee your data is completely gone. For peace of mind, using a tool like Coolmuster iOS Eraser ensures your data is permanently wiped and can't be recovered. By following the steps we've outlined, you can confidently sell or pass on your iPhone without worrying about your privacy. It's always worth taking the extra step to protect your personal data.
Related Articles:
Reset All Settings vs Erase All Content [Informative Comparison]
Erase All Content and Settings Not Working: 6 Ways to Fix iPhone Won't Erase
How to Erase iPhone Remotely If It's Lost or Stolen? - 2 Ways
How to Erase iPhone Without Passcode in 5 Simple Ways? (Step-by-Step)


 Free Download for PC
  Free Download for Mac

