"I just updated my iPhone and my GIFS are gone. How do I get them back?"
- from Apple Community
Accidentally deleted your favorite GIF photos from your iPhone? Don't worry; whether it's an animated meme, a fun reaction, or a precious memory, there are ways to recover GIF photos from iPhone, with or without a backup.
In this guide, we'll walk you through multiple proven methods to retrieve deleted GIFs on your iPhone. Let's dive in and get your animated memories back!
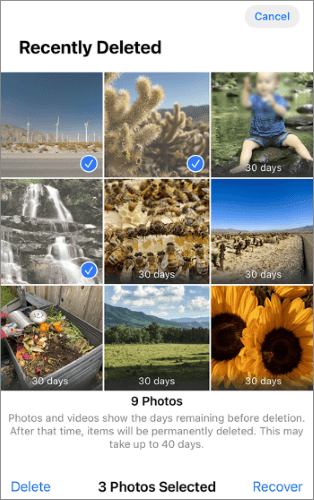
If you deleted a GIF recently, your first step should be checking the Recently Deleted album in your Photos app. iPhones store deleted photos (including GIFs) for up to 30 days before permanently erasing them, during which you can restore them at any time without the need for backups or tools.
Here is how to recover GIF photos from iPhone without backup from the Recently Deleted folder:
Step 1. Open the "Photos" app on your iPhone.
Step 2. Go to the "Albums" tab.
Step 3. Scroll down and tap "Recently Deleted" and locate your deleted GIFs.
Step 4. Tap "Select", choose the GIF(s) you want to restore, and then tap "Recover".
If you can't find the GIF you want to recover in "Recently Deleted", or if it's been more than 30 days, the next step is to use a professional recovery tool - Coolmuster iPhone Data Recovery. This tool supports recovering GIF images from iTunes or iCloud backups and will not overwrite the existing data on your phone.
Key features of iPhone Data Recovery:
Download the best iPhone data recovery tool on your PC and follow the steps below to retrieve GIF photos from your iPhone.
01Once you've installed the software on your computer, launch it and select the "Recover from iTunes Backup File" option from the left panel. The program will automatically locate the default iTunes backup directory on your computer. After it's done, choose the backup file for your deceased iPhone from the list and click the "Start Scan" button.
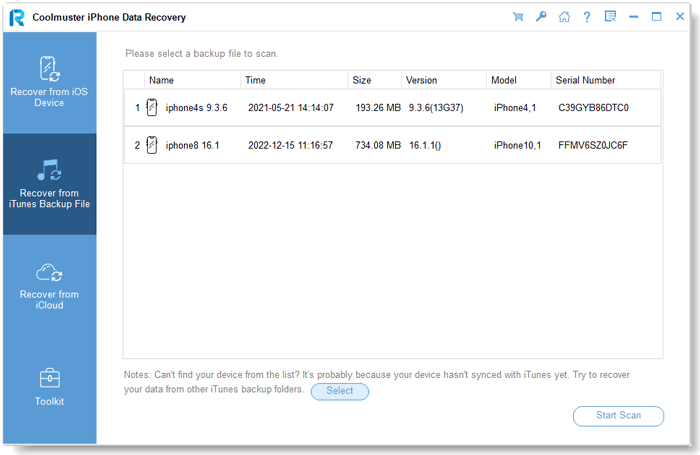
Note: If you can't find the desired backup file, simply click the "Select" button at the bottom to manually locate the iTunes backup from a different folder.
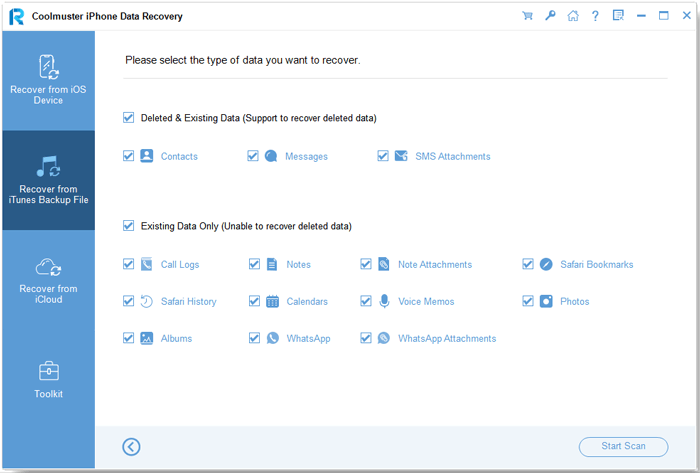
02Next, select "Photos" and "Albums", then click "Start Scan" to search for items in those categories.
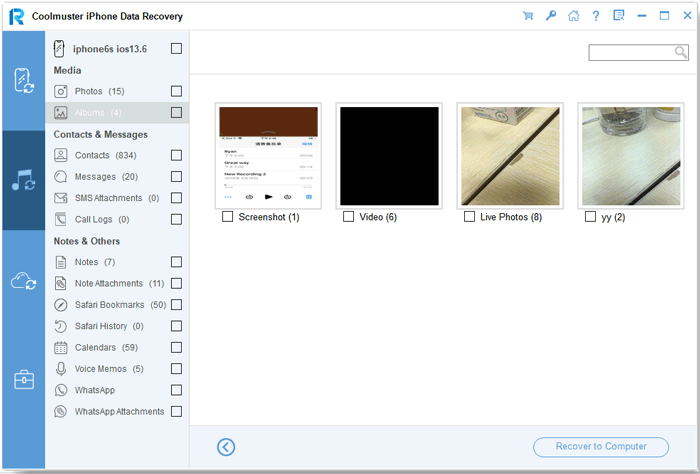
03After scanning, go to the "Photos" and "Albums" tabs under "Media" to view the photo details. Locate and select the GIF you want. Finally, click the "Recover to Computer" button to save the GIFs to your computer.
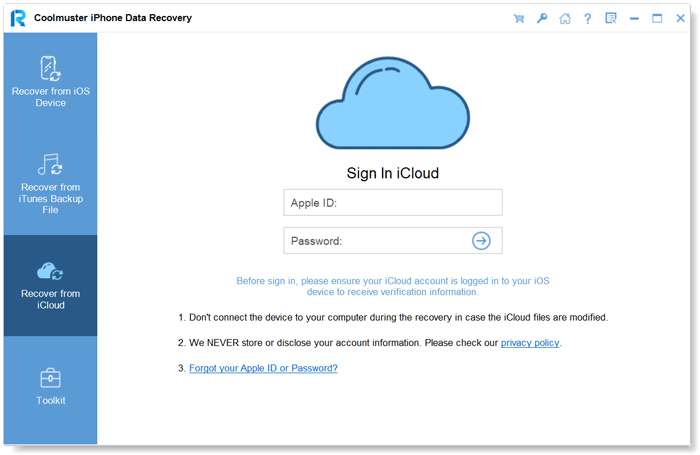
01Open the software and switch to "Recover from iCloud" mode. Next, sign in to your iCloud account when prompted. If Two-Factor Authentication is required, enter the verification code sent to your iOS device and click "Verify" to continue.
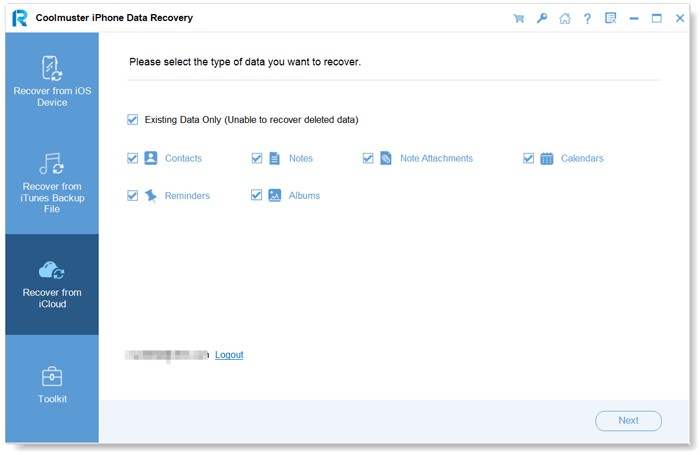
02Choose the file types you want to recover. For this, select "Albums" and click the "Next" button to start the quick scan.
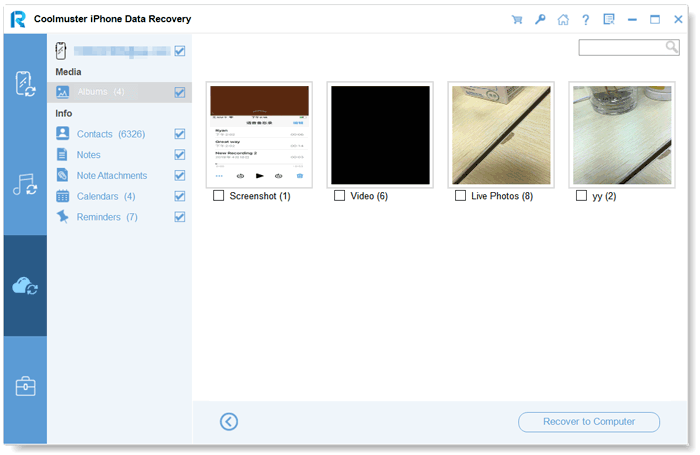
03Once the scan is complete, go to the "Albums" category, select the GIF photos you wish to restore, and click the "Recover to Computer" button to save them to your computer.
Video Tutorial:
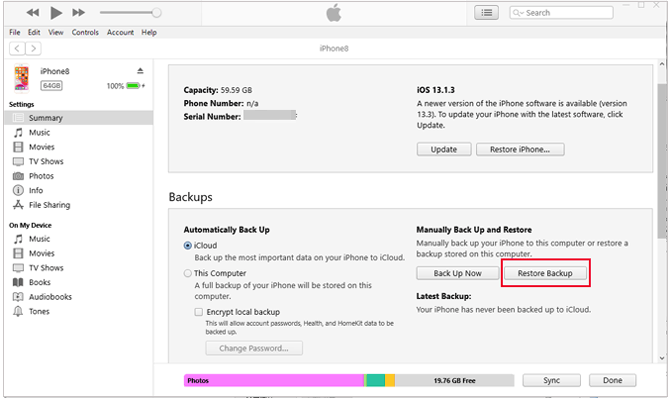
If you have previously backed up your iPhone with iTunes, the official iTunes recovery feature can also be used to recover deleted GIF images. However, please note that this method does not support selective recovery and will overwrite all content. Therefore, be sure to back up your current data before using this method.
Here is how to get GIF images back on iPhone from iTunes backup:
Step 1. Connect your iPhone to the computer and open iTunes.
Step 2. Click the device icon and go to the "Summary" tab.
Step 3. Click "Restore Backup".
Step 4. Choose the appropriate backup that includes the deleted GIFs.
Step 5. Click "Restore" and wait for the process to complete.
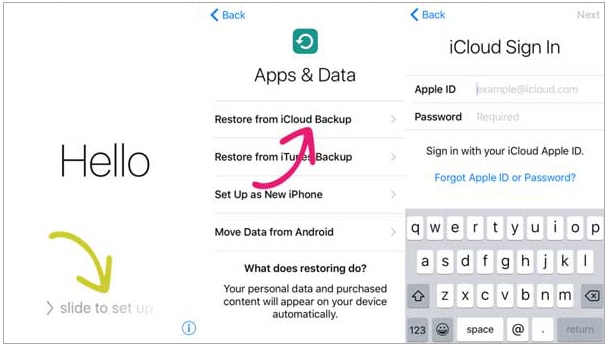
If you regularly back up your iPhone to iCloud, you may be able to recover deleted GIFs by restoring from an iCloud backup. However, like iTunes, this method also carries the risk of data being erased, as the process requires resetting the device. (How to restore from iCloud without a reset?)
Here is how to find deleted GIFs on iPhone from iCloud backup:
Step 1. Go to "Settings" > "General" > "Transfer or Reset iPhone".
Step 2. Tap "Erase All Content and Settings".
Step 3. Set up your iPhone and select "Restore from iCloud Backup" when prompted.
Step 4. Sign in to your iCloud account and choose the appropriate backup.
Step 5. Wait for the restore process to finish.
That's all about how to recover GIF photos from iPhone. If you're looking for a safe, reliable, and efficient way to restore GIF photos on iPhone, Coolmuster iPhone Data Recovery is the best option. Unlike Apple's native restore methods, it allows selective recovery from iTunes and iCloud backups without erasing your current data. What are you still hesitating about? Try it now.
Related Articles:
How to Transfer GIF Pictures from iPhone to Mac in 5 Useful Ways
How to Transfer Photos from iPhone to External Hard Drive in 7 Ways?
How to Transfer HEIC Photos from iPhone to PC: 4 Proven Ways


