In our daily use of computers and mobile phones, we often encounter the problem that files are too large, resulting in insufficient storage space or slow transmission speed. In this case, compressing files is a good solution. Compressed files can not only save space, but also make file transmission faster and more convenient. Then, how to compress files? Next, we will introduce some simple and easy-to-use methods to help you easily master the skills of file compression. No matter you are a novice or an experienced user, you can find a suitable method for yourself.

Windows and Mac users have in-built file compression functions, which may vary in processes. Below are detailed steps to compress a file on your Windows computer.
Step 1: Create a folder containing files that you wish to compress on your computer. To create a new folder, right-click on your screen, scroll down to New, then click Folder. You can choose to rename this new folder that you wish to compress.
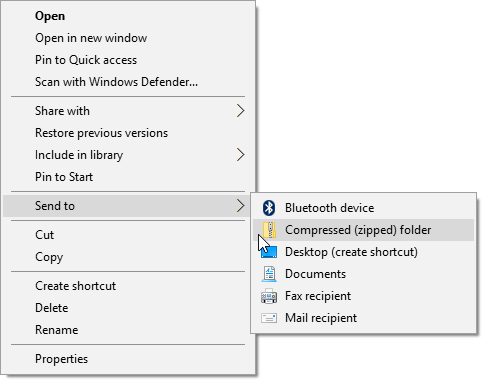
Step 2: Once you're ready to compress the file folder, right-click on it, and select Send to from the drop-down menu. From the list of presented options, select Compressed (zipped) folder.
Windows will automatically compress and zip your files into a ZIP file with the same name and within the same location. This compression process may take relatively long, depending on the magnitude of the files you wish to compress.
Need to transfer large files or running out of disk space? File compression on Mac makes it easier to save space on your computer's hard drive and transfer and receive large files. Additionally, archives allow you to store multiple folders or files in a single compressed file.
MacOS has an inbuilt utility that allows you to compress files and entire folders for easier storage and sharing. This is a good option when you need to quickly zip files on Mac. Follow these steps to compress files on Mac.
Step 1: Head to Finder and locate the file/folder you wish to compress. To select more than a single file for compression, hold down the Command key and click on the individual files you wish to choose.
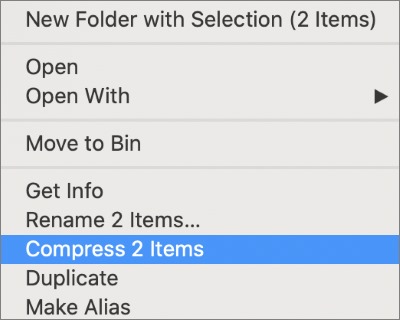
Step 2: Right-click on the files and choose Compress... from the context menu. Mac will begin compressing the files, which may take a few minutes, depending on the file size. The larger the file size, the longer the compression.
Once the compression is complete, you will find the new compressed file in the same directory as the original file. In case you compressed a single folder/ file, the new archive will share the same name, but with a .zip extension.
However, if you're compressing multiple folders/files, the newly-created item will be saved in the archive with the name Archive.zip. While you can rename your new file, ensure you retain the .zip extension.
Unfortunately, Mac's inbuilt archiver has limited capabilities. It works with only three formats; Zip, CPGZ, and CPIO. Therefore, if you want more advanced features, you may need an external solution.
With third-party apps, such as Commander One and Unarchiver, you can compress a file on Mac fast and free.
Step 1: Select all the files you wish to compress. Hold the Ctrl key and click each one individually. You can also drag a box around them to select multiple files.
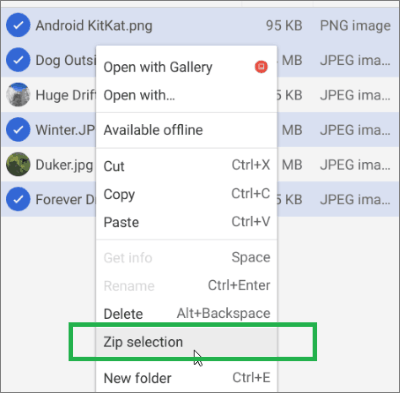
Step 2: Right-click on the files and select Zip selection. A ZIP file will appear with all the compressed data in one place. You can rename it or move the file as you please.
Linux refers to compression as deflating. Compared to other operating systems, you will need to use the command line to compress files on Linux. Here is how to deflate files on a Linux operating system.
Step 1: Press Ctrl + Alt + T to open a command window
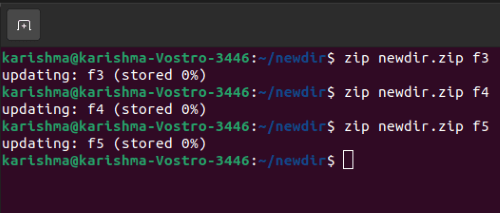
Type zip [what you want the zip file to be called].zip [files you want to zip] in the command window.
Case in point:
If you want to zip a text file called pen and an image called paper into a ZIP file called stationery, you could type:
zip stationery.zip pen.txt paper.jpg
The files will deflate and form a ZIP file. In addition, it will appear in the same directory as the original file. You will also see a percentage showing the compression level of each file.
If you want to compress a file on Linux without using command strings, consider third-party alternatives, such as PeaZip.
The File Manager app is Android's inbuilt way to compress and ZIP files. Depending on your Android device, this file may be absent. As such, you can consider downloading third-party alternatives like WinZip.
Follow these steps to compress a file on Android using the File Manager app:
Step 1: Open your File Manager app, then move all the files you want to compress into a single file/folder.
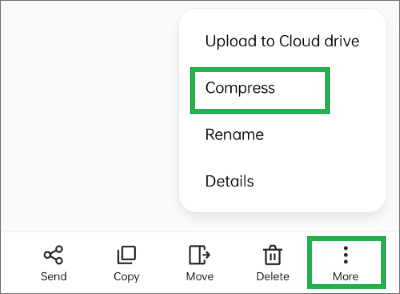
Step 2: Click on the menu button (typically three dots in the app's right-hand corner).
Step 3: Choose all the items you want to zip, and at the bottom, select Compress. Save the compressed files which will appear in a separate folder.
Additionally, here is how to compress files on Android using WinZip.
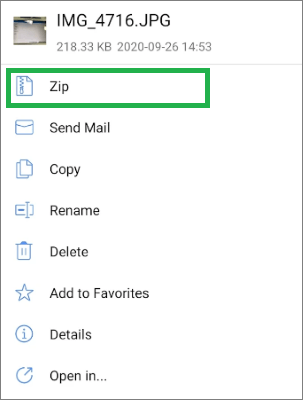
Step 1: Download and install the WinZip app. When prompted, allow the app access to your files.
Step 2: Select a single or multiple file for compression and click Zip. The Zip button should be the first option on the menu list. Then select the save location and click Zip here.
You can also read the following article to learn how to compress video on your Android.
How to Compress a Video on Android? 6 Quick Ways You Can't MissStep 1: Run your Files app on your iPad or iPhone, then select the files you wish to compress. In the top right corner of your screen, tap the three dots, then click Select.
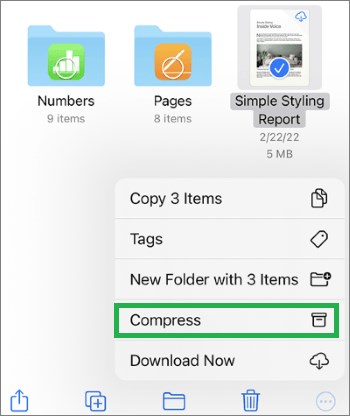
Step 2: Select all the files you wish to zip. Click the three dots if you're compressing on your iPhone or More in the screen's bottom right corner if you're compressing files with your iPad.
Step 3: Finally, hit Compress and a ZIP file will be saved to the folder you choose.
If you want to learn more about how to compress files on iPhone, you can read these articles:
If you want to compress video and audio files, Video Compressor is a popular method used to compress audio and video files of any any size without losing file quality.
The Video Compressor is an all-in-one tool that you can use to edit, convert, and compress audio and video files in thousands of formats. Best of all, it's absolutely free, allowing you to enjoy effortless file compressions before you opt for the fully-inclusive premium package.
Features of the Video Compressor Tool
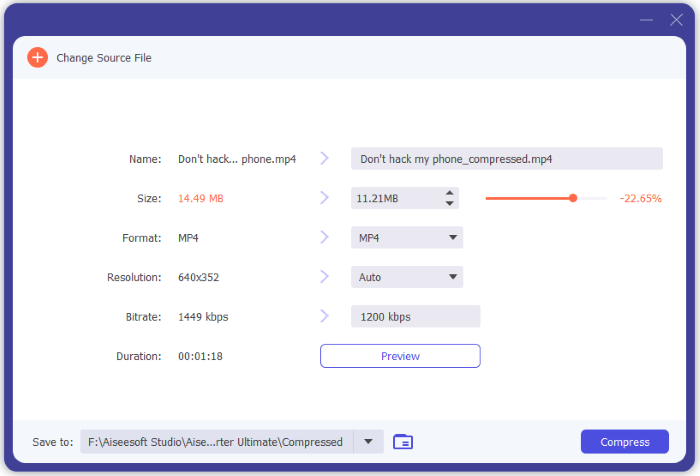
With the enhanced Video Compressor, you can compress large files to smaller ones in a few minutes. It allows video and audio file compression without losing the file quality. More importantly, you can customize the output format, rename your new files, change the sample rate, and adjust your video file resolution effortlessly. Video Compressor also allows you to preview your file before compressing.
Here is how to compress a file using Video Compressor's high-tech features.
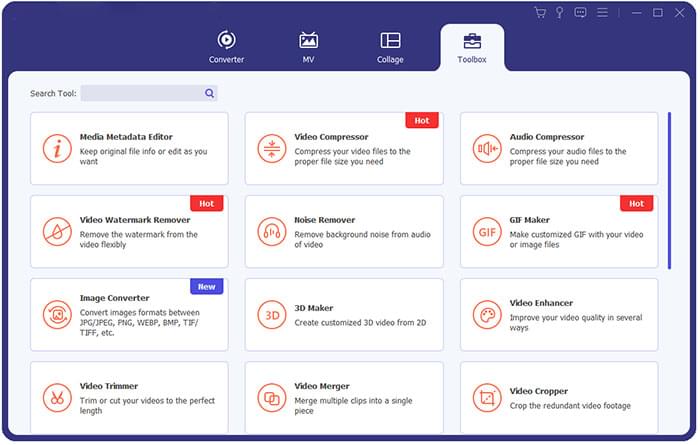
01Download the audio and video file compressor from the official site. Install and run it on your computer, then choose Video Compressor in the Toolbox and select the files you wish to compress.
02Customize the video output settings and choose the destination folder for the new compressed files. Run the compression and wait a few minutes to get your compressed file that you can share or use to save on storage space.
If you have large files that take up a lot of space or can't be easily shared online, compressing them is a recommendable idea. You can compress files on your phone or computer using in-built tools and apps. If you just want to compress your videos and audios files, consider Video Compressor.
Feel free to contact our support team if you have any questions or concerns.
Related Articles:
Full Guide - How to Make File Size Smaller Without Losing Quality
How to Compress Image Size: 3 Online and 4 Offline Techniques
A Comprehensive Guide to Compress MP3 File [Online & Offline]


 Free Download for PC
  Free Download for Mac

