TL;DR: Want to know how to compress a video on iPhone for free or send large videos via email? Discover 7 easy methods in this guide.
Have you ever tried to share a video from your iPhone, only to find that the file is too large to send via email or messaging apps? Large videos can also take up valuable storage space and make uploading or sharing files more difficult. Learning how to compress a video on iPhone can help you reduce file size, save storage, and share videos more easily.
Fortunately, you don't need to be a video editing expert to get the job done. Whether you want to compress a video on your iPhone for free, reduce video size after recording, or shrink a video to send via email, there are several practical solutions available. In this guide, we'll explore seven ways to compress iPhone videos. Let's take a look!
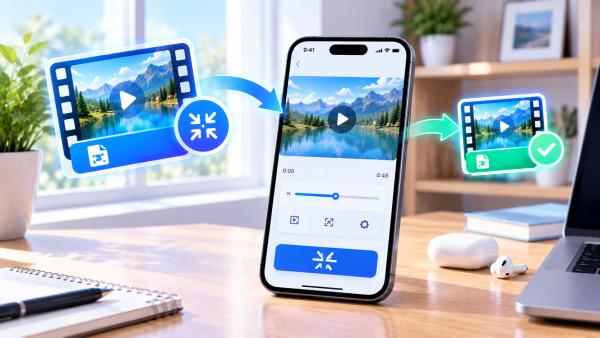
iMovie is Apple's free video editing app for iPhone. Although it doesn't offer a dedicated video compression slider, you can reduce video file size by exporting your video at a lower resolution, such as 720p instead of 1080p or 4K.
This method is useful if you're looking for how to compress a video on iPhone for free without installing a third-party compression tool.
Follow these steps to compress your video using iMovie:
Step 1. Download and open iMovie on your iPhone. Tap "Start New Project", then select "Movie".
Step 2. Select the video you want to compress from your Photos library and tap "Create Movie".
Step 3. Trim unwanted footage if needed. Shortening the video can reduce its file size without changing the resolution.
Step 4. Tap "Done" in the upper-left corner, then tap the "Share" button.
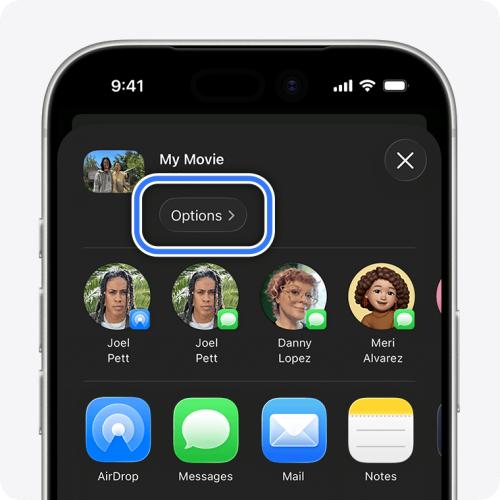
Step 5. Select "Share Video", then tap "Options" to view the export settings.
Step 6. Choose a lower resolution, such as 720p instead of 1080p or 4K, if available. Lower resolutions generally produce smaller video files.
Step 7. Tap "Done", then select "Save Video" to export the compressed video to your Photos library.
If you need more control over video compression, Video Converter Ultimate is a desktop solution for Windows and Mac. Unlike iMovie, it includes a dedicated Video Compressor that lets you adjust the target file size and other output settings.
This option is particularly useful when you need to compress a large iPhone video after recording, prepare a video for email, or reduce the size of multiple files. You will need to transfer your iPhone video to a computer before compressing it.
The highlights of Video Converter Ultimate:
Here is how to compress a video on iPhone without losing quality:
01Transfer the video from your iPhone to your Windows PC or Mac using a USB cable, AirDrop, or another file-transfer method.
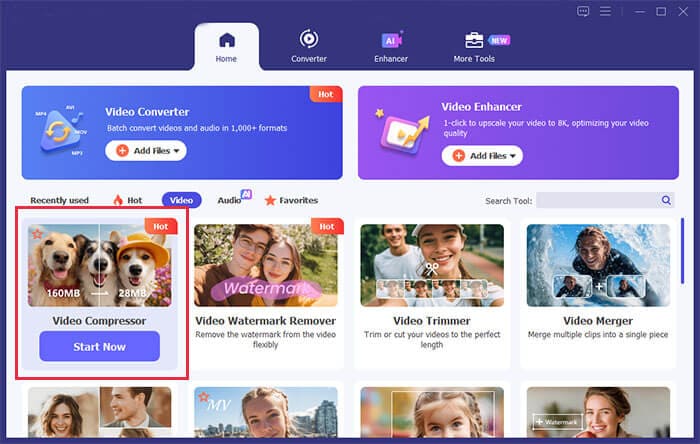
02Download and install Video Converter Ultimate on your computer. Launch the program, open the "Video" tab, and select "Video Compressor". Then, click the "+" button to import the iPhone video you want to compress.
03Adjust the target file size using the compression settings. You can also change the output resolution or format if necessary. Preview the settings and select a suitable output location. Then, click "Compress" to start processing.
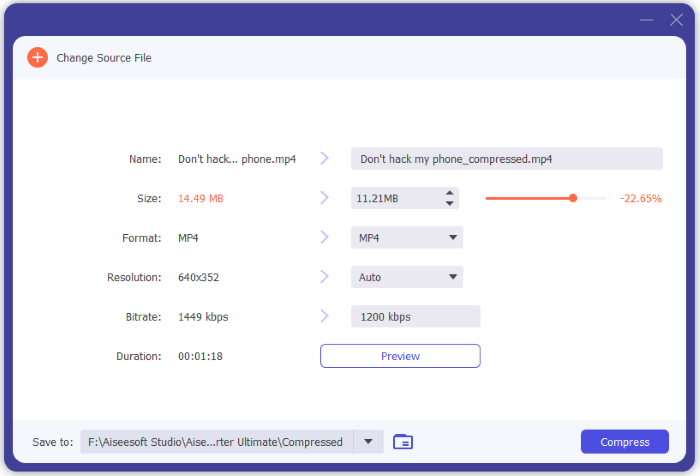
Once the compression is complete, transfer the smaller video back to your iPhone if needed.
If you prefer to compress videos directly on your iPhone, a dedicated video compressor app can be more convenient than desktop software. Here are three iPhone apps worth considering.
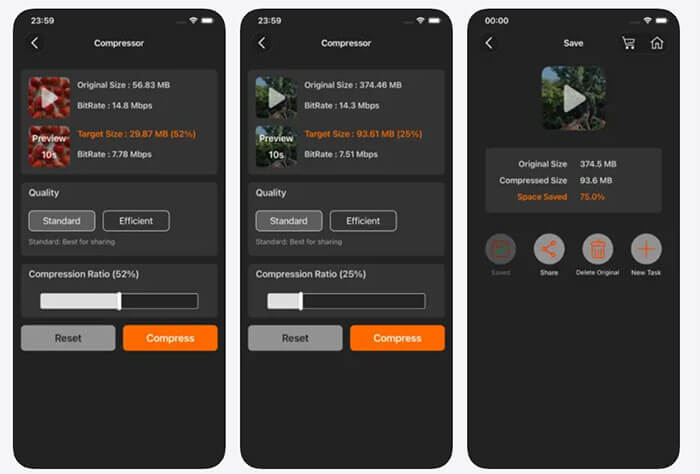
Video Compress - Shrink Videos is an iPhone video compression app that helps you reduce video file sizes directly on your device. It allows you to select a video, adjust the target file size using a slider, and compress large videos to save storage space or make sharing easier. The app processes videos locally, so you don't need to upload them to an online server. It's a convenient option if you're looking for how to compress a video on iPhone without using a computer.
Here is how to compress a video on iPhone to send via email using Video Compress - Shrink Videos:
Step 1. Open Video Compress - Shrink Videos on your iPhone and select the video you want to compress. The app displays the original file size and bitrate.
Step 2. Choose a compression quality option, such as "Standard" or "Efficient", and adjust the compression ratio slider to reduce the video size. Preview the estimated output size before proceeding.
Step 3. Tap "Compress" to start compressing the video. Once the process is complete, check the resulting file size, then tap "Save" or "Share" to save the compressed video to your iPhone or share it with others.
Compress Videos & Resize Video is another option for users who want to reduce video file size on an iPhone. It supports common video formats such as MP4, MOV, M4V, H.264, MPEG-4, and HEVC, and lets users adjust compression settings to balance file size and visual quality.
Here is how to compress a video on iPhone after recording via Compress Videos & Resize Video:
Step 1. Download Compress Videos & Resize Video from the App Store. Open the app and select the video you want to compress from your iPhone's photo library.
Step 2. Open the compression settings and choose one of the available compression options. The app lets you adjust the frame rate and video dimensions to reduce the file size.
Step 3. Adjust the frame rate and video dimensions according to your needs. For a balance between file size and visual quality, the developer recommends a frame rate of 24 fps and video dimensions set to 80% of the original.
Step 4. Start the compression process and wait for the app to finish processing your video.
Step 5. Review the compressed video and check its new file size. The app saves compressed videos to your main Photos library and a dedicated Compressed Videos album, making them easy to find.
Step 6. Play the saved video to check its quality. If you're satisfied with the result, you can share it or delete the original video to free up storage space.
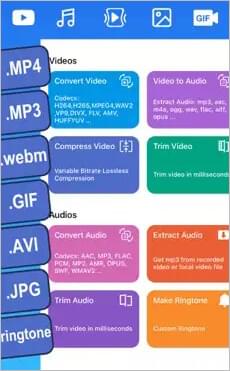
Media Converter - video to mp3 is an iPhone and iPad multimedia tool that can compress videos, convert video formats, extract audio, and edit basic video properties. It supports popular formats such as MP4, MOV, AVI, MKV, and WMV, and lets users reduce file size by adjusting video resolution, frame rate, and bitrate. The app also includes trimming, cropping, resizing, and batch import features, making it useful for reducing video sizes before sharing or freeing up iPhone storage.
Here is how to compress a video on iPhone to email with Media Converter - video to mp3:
Step 1. Download and install Media Converter - video to mp3 on your iPhone. Under the "Videos" section, tap "Compress Video".
Step 2. Select your video source from the next page. Grant the application access to your iPhone files. Select the video you would like to compress.
Step 3. Select a compression mode, specific time range, and ratio from the video compression page.
Step 4. Under the "Video Settings" tab, tap "More Settings" to customize the output video's frame rate, code, format, and resolution. Tap "OK" to save your changes.
Step 5. In the top-right corner, tap "Next", then "Start" from the pop-up to begin compressing your videos. You will find the compressed video under the "My Creation" tab.
Don't want to install an app or transfer videos to a computer? An online video compressor may be the easiest alternative. You can upload a video through your iPhone browser, adjust the available settings, and download the smaller file.
However, online compression requires uploading your video to a third-party service. Check its file-size limits, privacy terms, and free-plan restrictions before uploading personal or sensitive footage.
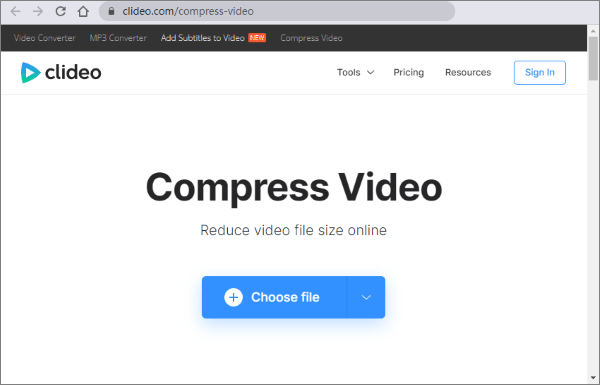
Clideo is an online video editing platform that includes a video compression tool. You can access it through a browser on your iPhone, making it useful when you want to compress a video without installing another app.
Here is how to compress a video on iPhone for free via Clideo:
Step 1. Open Safari or another browser on your iPhone and visit the Clideo Video Compressor. Tap "Choose file" to select a video from your iPhone. You can also import a video from a supported cloud storage service, such as Google Drive or Dropbox.
Step 2. Once your video has uploaded, Clideo will display available compression presets. Select the option that best suits your needs.
Step 3. Review the estimated output size and compression ratio, then tap "Compress" to start processing. Wait for Clideo to finish.
Step 4. When processing is complete, preview the result and check whether the video quality is acceptable. Tap "Download" to save the compressed file to your iPhone. If Safari asks where to save it, choose a suitable location in Files. You can then move or share the video as needed.
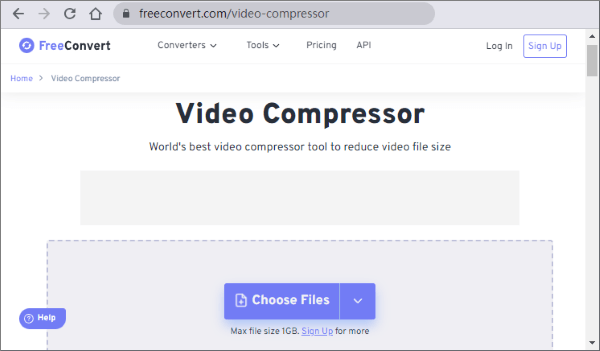
FreeConvert is an online file conversion platform that also offers a video compressor. It provides more configurable compression options than some basic online tools, making it worth considering when you need to reduce file size for a specific sharing limit.
Here is how to compress a video on iPhone online via FreeConvert:
Step 1. Open Safari on your iPhone and visit the FreeConvert Video Compressor. Tap "Choose Files", then select "From Device" to browse for your video in the Files app. You can also import videos from supported cloud storage services.
Step 2. After uploading your video, open "Advanced Settings". Choose a compression method based on your needs.
Step 3. Review your settings and tap the "Compress Video" button to begin. Keep the browser tab open while FreeConvert processes the file. The time required depends on the video size and selected settings.
Step 4. When the processing status changes to Done, tap "Download Video". If Safari prompts you to choose a download location, select a folder in "Files", such as "Downloads".
Step 5. Open the downloaded video in Files to confirm that it plays correctly and is small enough for your needs. If you want to save it to Photos, use the "Share" menu and select "Save Video" when available.
Compressing an existing video is helpful, but changing how you record videos can prevent oversized files in the first place. If you frequently run out of storage or need to email video clips, try these tips.
1. Record at a Lower Resolution
Higher resolutions capture more detail but generally produce larger files. If you don't need 4K footage, recording at 1080p or 720p can help save storage space.
To change the recording resolution:
Step 1. Open "Settings" on your iPhone.
Step 2. Scroll down and tap "Camera".
Step 3. Tap "Record Video".
Step 4. Choose a lower resolution or frame rate that suits your needs.
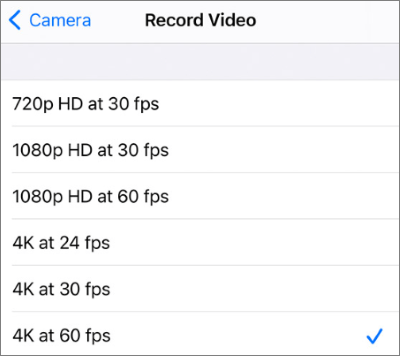
The available options vary by iPhone model. You can usually select a lower resolution or frame rate to reduce the amount of data recorded.
2. Use High Efficiency Video Format
Many recent iPhones support High Efficiency Video Coding (HEVC), which can provide smaller files than the older H.264 format at comparable quality.
To enable it:
Step 1. Open "Settings".
Step 2. Tap "Camera", then "Formats".
Step 3. Select "High Efficiency" if the option is available.
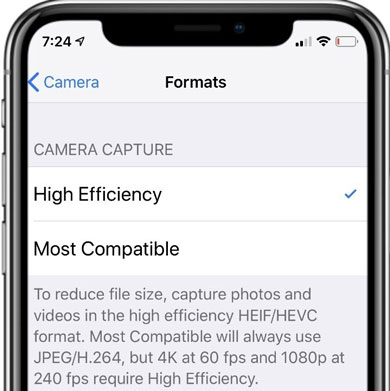
Keep in mind that HEVC compatibility varies across devices and apps. If you frequently share videos with older devices, you may need to convert them to a more widely supported format.
In conclusion, there are several ways to compress a video on iPhone, including using iMovie, iPhone video compressor apps, and online tools like Clideo and FreeConvert. While free methods are convenient for basic compression, they may offer limited control over the output file size and quality.
If you frequently work with large iPhone videos or need to reduce file size for email, Video Converter Ultimate is our recommended choice. Its dedicated Video Compressor lets you adjust the target file size, resolution, and output format to suit your needs. Although it requires transferring videos to a Windows PC or Mac, it provides a flexible solution for compressing large videos while maintaining good visual quality.
Related Articles:
Does iMessage Compress Photos/Videos? Find Out the Answer Here!
[Full Guide] How to Compress Files on Windows/Mac/Android/iPhone?
How to Compress Video for Instagram? [Computer & Online & Mobile Phone]




 Free Download for PC
 Free Download for Mac


